STEP 1: Set up Welcome Page
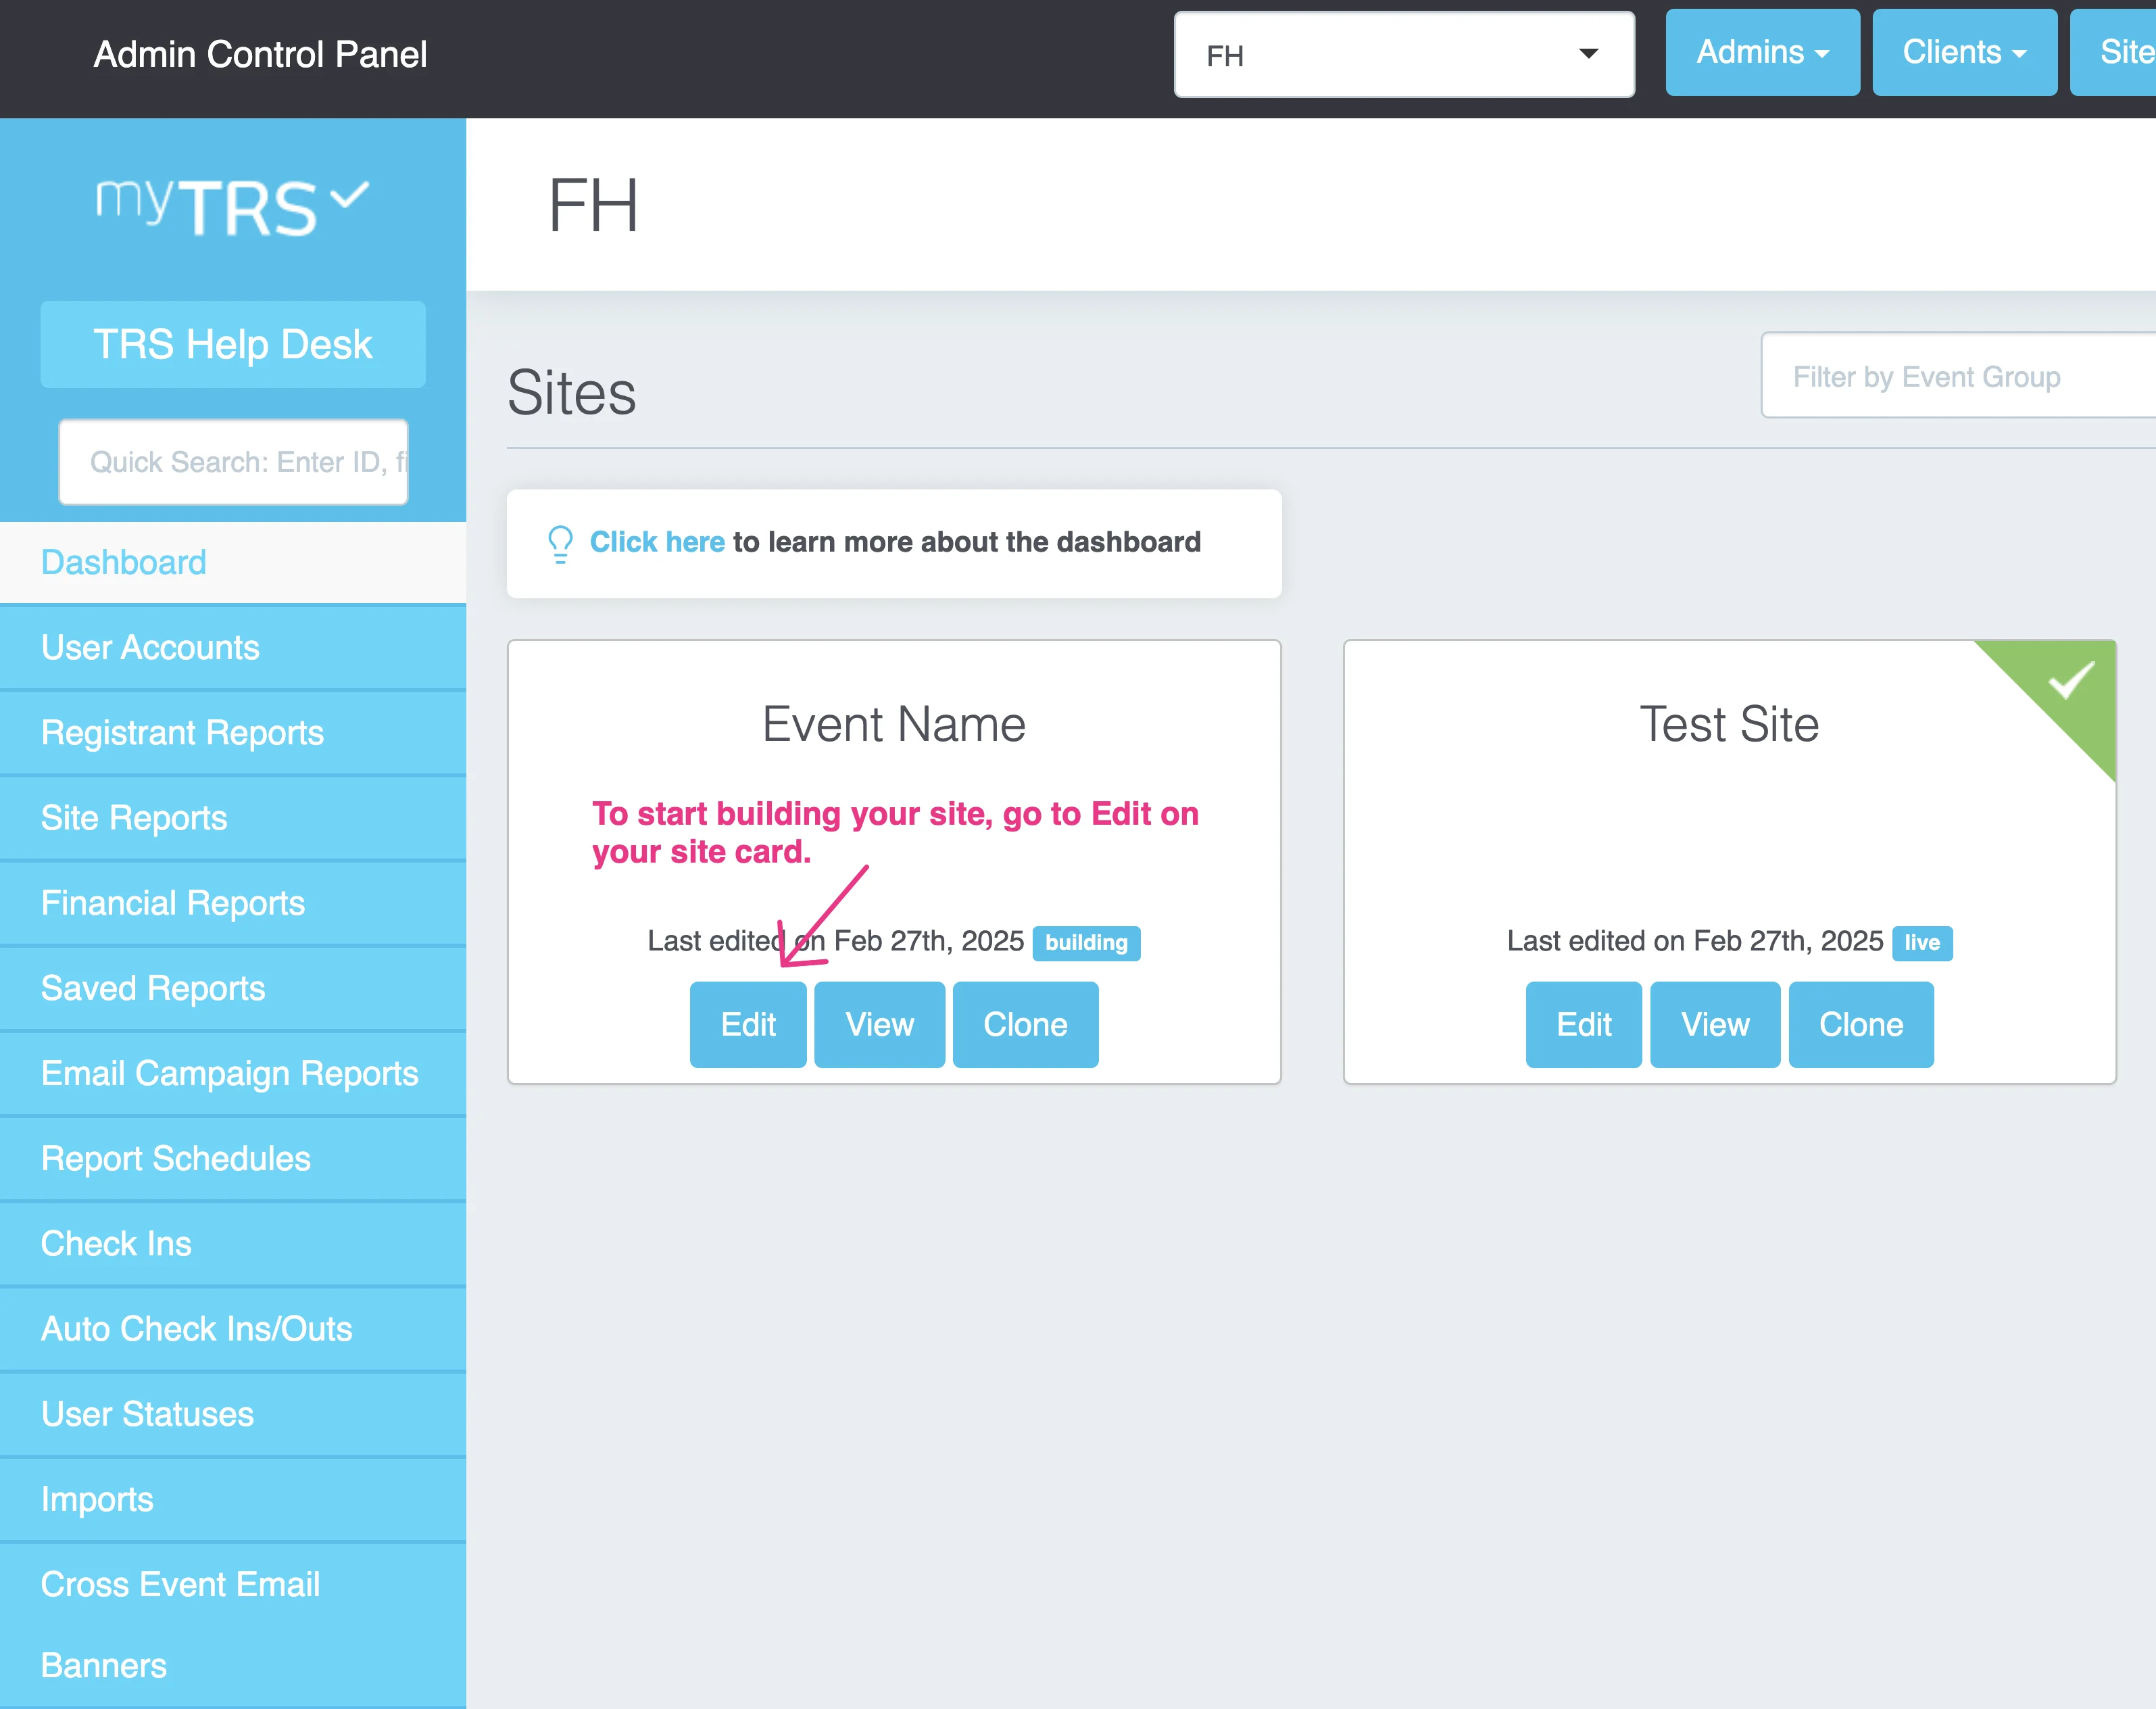
Where can I find my site editor/builder?
NOTE: Before you start building your registration site:
- Log in to admin.my-trs.com
- Navigate to the site you want to build
- Click
Editto access site editor
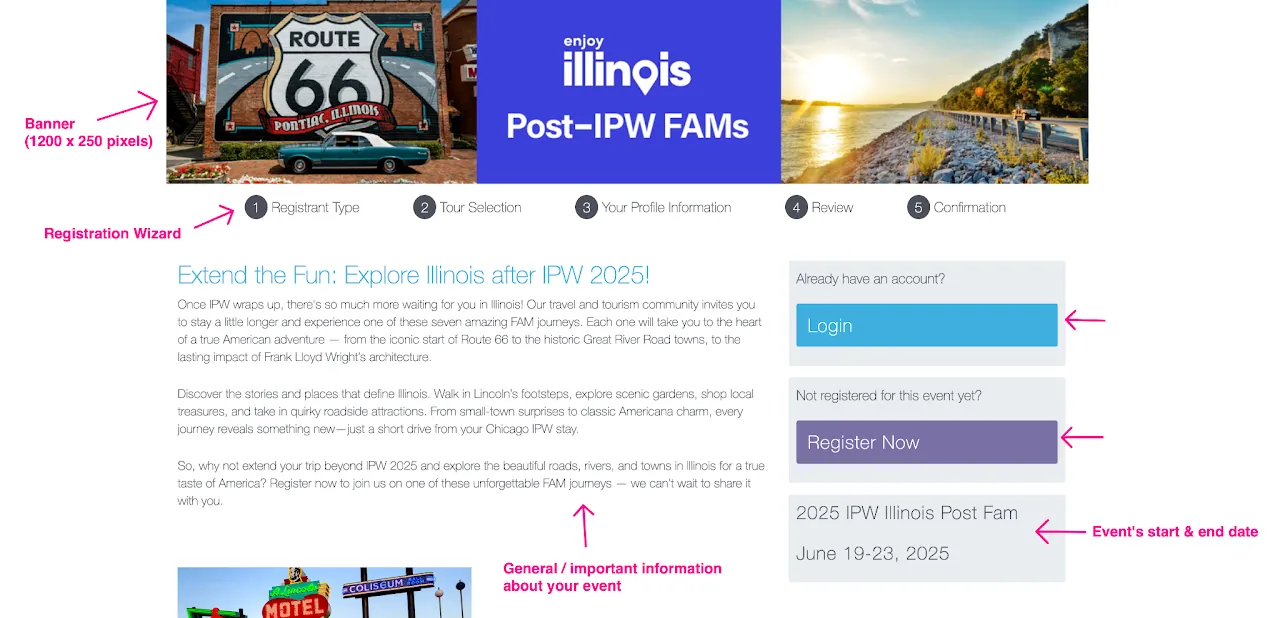
Welcome Page Components
The Welcome Page serves as the initial introduction to your registration site for registrants/volunteers. To effectively set up this page, you will require the following components:
- The banner of your event (resolution 1200 x 350 and 350 x 150)
- The start & end date of the event
- General/important information about your event
- Login button (for volunteers/registrants who have user accounts from your previous event on TRS)
- Register Now button (for new volunteers/registrants)
- Registration Wizard (the headers of steps to complete registration)
Welcome Page Banner
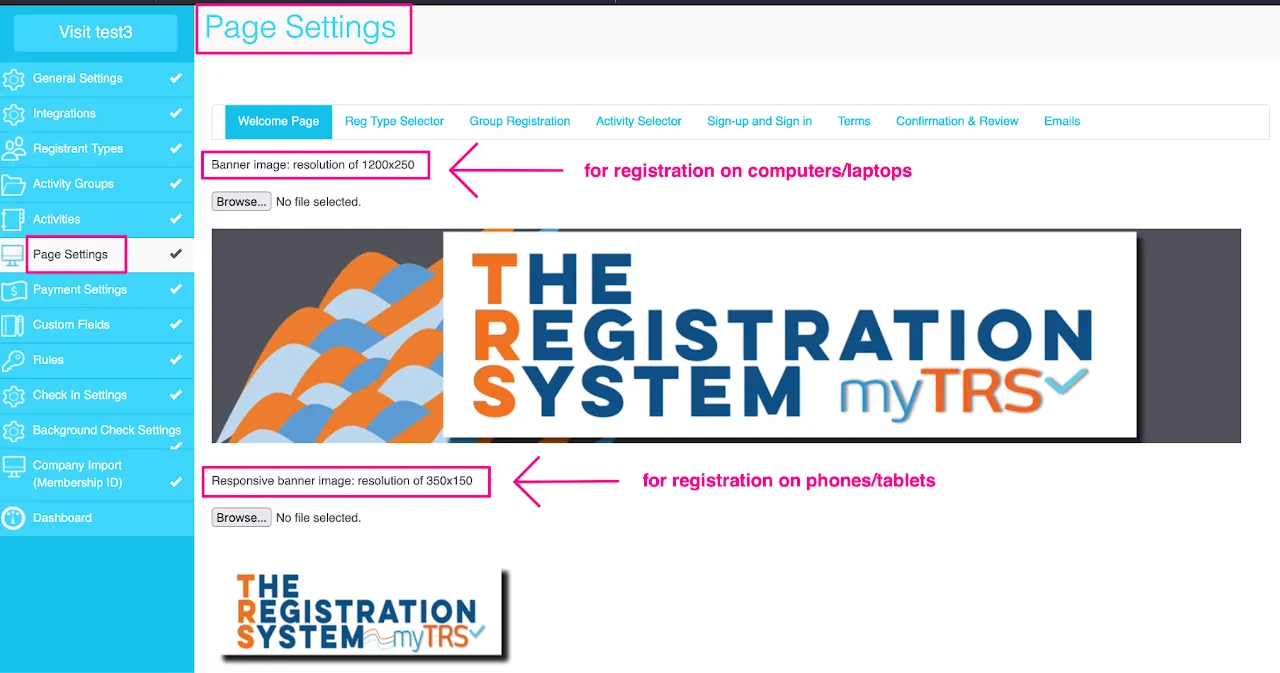
Prepare and Upload Banners
Prepare the banner in two different resolutions:
- 1200 x 250 pixels
- 350 x 150 pixels
Make sure these banners are saved in your computer. Then follow the instructions below to upload your banners:
- Go to
Page Settings - Click
Browse - Select banner from your computer (with correct resolution)
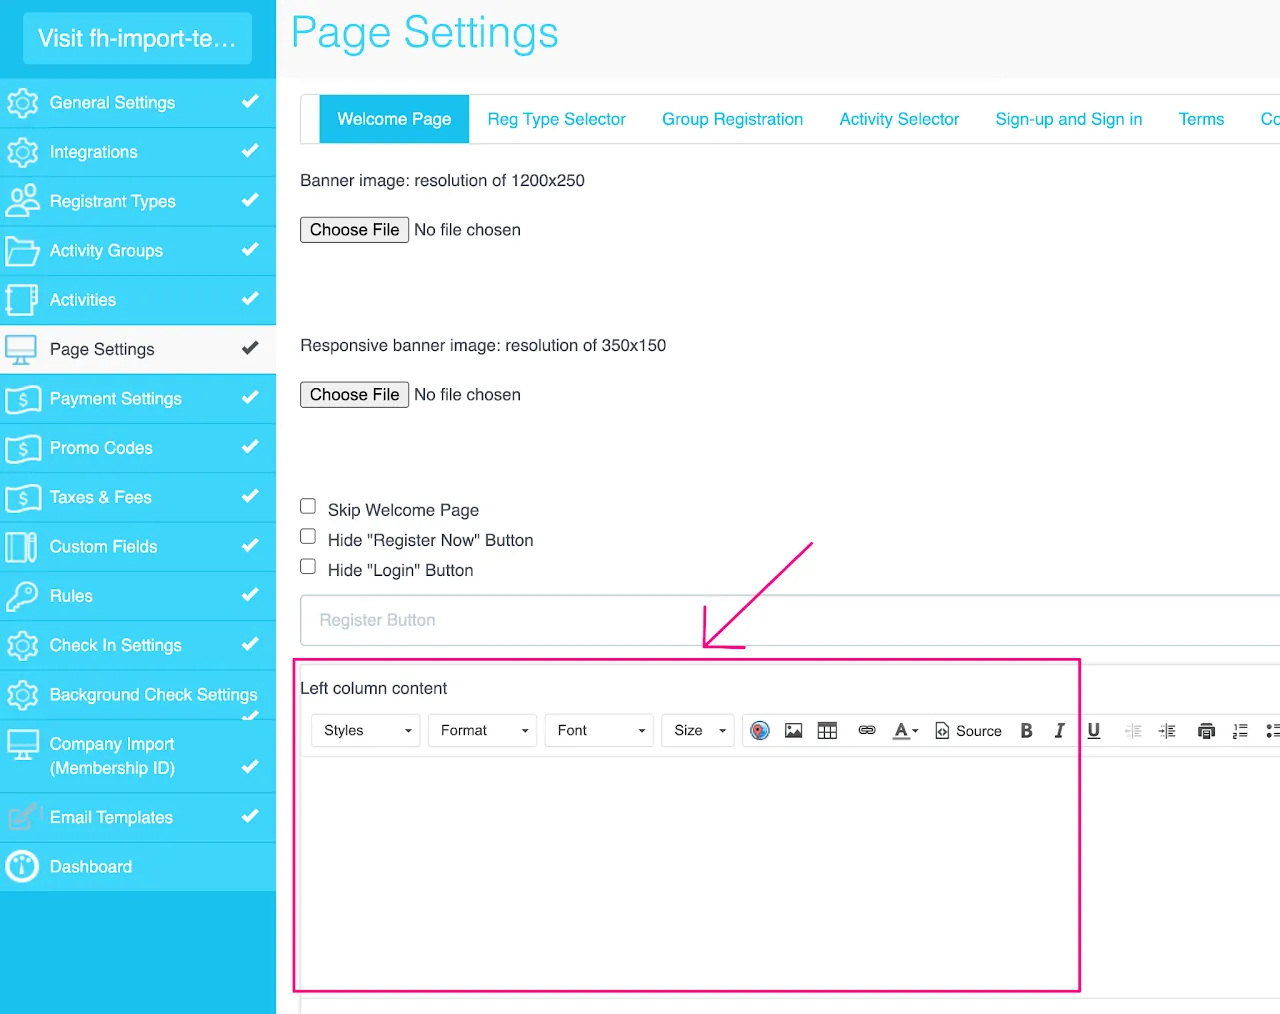
Welcome Page Content
Create a welcoming and informative start to your registration process. The Welcome Page should concisely cover schedules, important details, and requirements, ensuring registrants are prepared and excited to sign up.
Follow the steps below to set up the content for Welcome Page:
- Go to
Page Settings - Scroll down to left column content
- Type in your information
You can add maps, pictures, hyperlinks, tables as well as customize the wordings and paragraph alignment in this box.
Event's Start & End Date
Go to General Settings and set up the following:
- Site Name: The event's name that will show up on the Welcome Page and Registration Confirmation email.
- Event Start Date: Click the calendar icon to adjust the event start-date and time
- Event End Date: Click the calendar icon to adjust the event end-date and time
- Registration End Date: This is the date that you want registration to close on the site and will prevent individuals from beginning new registrations.
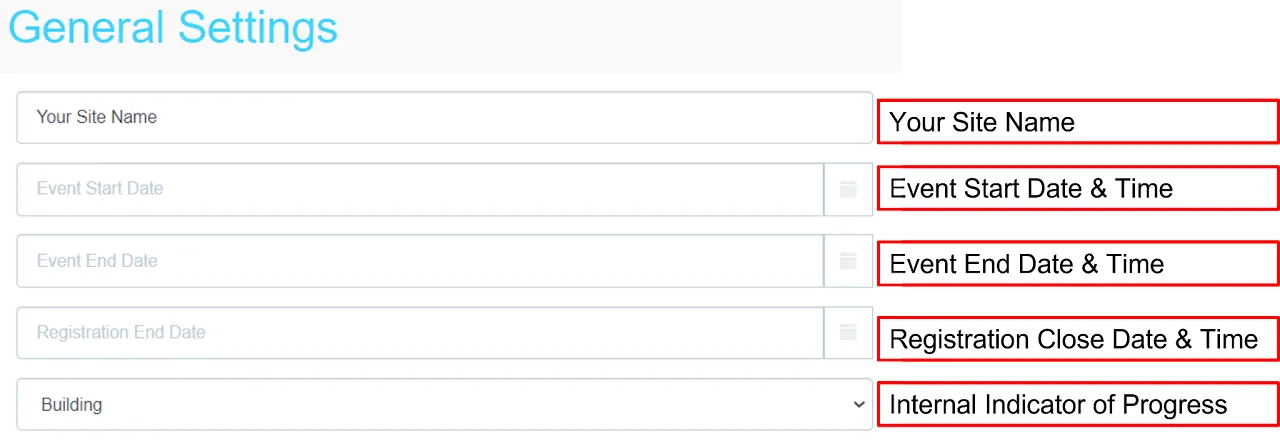
Dropdown Set Status – choose between Building/Testing/Live/Closed. These options are ONLY for internal reference with all admins working on the site. Changing the dropdown status does not affect the functionality of your site.

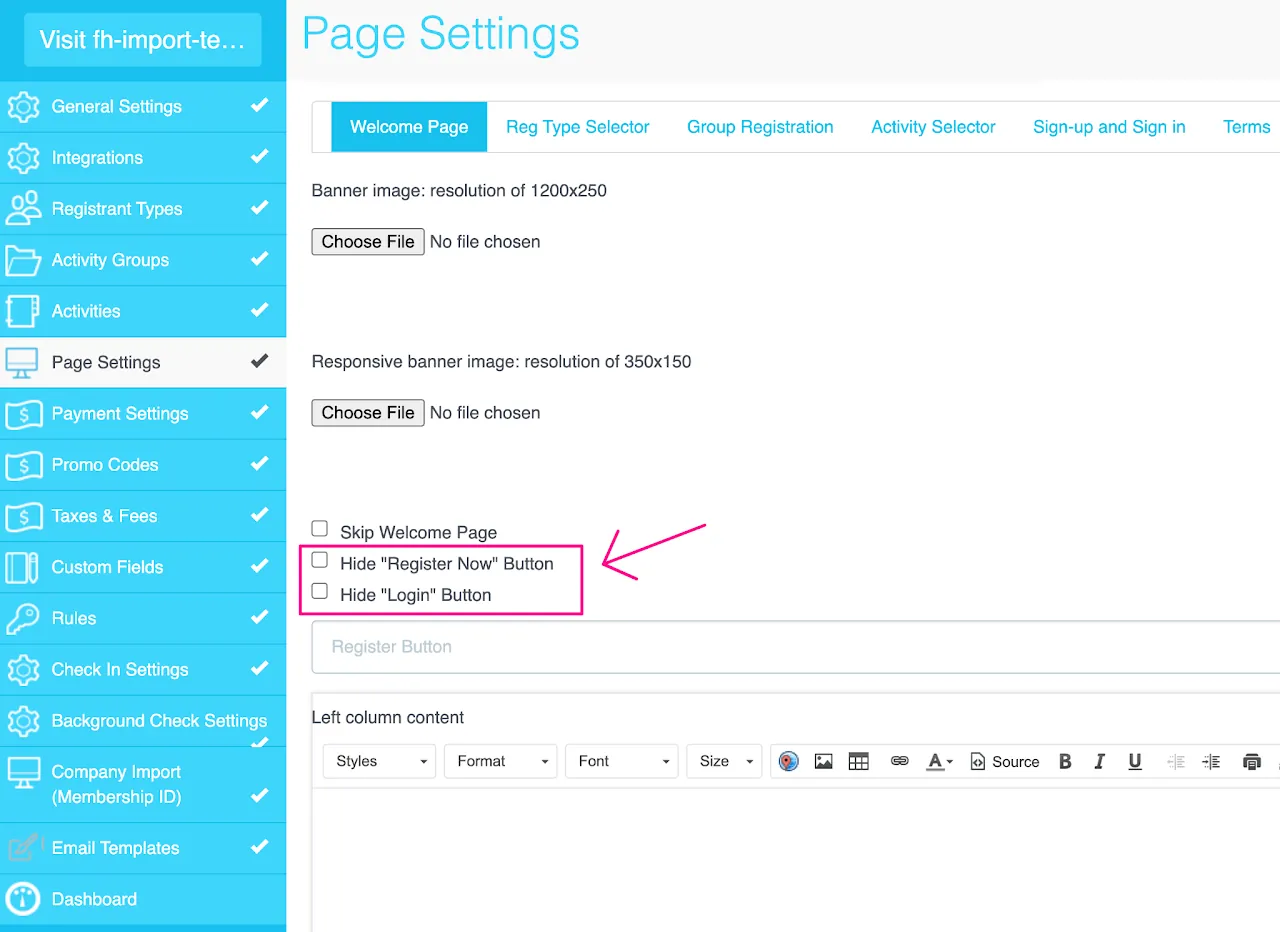
Login & Register Now Buttons
For new registrants: If your volunteers/registrants are new to myTRS platform, they would click on Register Now to start their registration process.
For existing registrants: If they have previously signed up for accounts on this or other events that you created on myTRS platform, they will Log in to their user accounts.
Hide the LOGIN button for all registrants and have all of them start with REGISTER NOW. Once they have selected schedules, they will see the option to sign up or log in to their user accounts.
Prevent registrations temporarily: If you you have already shared the link to your site with registrants, but you don't want to accept registrations yet or need to make some changes to the site, check the box to hide the REGISTER NOW button to prevent registrations temporarily. Please note that we encourage our clients to do multiple test registrations before sharing the links to their sites.
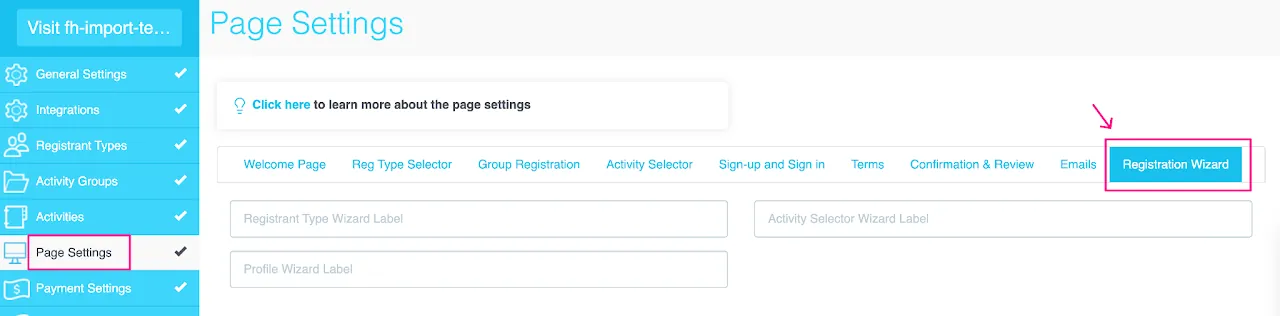
Registration Wizard Steps
Registration Wizard is the headers for the steps that volunteers/registrants will go through to complete their registration. You can customize the name for step 1-3.
- Go to
Page Settings - Go to
Registration Wizard - Type in a custom name for each step
- Registrant Type = registration category section
- Activity Selector = where volunteers/registrants select their schedules/shifts
- Profile = page where volunteers/registrants answer profile questions