Step 2 Registrant Types
What would Registrant Types page look like to registrants/volunteers?
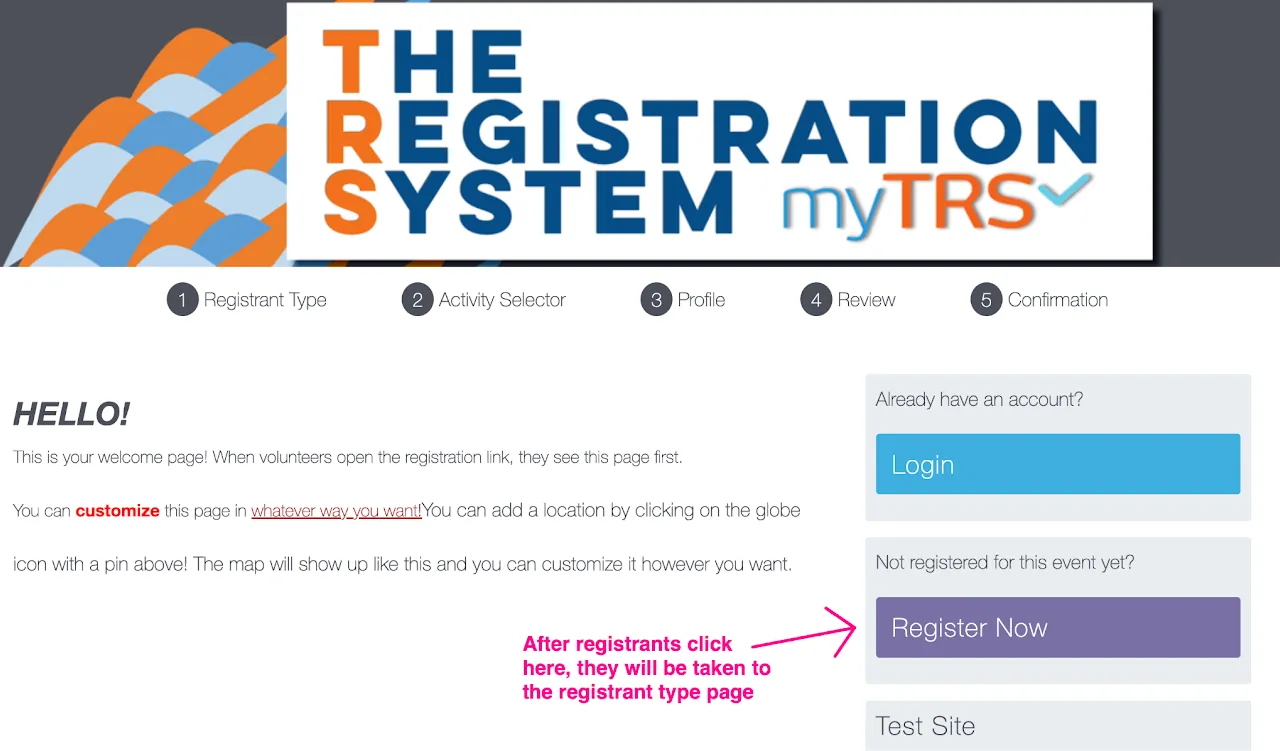
Step 2 is to set up your registrant types. Registrant types are required in order for activities and schedules to be visible to registrants. After your registrants click on REGISTER NOW on the welcome page...
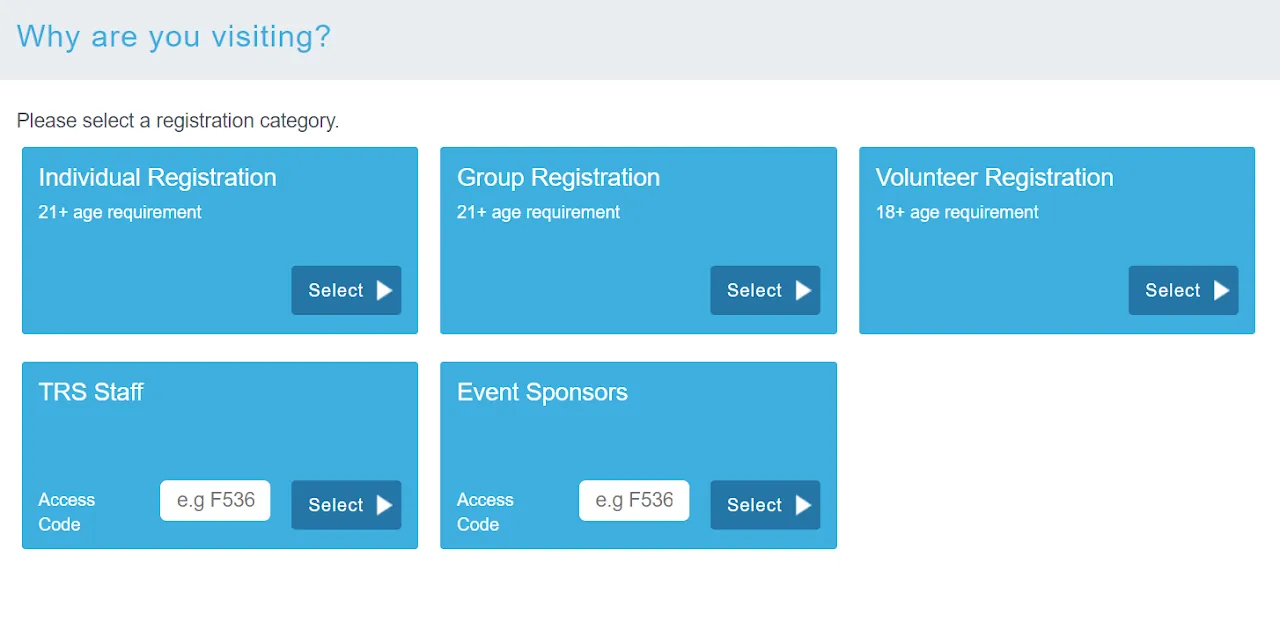
...they will see Registrant Type page where they will determine which registrant type they belong to.
You have the ability to create simple, or more complex registrant types. There are instances where only ONE registrant type is needed (in this case, use the name of your event as the registrant type). In other cases, dozens may be useful. It all depends on your specific event and site needs.
Do I need one or multiple registrant types?
If the following apply to your registration site:
- Your registrants will need to see different activities/schedules, profile questions, and prices (if applicable).
- Some activities/schedules will NOT be accessible to all registrants or the general public.
- Some registrant types will be allowed for group registration, while others won't.
Then YES, you need to categorize your registrants into different types.
If none of the above applies, simply create ONE registrant type and name it with your event's name.
How should I categorize my registrants?
Here are some examples of how you can categorize your registrants:
- Age Group - Adults vs. Minors (Volunteers, staff, participants, etc.)
- Type of Volunteer/Staff - General, Corporate, Leader, Student
- Membership or Industry Types - Member vs. Non-member, Distributor
- Committee - Airport Volunteers, Hotel volunteers, VIP Volunteers, etc (This is mainly used for events that provide job-specific training and don’t allow volunteers to sign up for multiple committees)
Can volunteers/registrants change their registrant type?
During the registration process, if registrants/volunteers realized that they selected the wrong registrant type, they can click on Change Reg Type button and go back to select a different registrant type.
Once a registrant completes a registration, they are locked in as that registrant type. If they need to change their registrant type, they have to contact you to cancel and re-register.
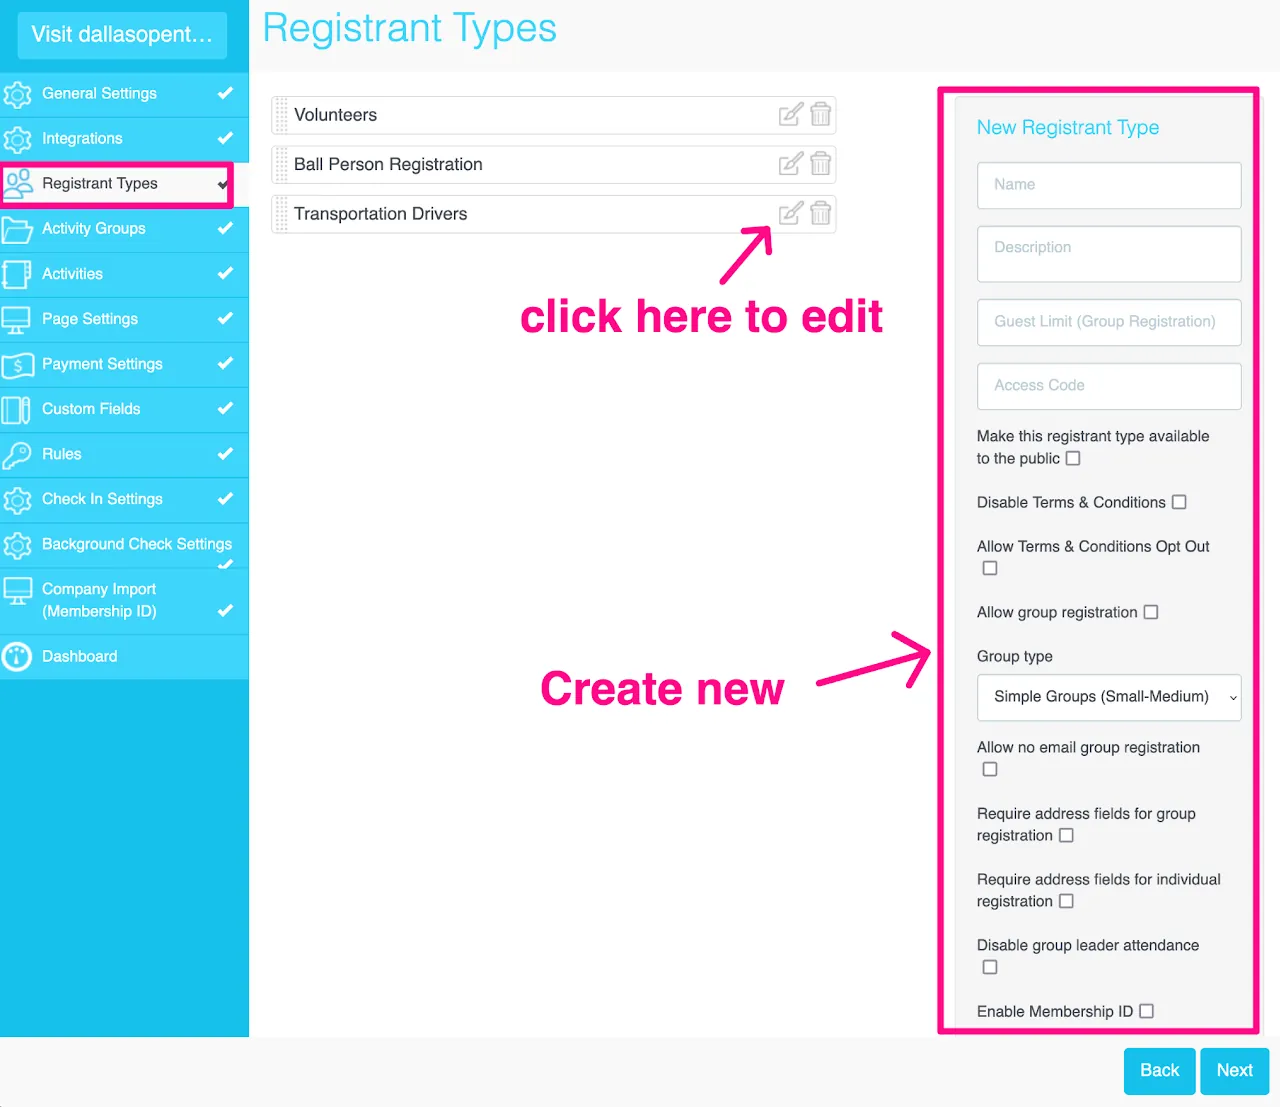
Set up Registrant Types
- Go to
Registrant Typessection - Type in the name, description (optional), and access code (optional)
- Check the box Make this registrant type available to the public ✅ (If not checked, this registrant type will be kept private)
- Scroll down and click Add
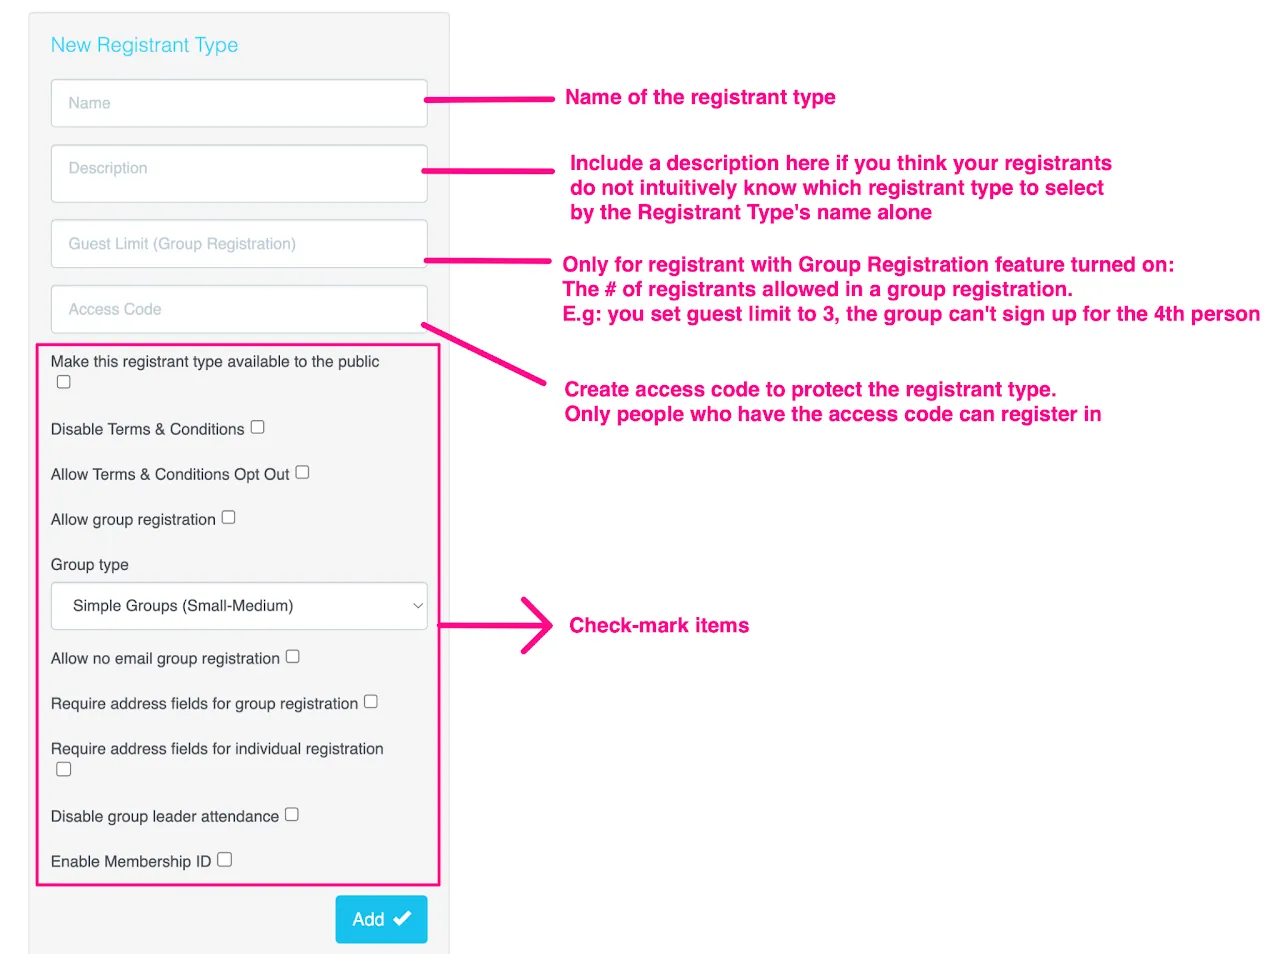
Other check-mark options
- Allow group registration – Group registration on means one person (Group Leader) registers and includes additional group members (Guests) under one registration. See below for instructions on how to set up Group Registration & Group Labels.
- Additional members of a group registration have options to create their own accounts OR register under their group leader's email.
- TRS recommends consulting with a TRS rep before utilizing group registration. There may be alternatives that meet your needs.
-
Allow no email group registration – This will allow the group leader to enter their group's guests without being required to enter guests' email addresses. This speeds up the registration process but you will not be able to communicate directly with the guests apart of a group registration.
-
Require address fields for group registration – Require all group members within a group registration to provide a home address to complete their individual group member registration profiles and proceed to Review & Check-out.
- This check-mark item can be used in combination with
Require address fields for individual registrationif group registration is allowed for the registrant type
-
Require address fields for individual registration – Require individual registrants to provide their home address in order to complete a registration profile and proceed to Review & Confirmation.
-
Disable group leader attendance – The group leader will not be given the option to attend. This is used only when you know the group leader should not attend. (i.e. An event for kids only. Parents will enter their children in the system, but will not attend the event).
-
Membership ID enabled – For registrant types that use a membership identification to confirm their identity or membership with an association. This is an additional service, consult your TRS rep.
Set up Group Registration
Our group registration feature is designed to simplify the registration process for small groups, families and groups including multiple registrant types. With this group feature, you will also be able to add a new person to an individual registration and create a group. You can also allow No Email for group registration which is especially helpful when parents are signing up with their children who don't have email addresses.
Watch this tutorial to find out:
- How to set up Group Registration for a specific registrant type
- How to change the Group Leader's and Guest's Label in group registration
- What the registration process looks like on the front end for volunteers