Step 4 Activities/Schedules
What would activities/schedules look like to registrants/volunteers?
Below is an example of what an activity and its time slots look like on the frontend for volunteers/registrants:
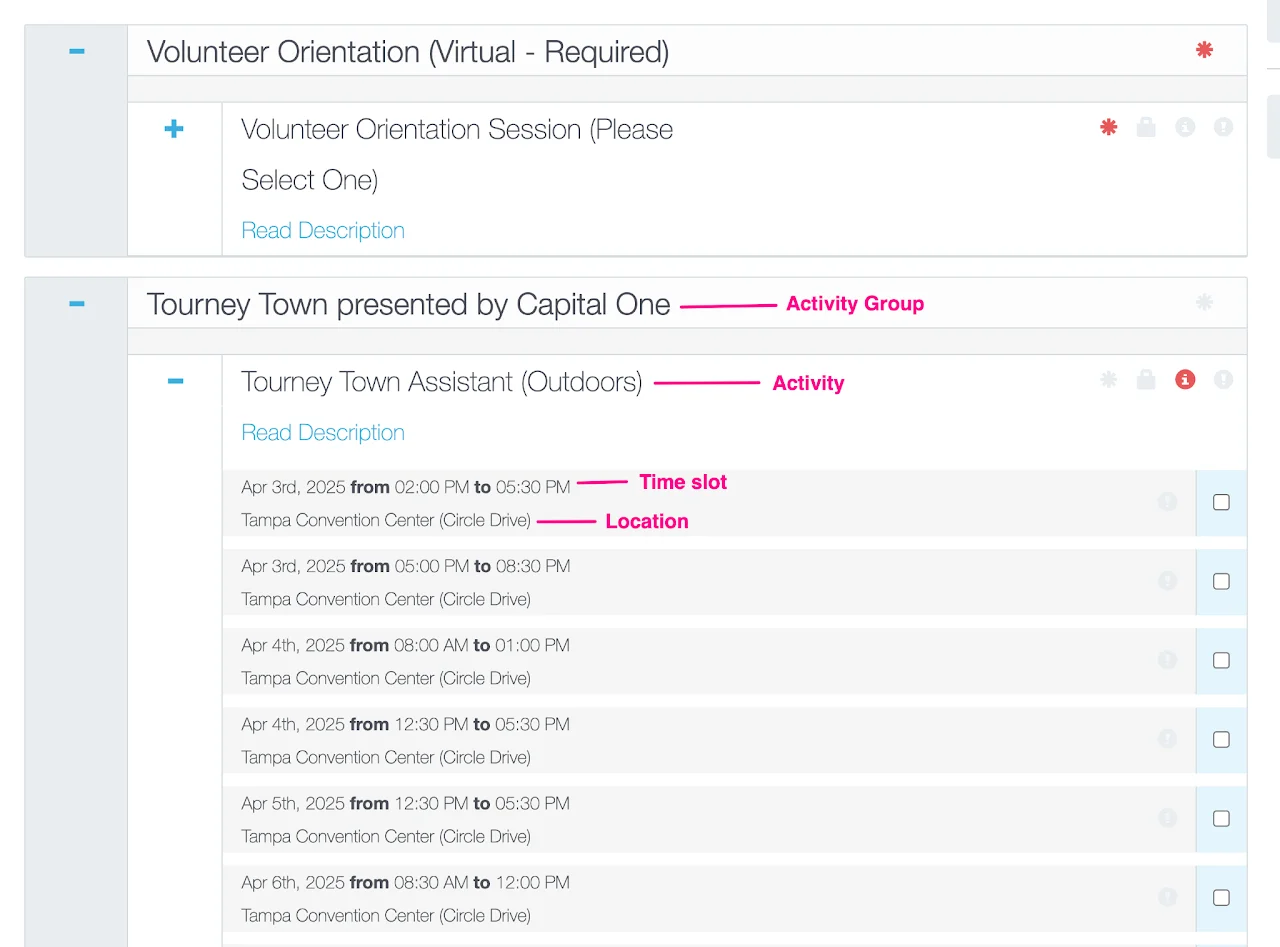
Components required to set up activities/schedules
On the Activity Selector Page, your volunteers will see the activities and schedules that are available for them to sign up. Before setting up your activities, gather the following components:
- Activities' names
- Activity Descriptions (image & important information about each activity)
- Determine the registrant types that should have access to each activity
- Determine the activity group that each activity belongs to
- Optional: Time slots & location of each time slot
- Optional: Confirmation email notes (important note about each activity—e.g: must show up 15 minutes before shift starts)
- Optional: Custom Field questions for registrants who sign up for specific activities (e.g: drivers volunteers will be asked to provide their driver's license number and insurance company's name)
Once you have these components, follow the instructions below to set up:
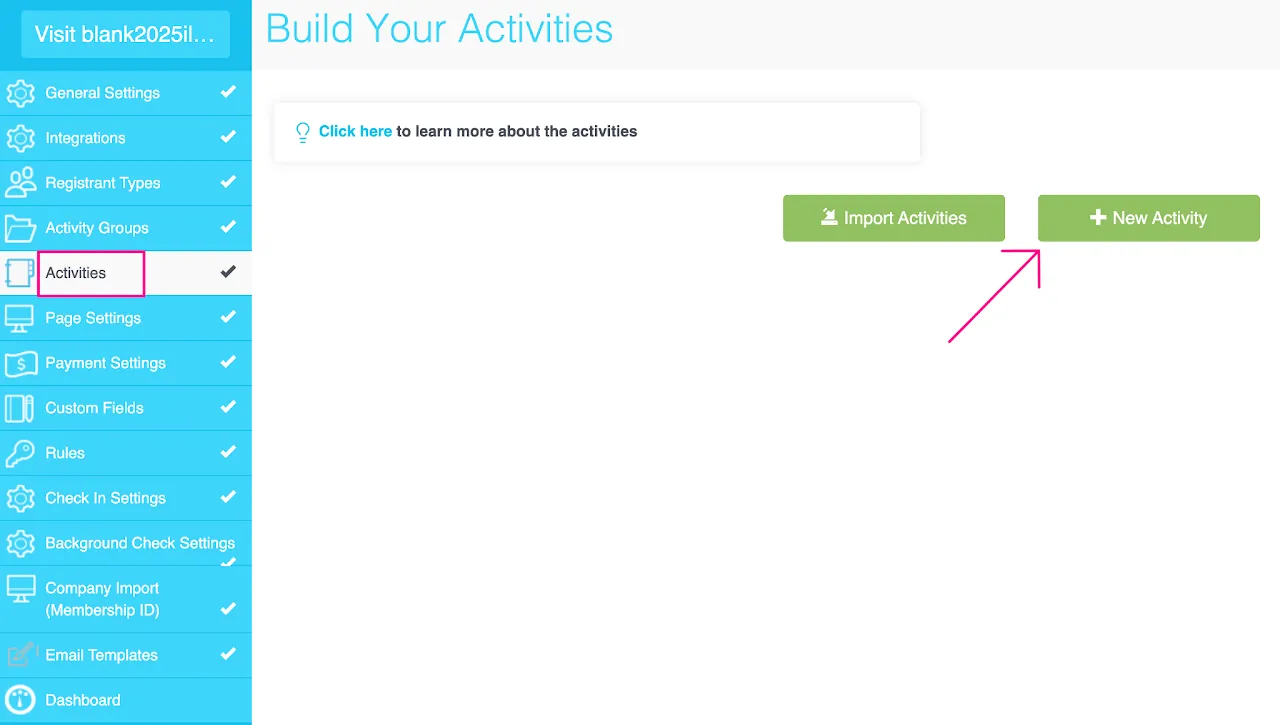
Set up Activities manually
- Go to Activities section
- Click on New Activity
You will see the following screen with different tabs to add your activity information:
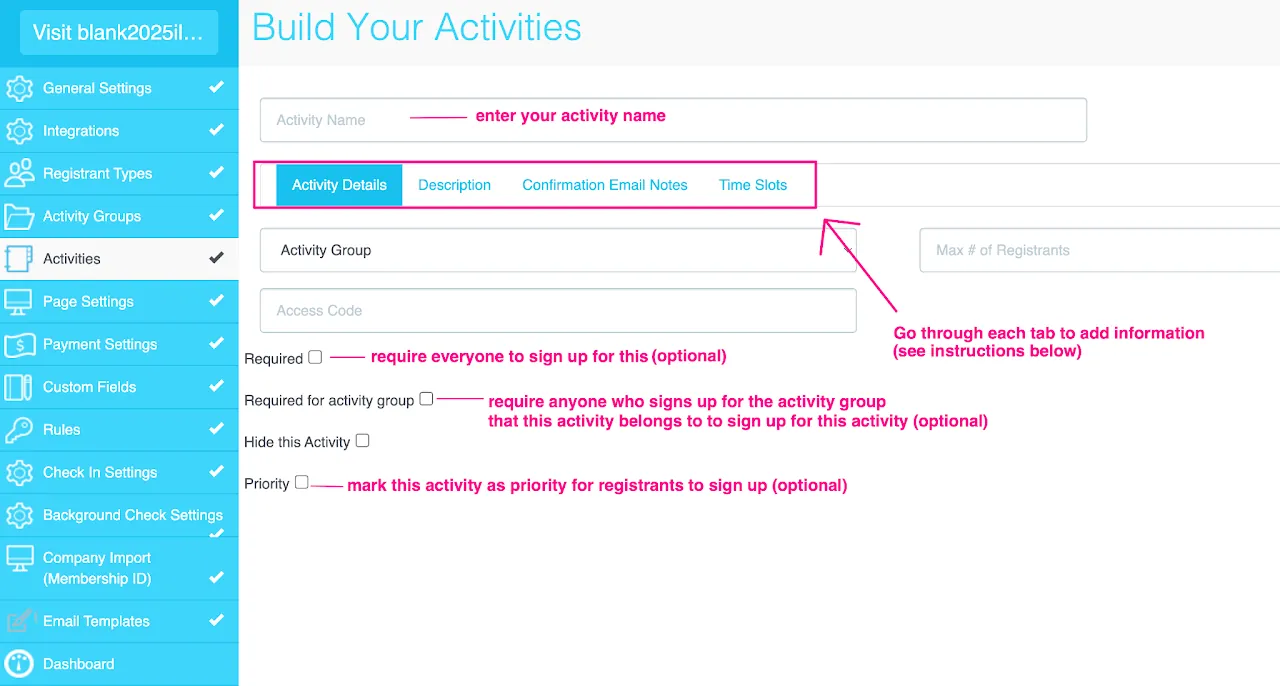
See instructions for each tab below:
Activity Details
- Enter your activity name
- Select the activity group that this activity belong to
- Optional: enter max # of registrants if this activity doesn't have time slots/shifts
- Optional: enter an access code (e.g: Volunteers2025!) if you only want certain registrants to view this activity and sign up for it.
- Optional: check the
required boxif all of your registrants/volunteers must sign up for this activity. - Optional: check the
required for activitygroup box if this activity must be selected when registrants sign up for the activity group that includes this activity - Optional: check the box
hide this activityif you want to keep this activity private and visible to admin only. - Optional check the box
priorityif you want your registrants/volunteers to prioritize signing up for this activity (they can choose not to select this activity if they want though)
Description
- Type in the description and important information for this activity (keep it concise and informative)
- To add images to the description, follow the instructions here.
Confirmation email notes (optional)
Example notes that you can add for the activity:
- Meet at [LOCATION] with luggage for tour departure. Own transport to [LOCATION].
- During Tour: Transportation provided by [your organization].
- Packing: smart casual, comfortable walking shoes, layers (including warm jacket), sunglasses, hat, sunscreen, water bottle.
- Volunteers will be provided with lunch and water. Time slots (optional)
Time slots (optional)
If your activities have time slots/shifts, add them here. Each activity can have multiple time slots.
- Click on
New Time Slot - Select the
start date & time(selection order: year, month, date, time) - Select the
end date & time(selection order: year, month, date, time) - Set the
maximum number of slotsfor this time slot (leave blank if unlimited) - Type in a
locationfor this time slot - Repeat for other time slots of this activity
- Click
Save Activityonce you finish.
Set up Activities by importing (quicker option)
Importing activities is recommended once you have most of your activities/time slots grid ready. The import feature is designed to save you time by adding activities in batches and avoid the manual entry.
Watch the video above or read the instructions below about importing activities:
STEP 1: Download import template
Click on the this template link to download the import template.
STEP 2: Read instructions
See an example and instructions for filling out the template here.
STEP 3: Fill in the template
Open the template you downloaded in STEP 1 and replace the sample data with your information.
STEP 4: Save as a CSV (comma separated value) file (.csv)
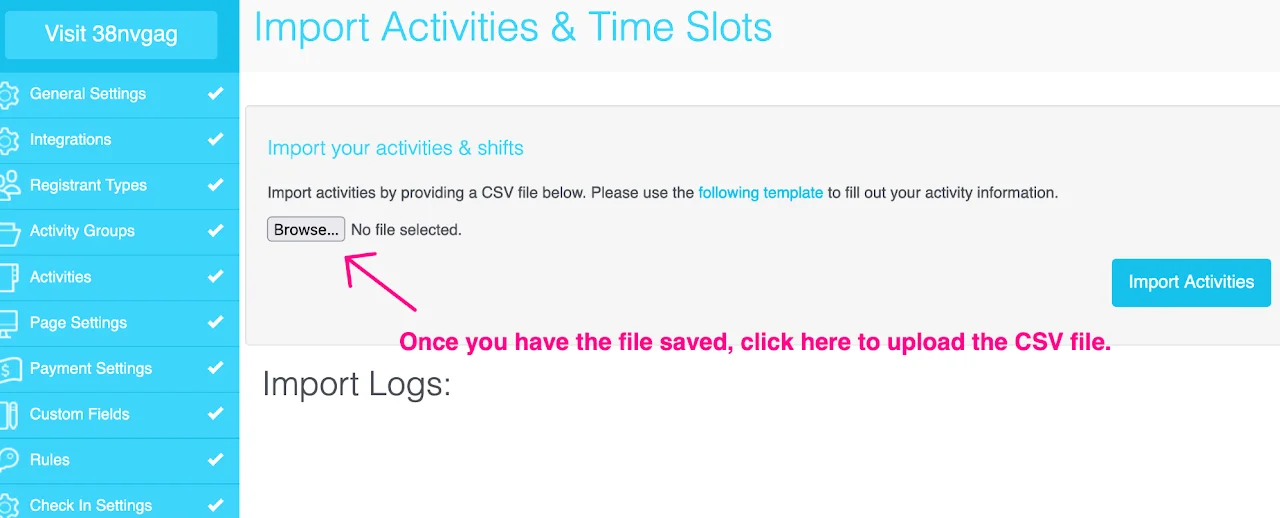
STEP 5: Import to myTRS
- Go back to myTRS admin
- Go to
Activities section - Click
Import activities - Click on
Choose Fileand select your import template. - Click on
Import Activities. - Check
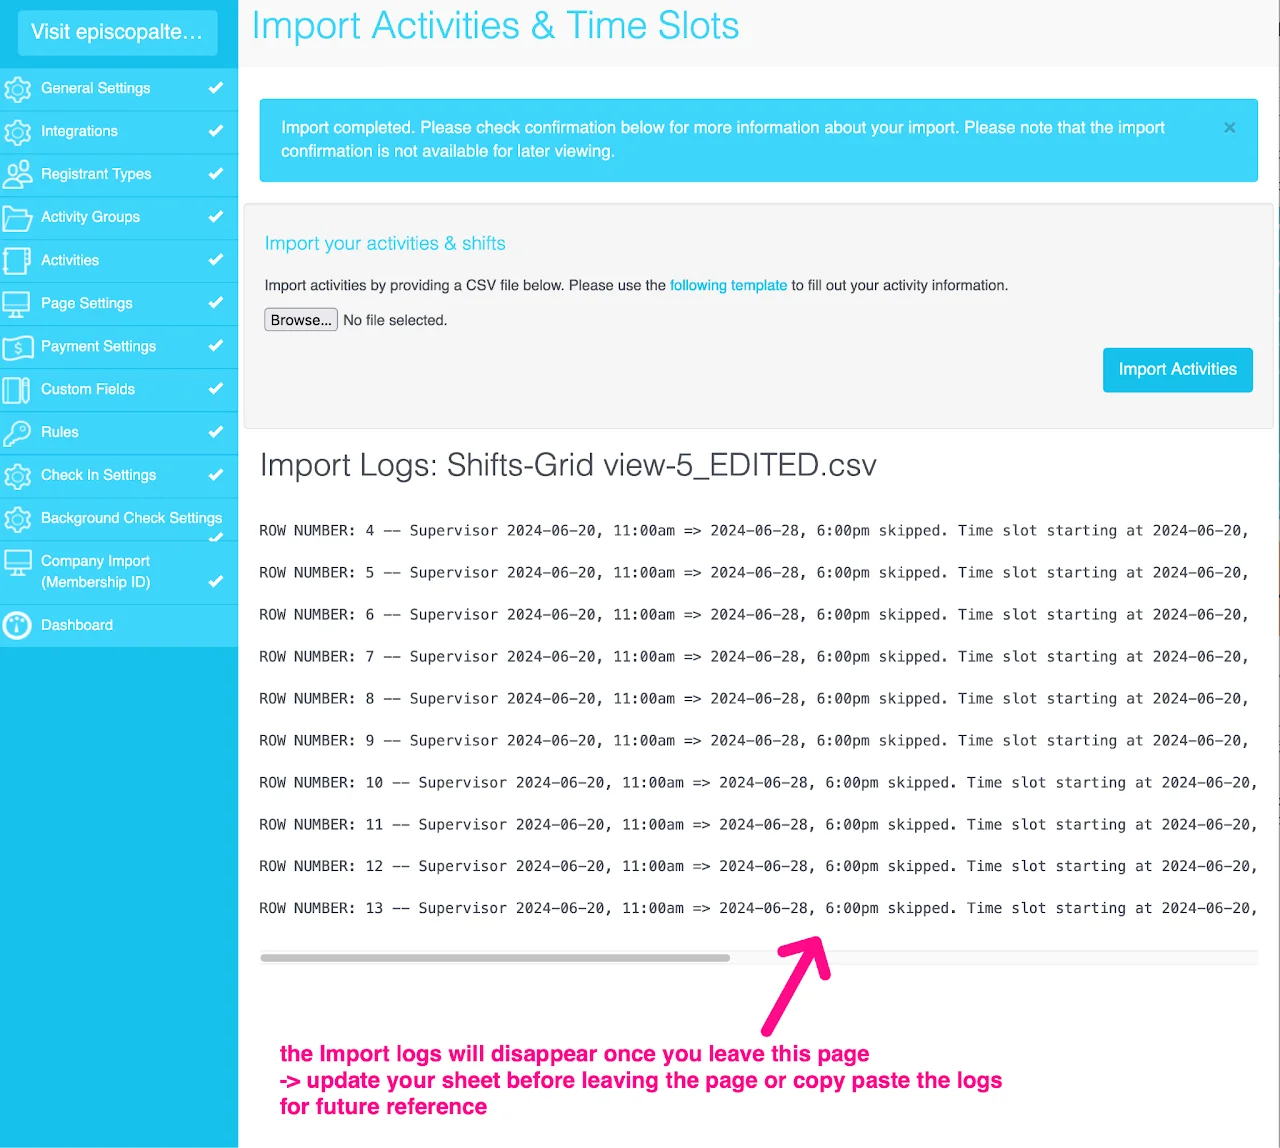
Import Logsfor any issues (if it's blank after import completed, you did great!!)
Understanding Import Logs
If some of your activities or time slots are not entered properly on the spreadsheet, the system will generate a list of activities skipped during the import and the reason why they were skipped under Import Logs.
If you see errors under Import Logs, we recommend that you copy and paste the log for future reference or update your spreadsheet before leaving the page. Once you leave the import page, you will no longer have access to your latest import log.
Set up min/max rules for scheduling
If you want to require volunteers/registrants to select a minimum or maximum number of activities/time slots, watch the video above to learn more about setting up rules.
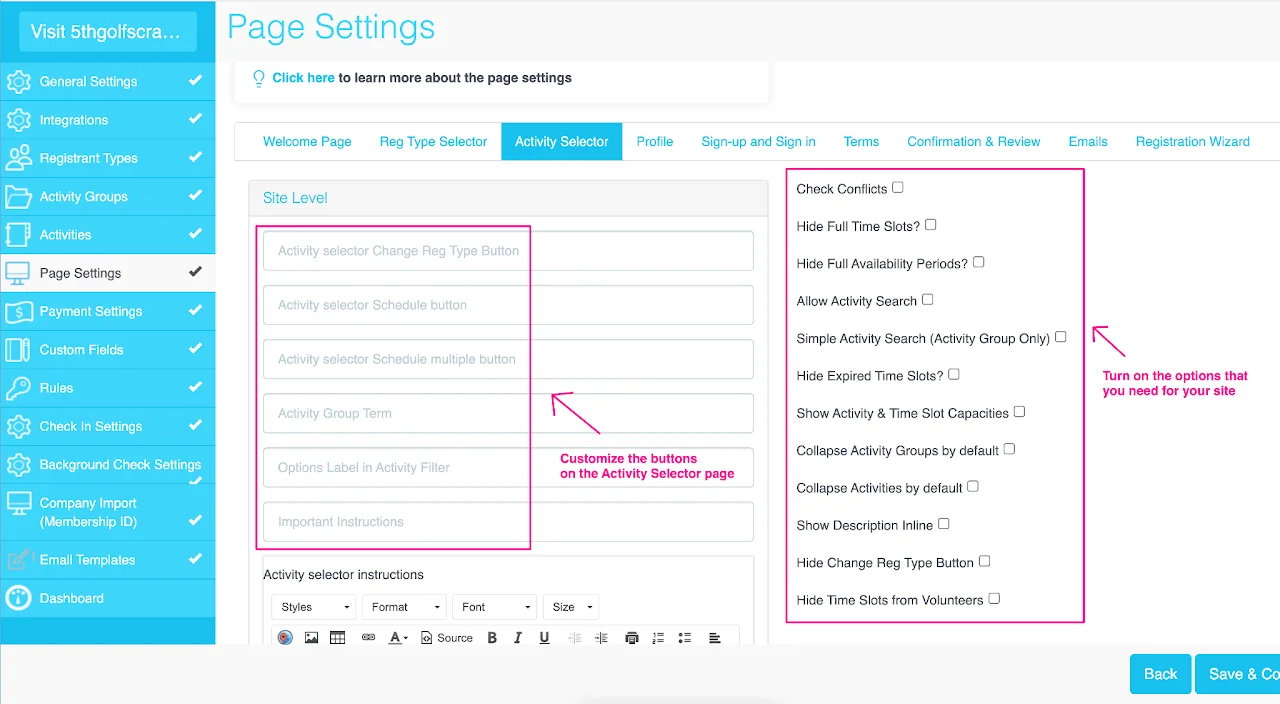
Set up time conflict prevention
To prevent your volunteers/registrants from selecting overlapping time slots, follow the instructions below:
- Go to
Page Settingsection on the left panel - Go to
Activity Selectortab - Check the box for
Check conflicts Savethe change

For the Activity Selector page, you have many options to customize and set up this page. Consider checking the following options:
- Collapse Activity Groups and Activities (if there are many of them)
- Show activity & time slot capacities
- Show description inline
- Hide full & expired time slots
- Hide Reg Type button (if you only have 1 registrant type)
We understand that your events may require occasional adjustments even after registrations have been accepted. However, it's important to note that changing specific activity details post-registration can lead to challenges with registrant reports. To ensure a seamless process, we strongly recommend that you and your committees confirm the following details before going live:
- Activity Description
- Confirmation Email content
- Time Slots
These details are communicated via email with volunteers after they complete registrations and are integral to their registration record. Therefore, changes made in these areas post-registrations won't automatically be communicated to registrants or reflect the schedules they received in their emails.
However, if you need to make changes to the activities, contact TRS support for recommendation on the best next steps.