Step 6: Waiver & Confirmation
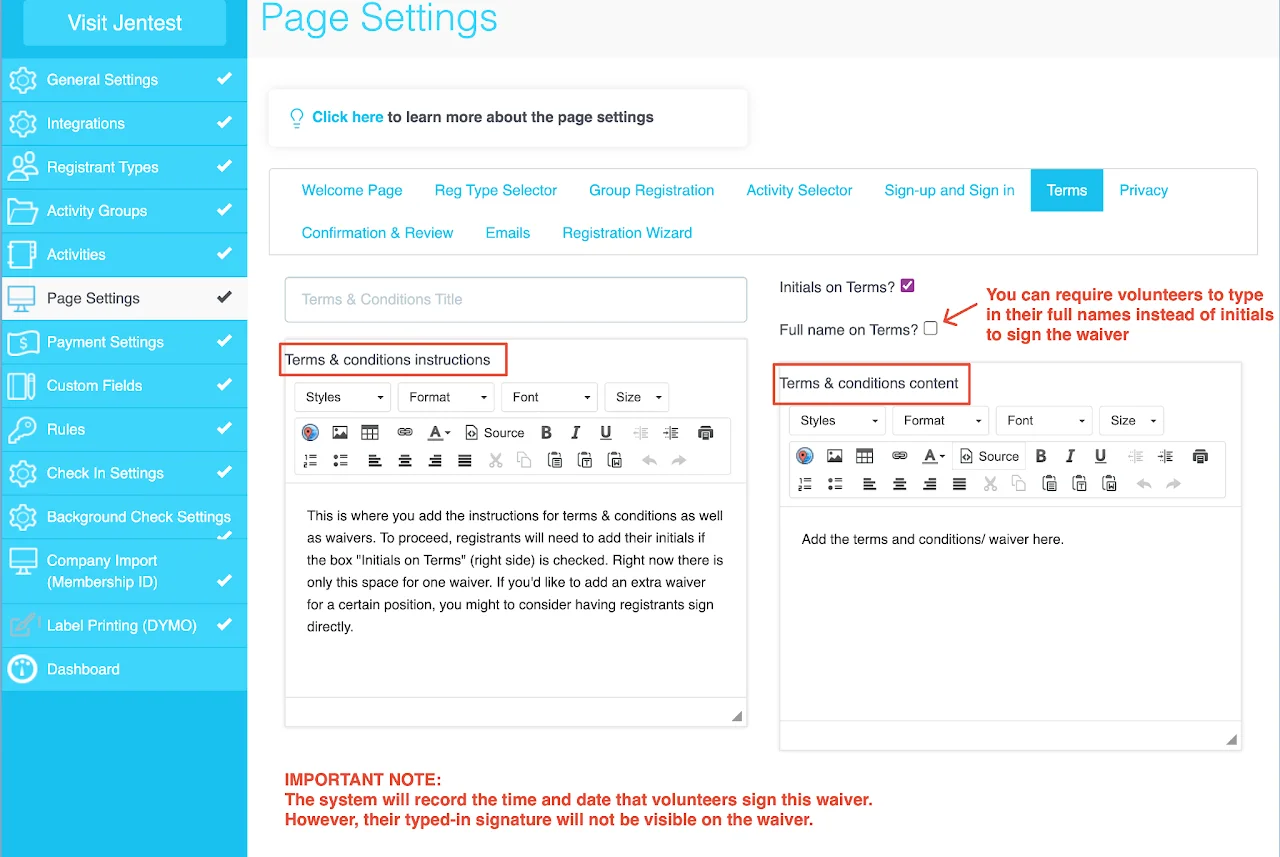
Option 1: Set up a standard waiver for all registrants
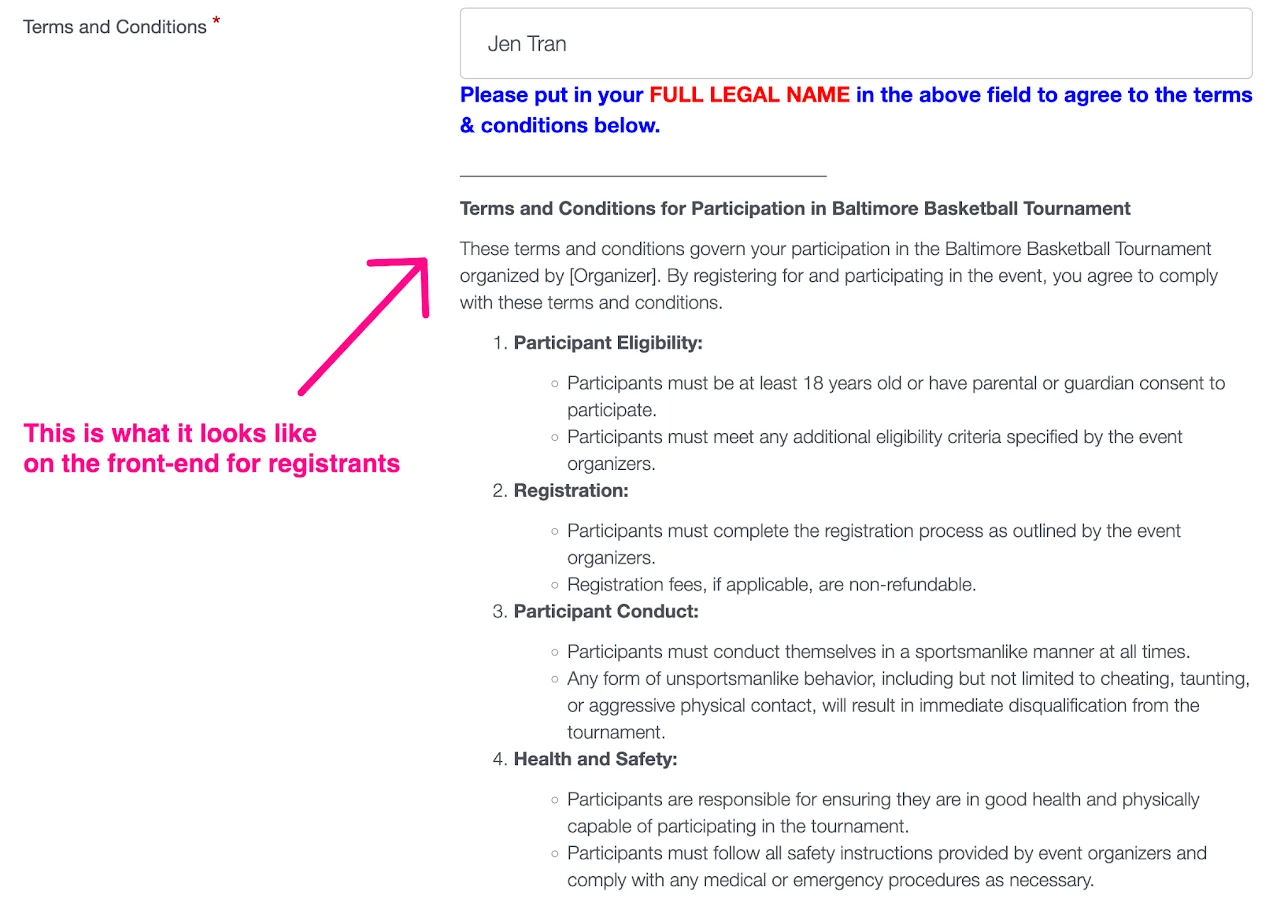
This option allows you to have a waiver where volunteers acknowledge by entering their names, with TRS recording the date and time of their acknowledgment. It ensures a timestamped record without requiring an actual signed document.
Follow the steps below to set up:
- Navigate to
Page Settingssection in your site editor - Select the
Termstab. - Add your
Terms & Conditionscontent and any necessary instructions.
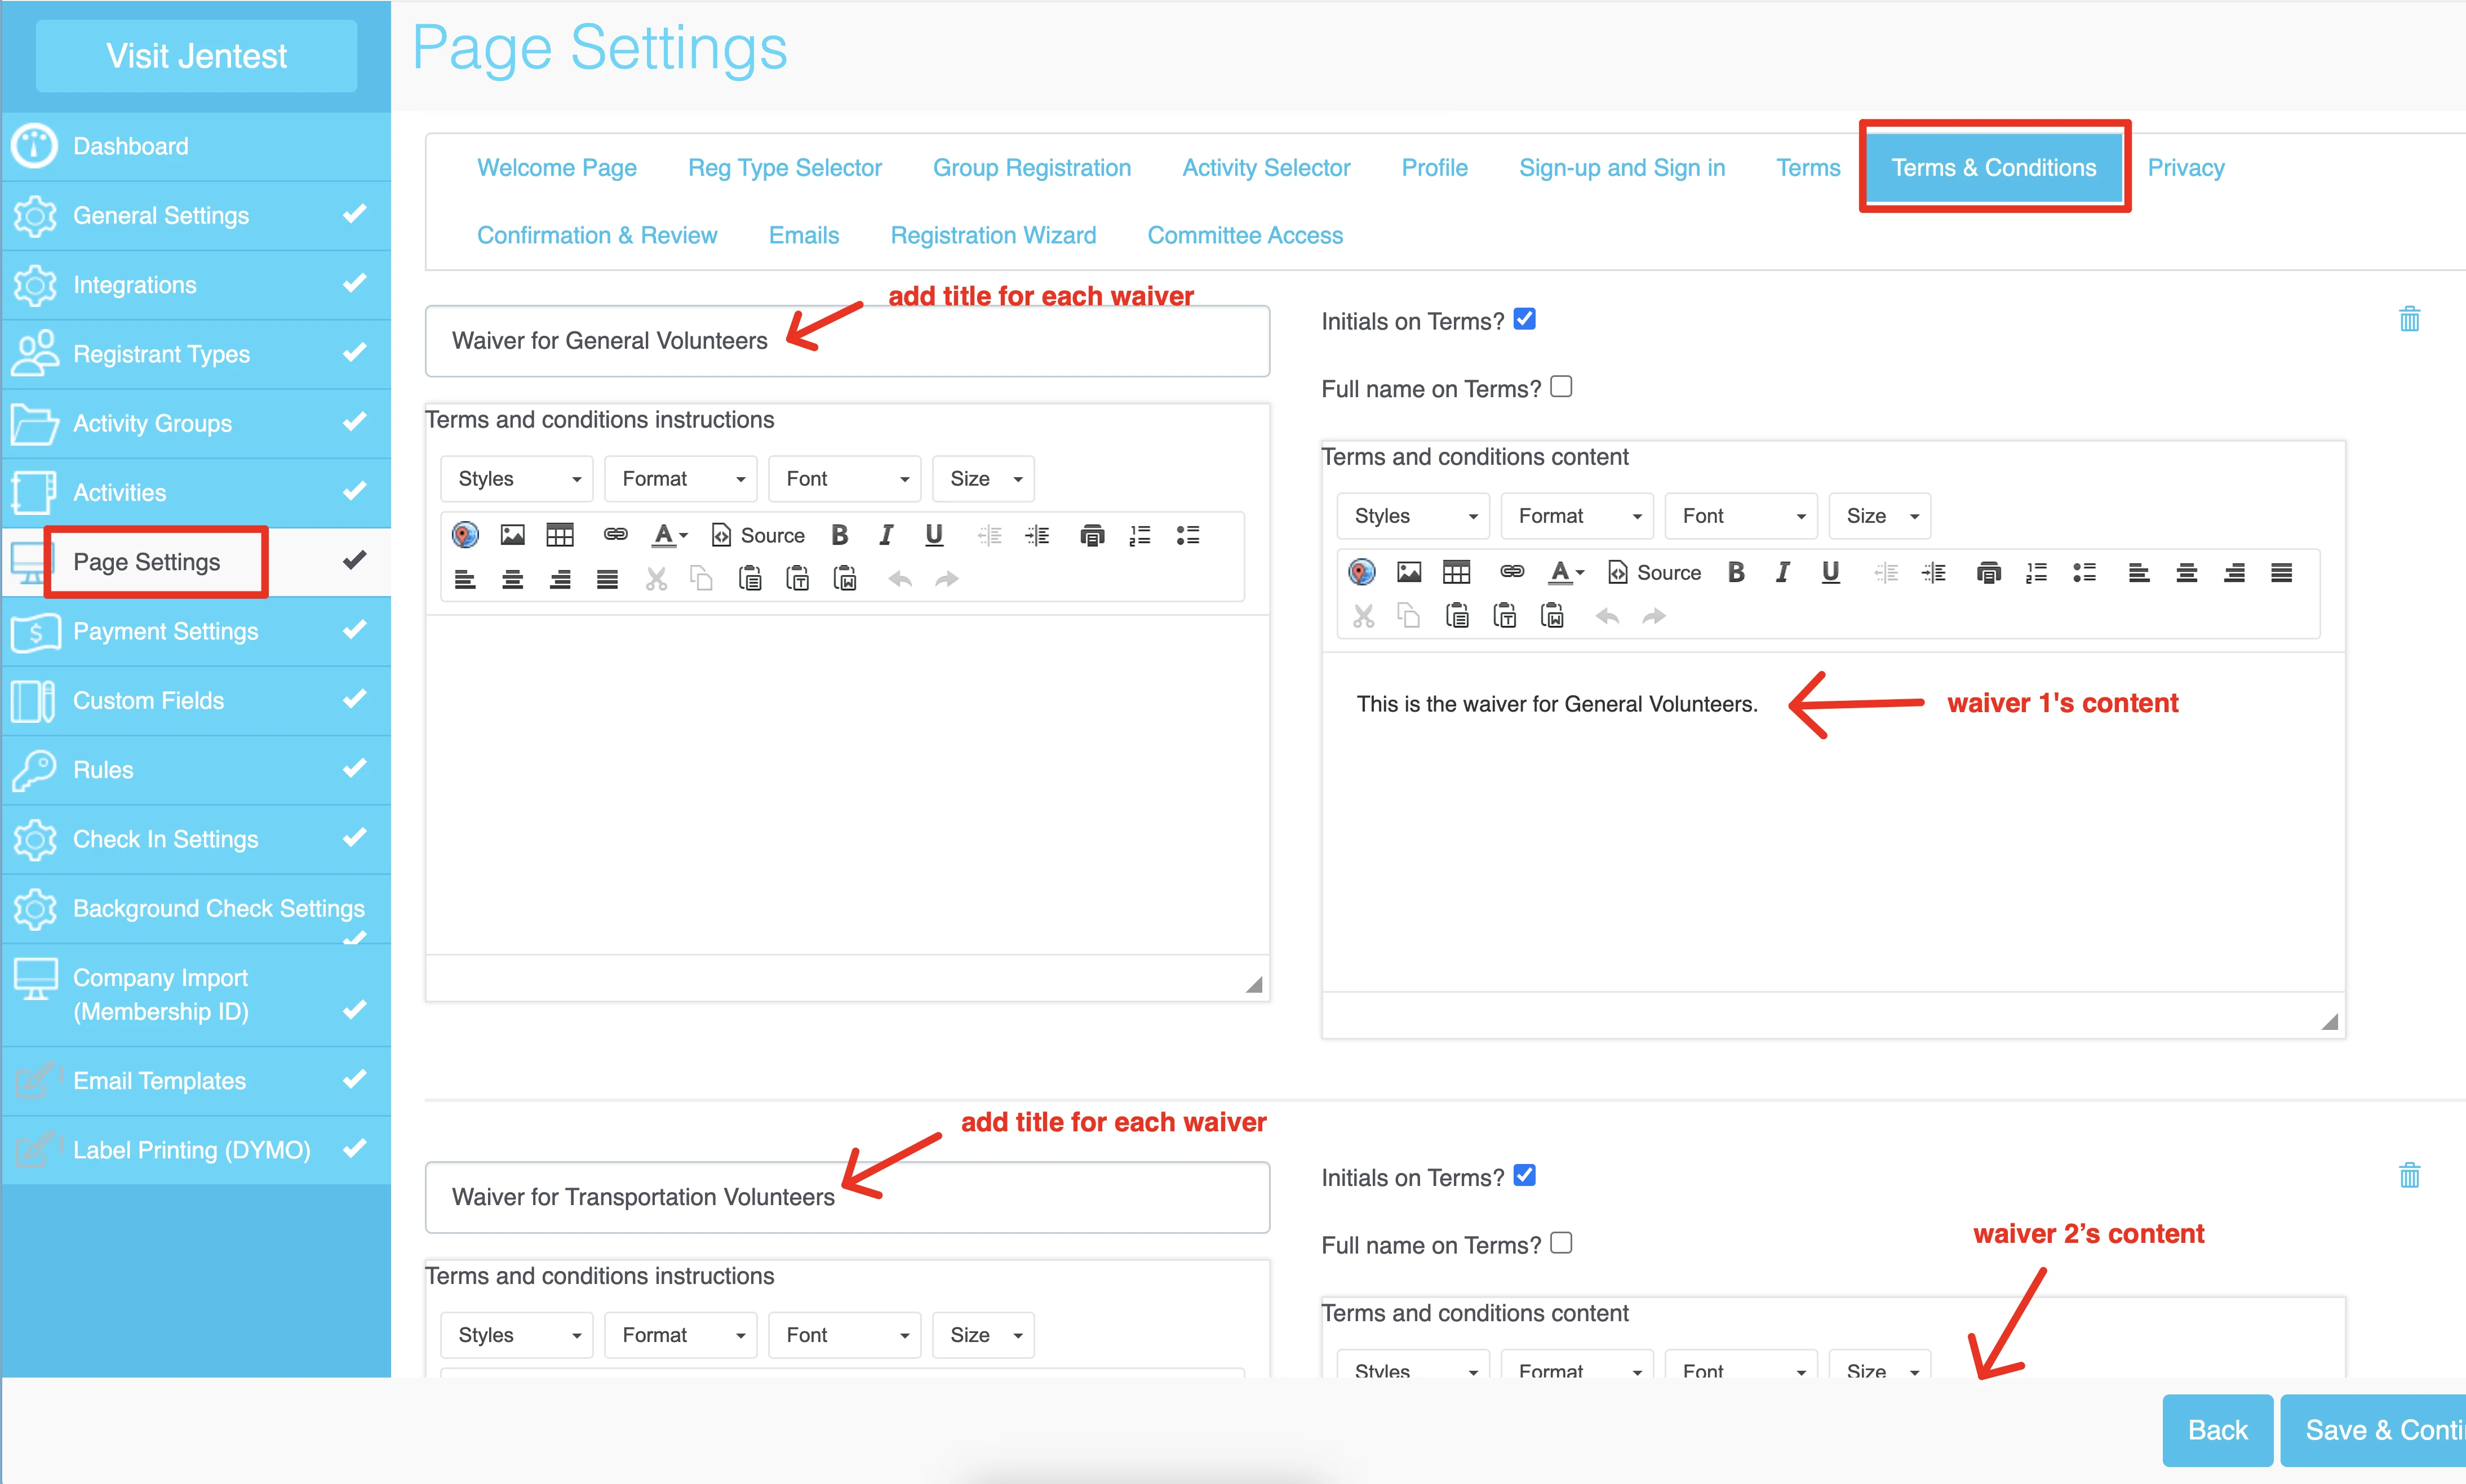
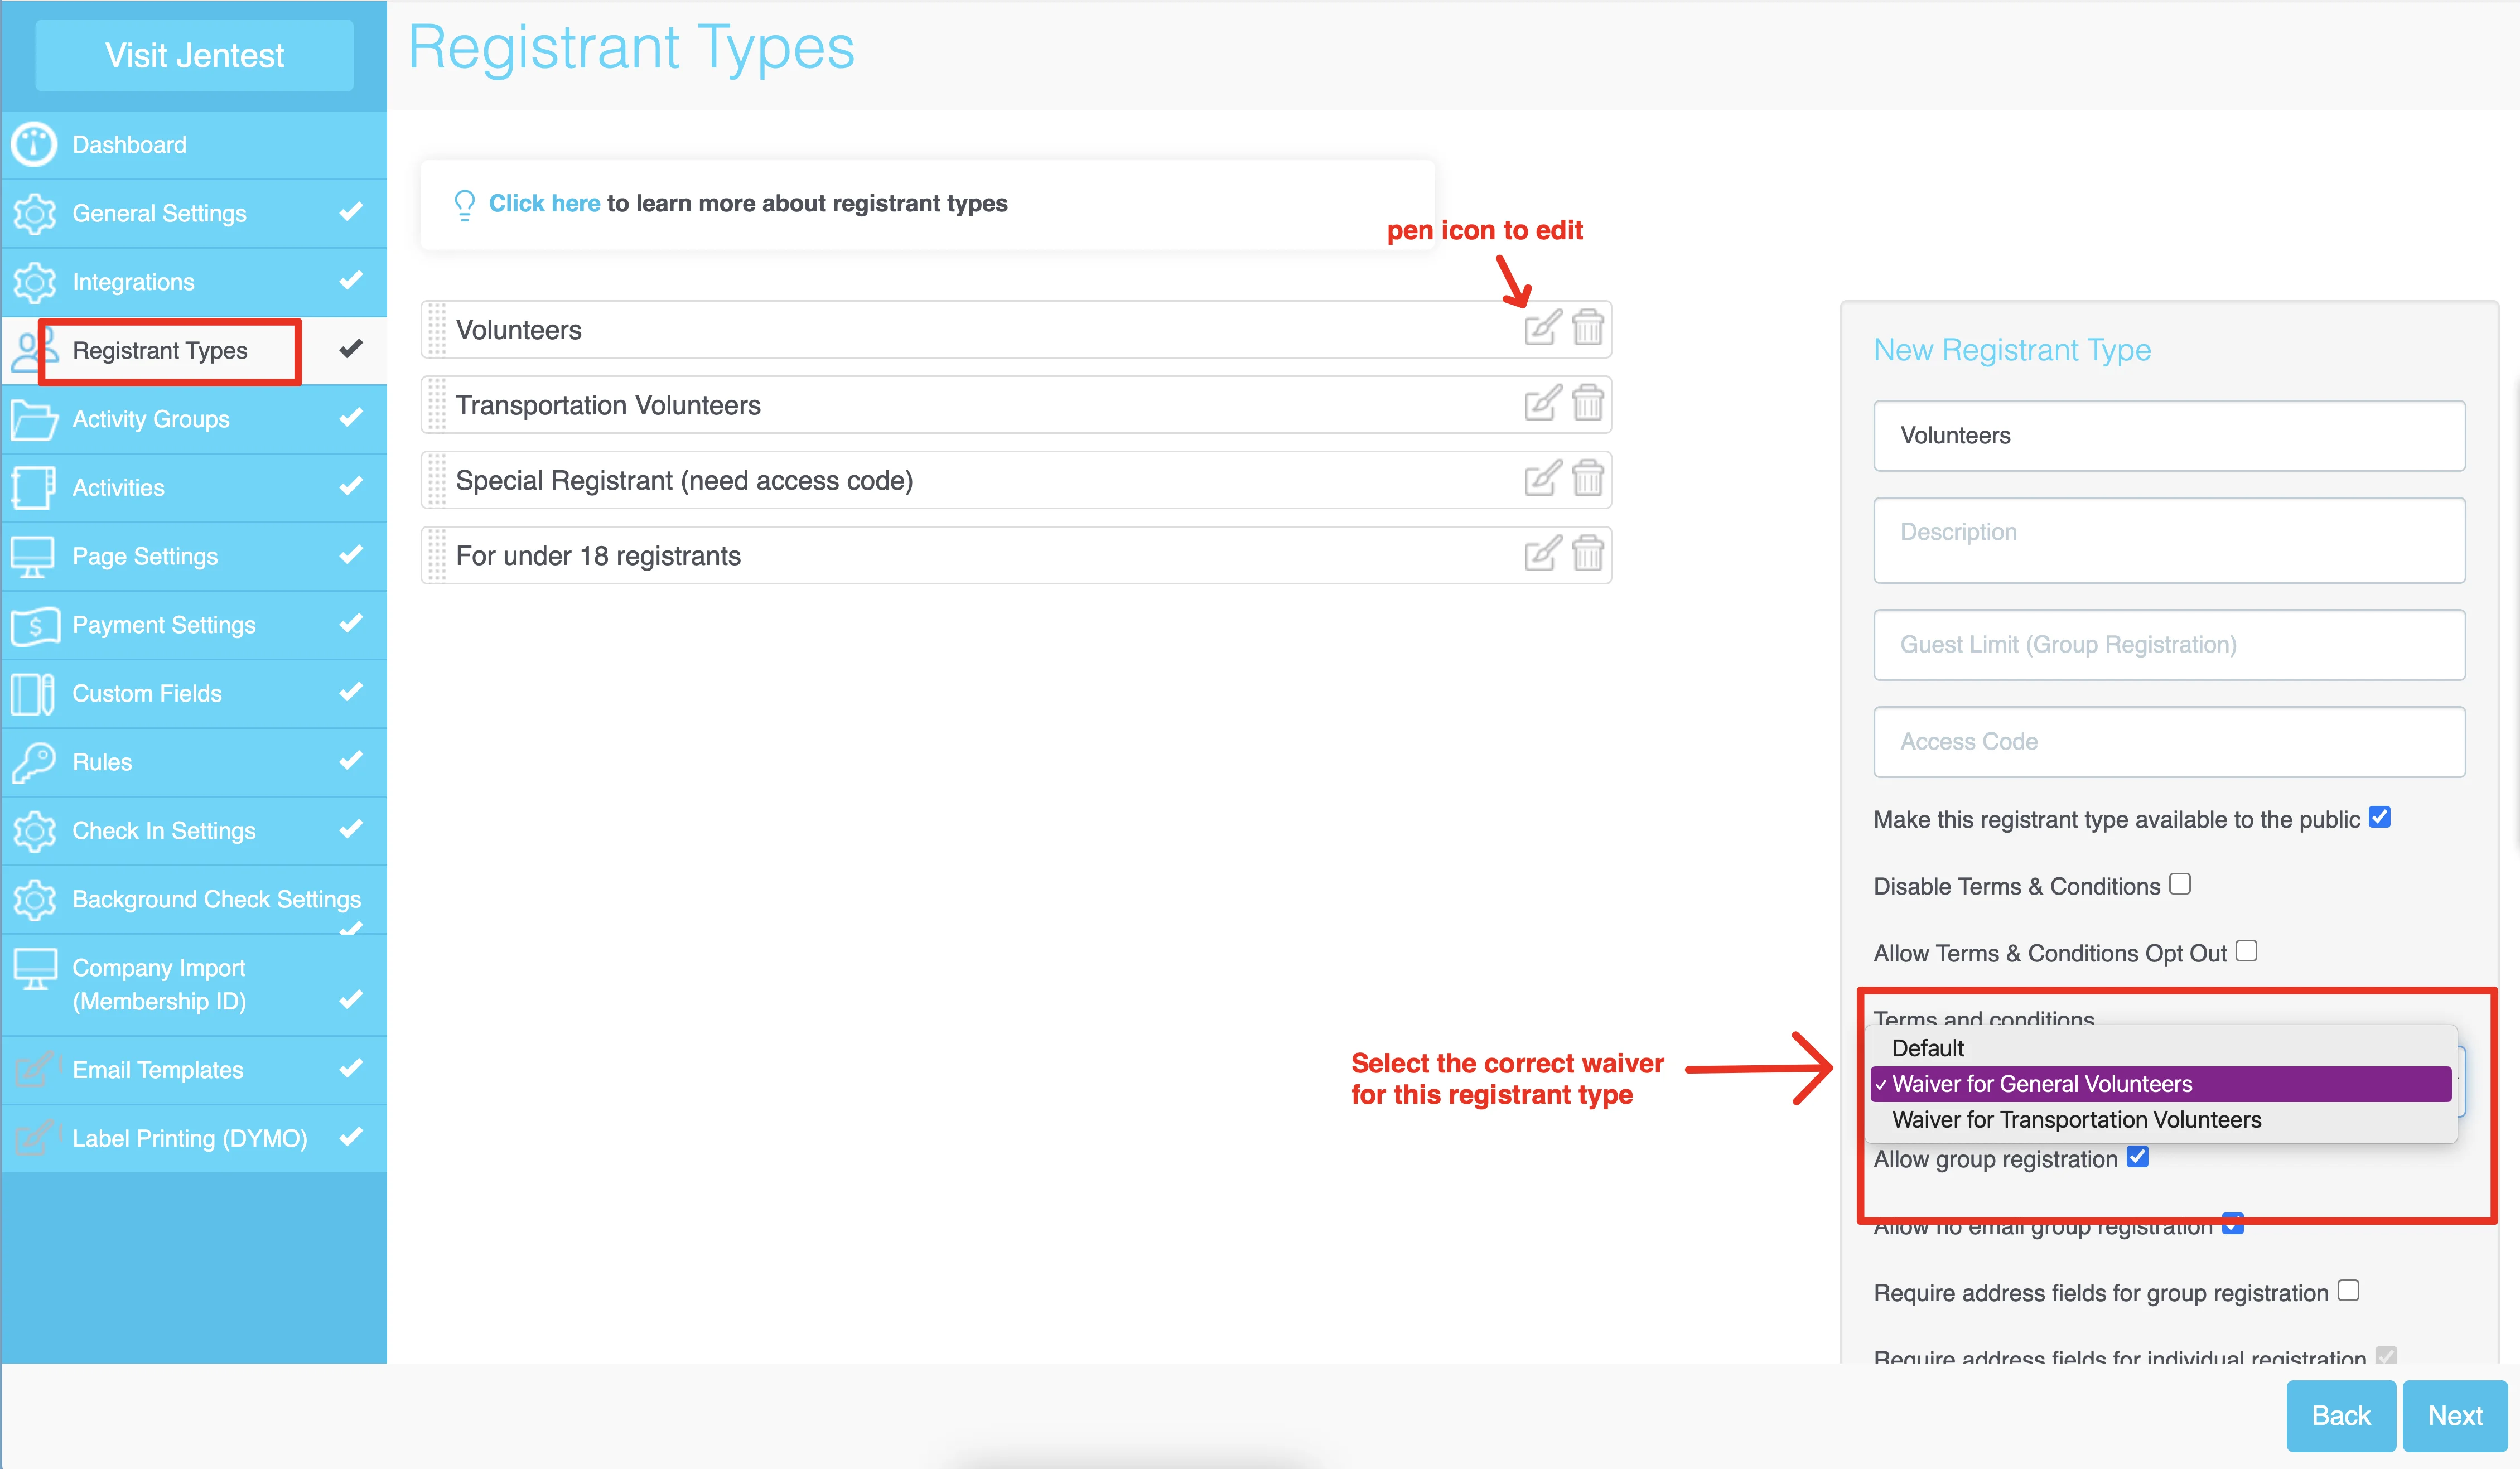
Option 2: Set up waivers for specific registrant types
If your volunteers/registrants need to sign different waivers based on their registration category, follow the steps below to set this up:
- Navigate to
Page Settingssection in your site editor - Go to
Terms & Conditionstab - Add waivers for specific registrant types (Make sure to add a title to these waivers to differentiate them)
- Save the change
- Navigate to
Registrant Typessection - Click
the pen iconon a registrant type - Select the correct waiver for this registrant type under
Terms & Conditions - Save the change
- Repeat for other registrant types
Option 3: Set up PDF waiver for live signature (for all registrants)
If you wish to set up a PDF waiver that require all volunteers to sign electronically (with their real signatures instead of typing in their names), please contact the TRS team for customization. This option involves an additional fee and may take up to 3 hours to complete the setup.
Custom Pages
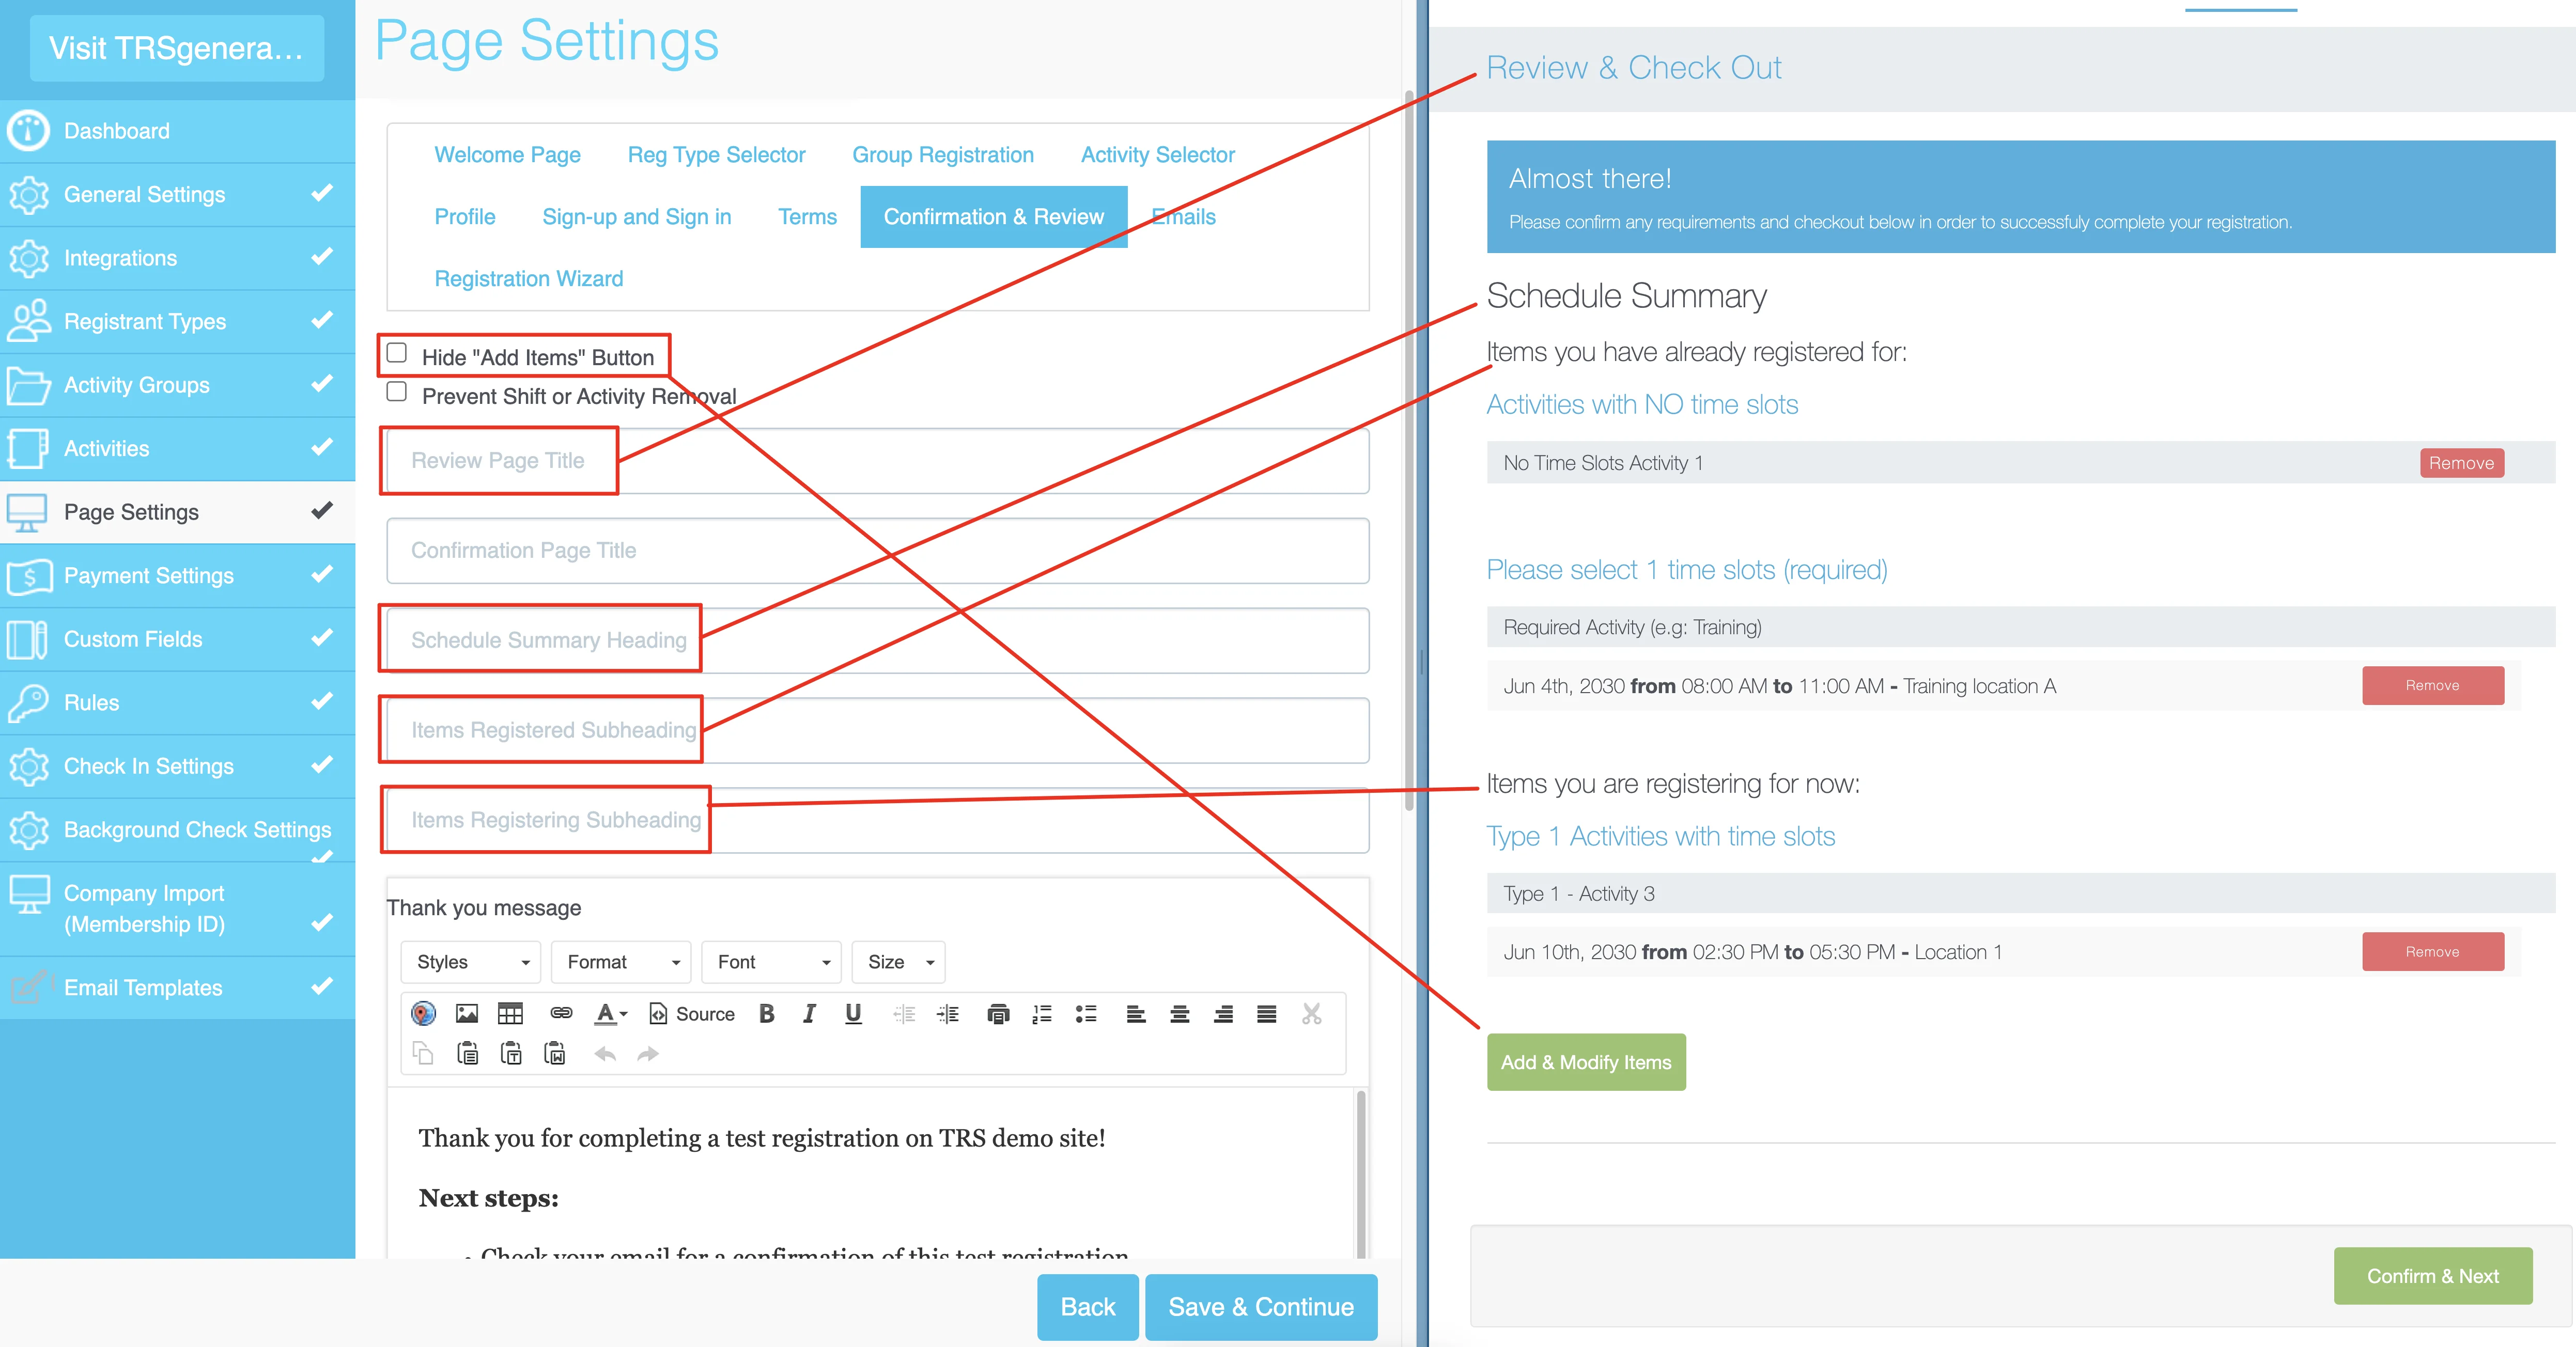
To customize the button on the Review & Check Out page, go to Page Settings > Confirmation & Review and change the button names as shown below:
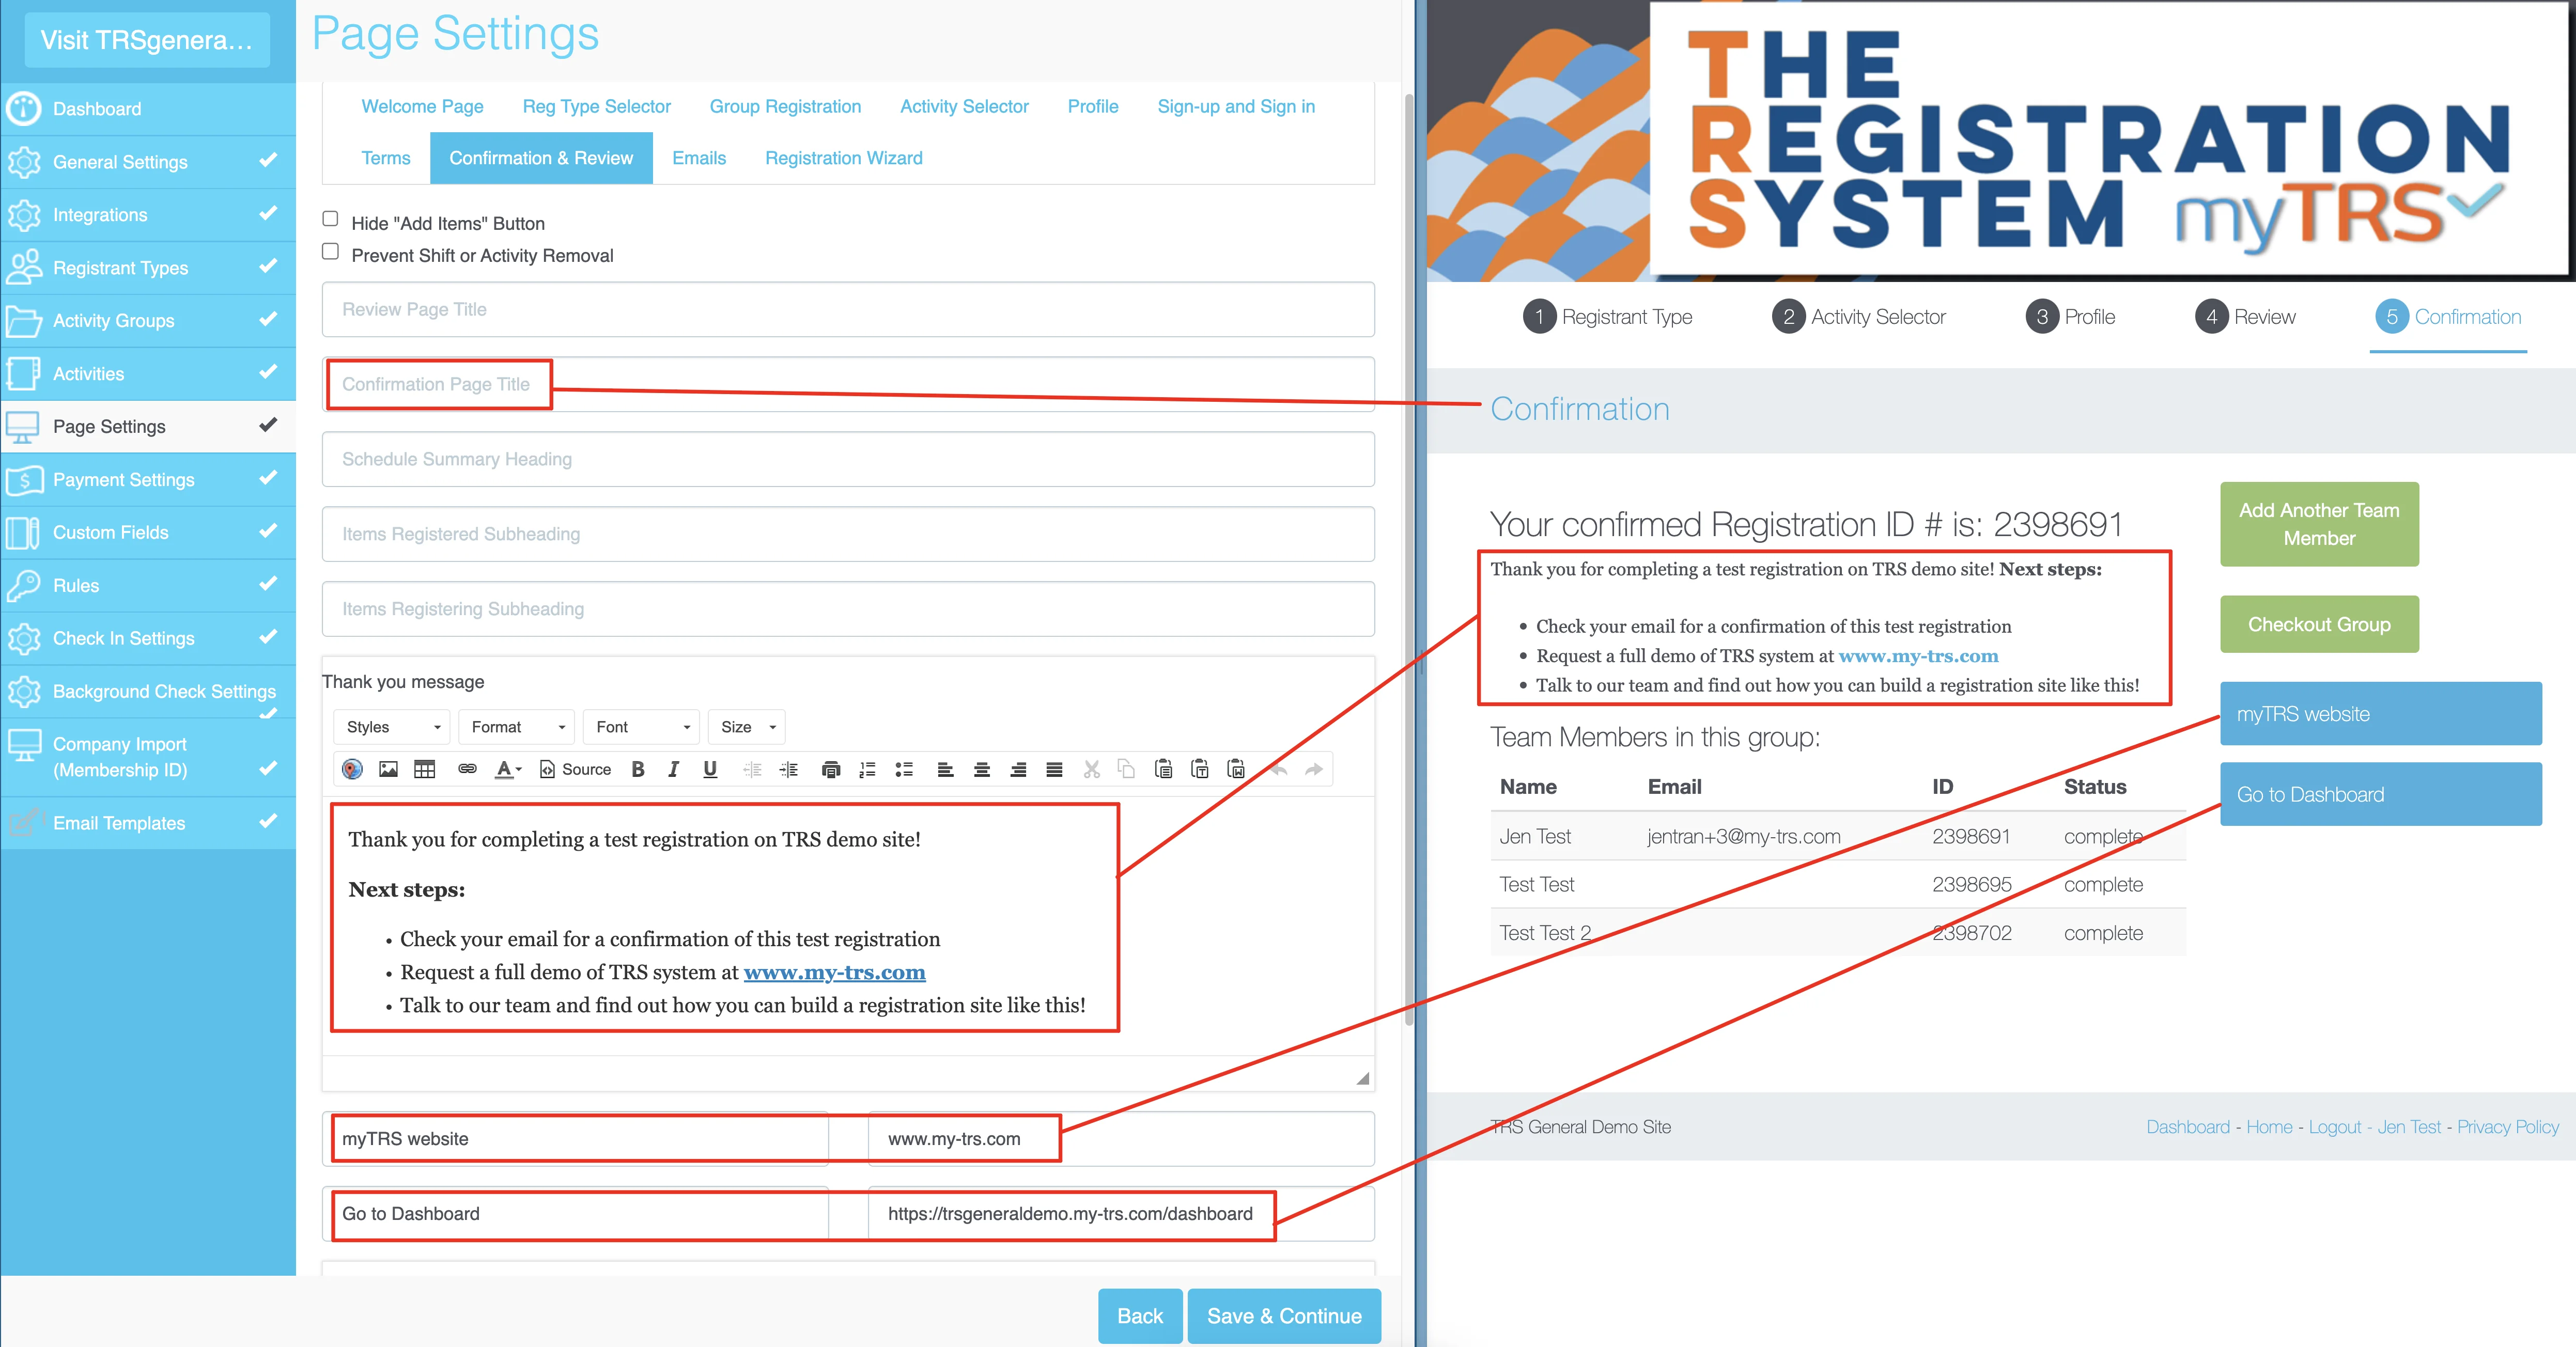
To add wording & customize the Confirmation page title, go to Page Settings > Confirmation & Review tab and update as shown below:
Welcome & Confirmation Email
Welcome email is sent to registrants right after they finish creating a user account. It doesn't mean they have completed their registration.
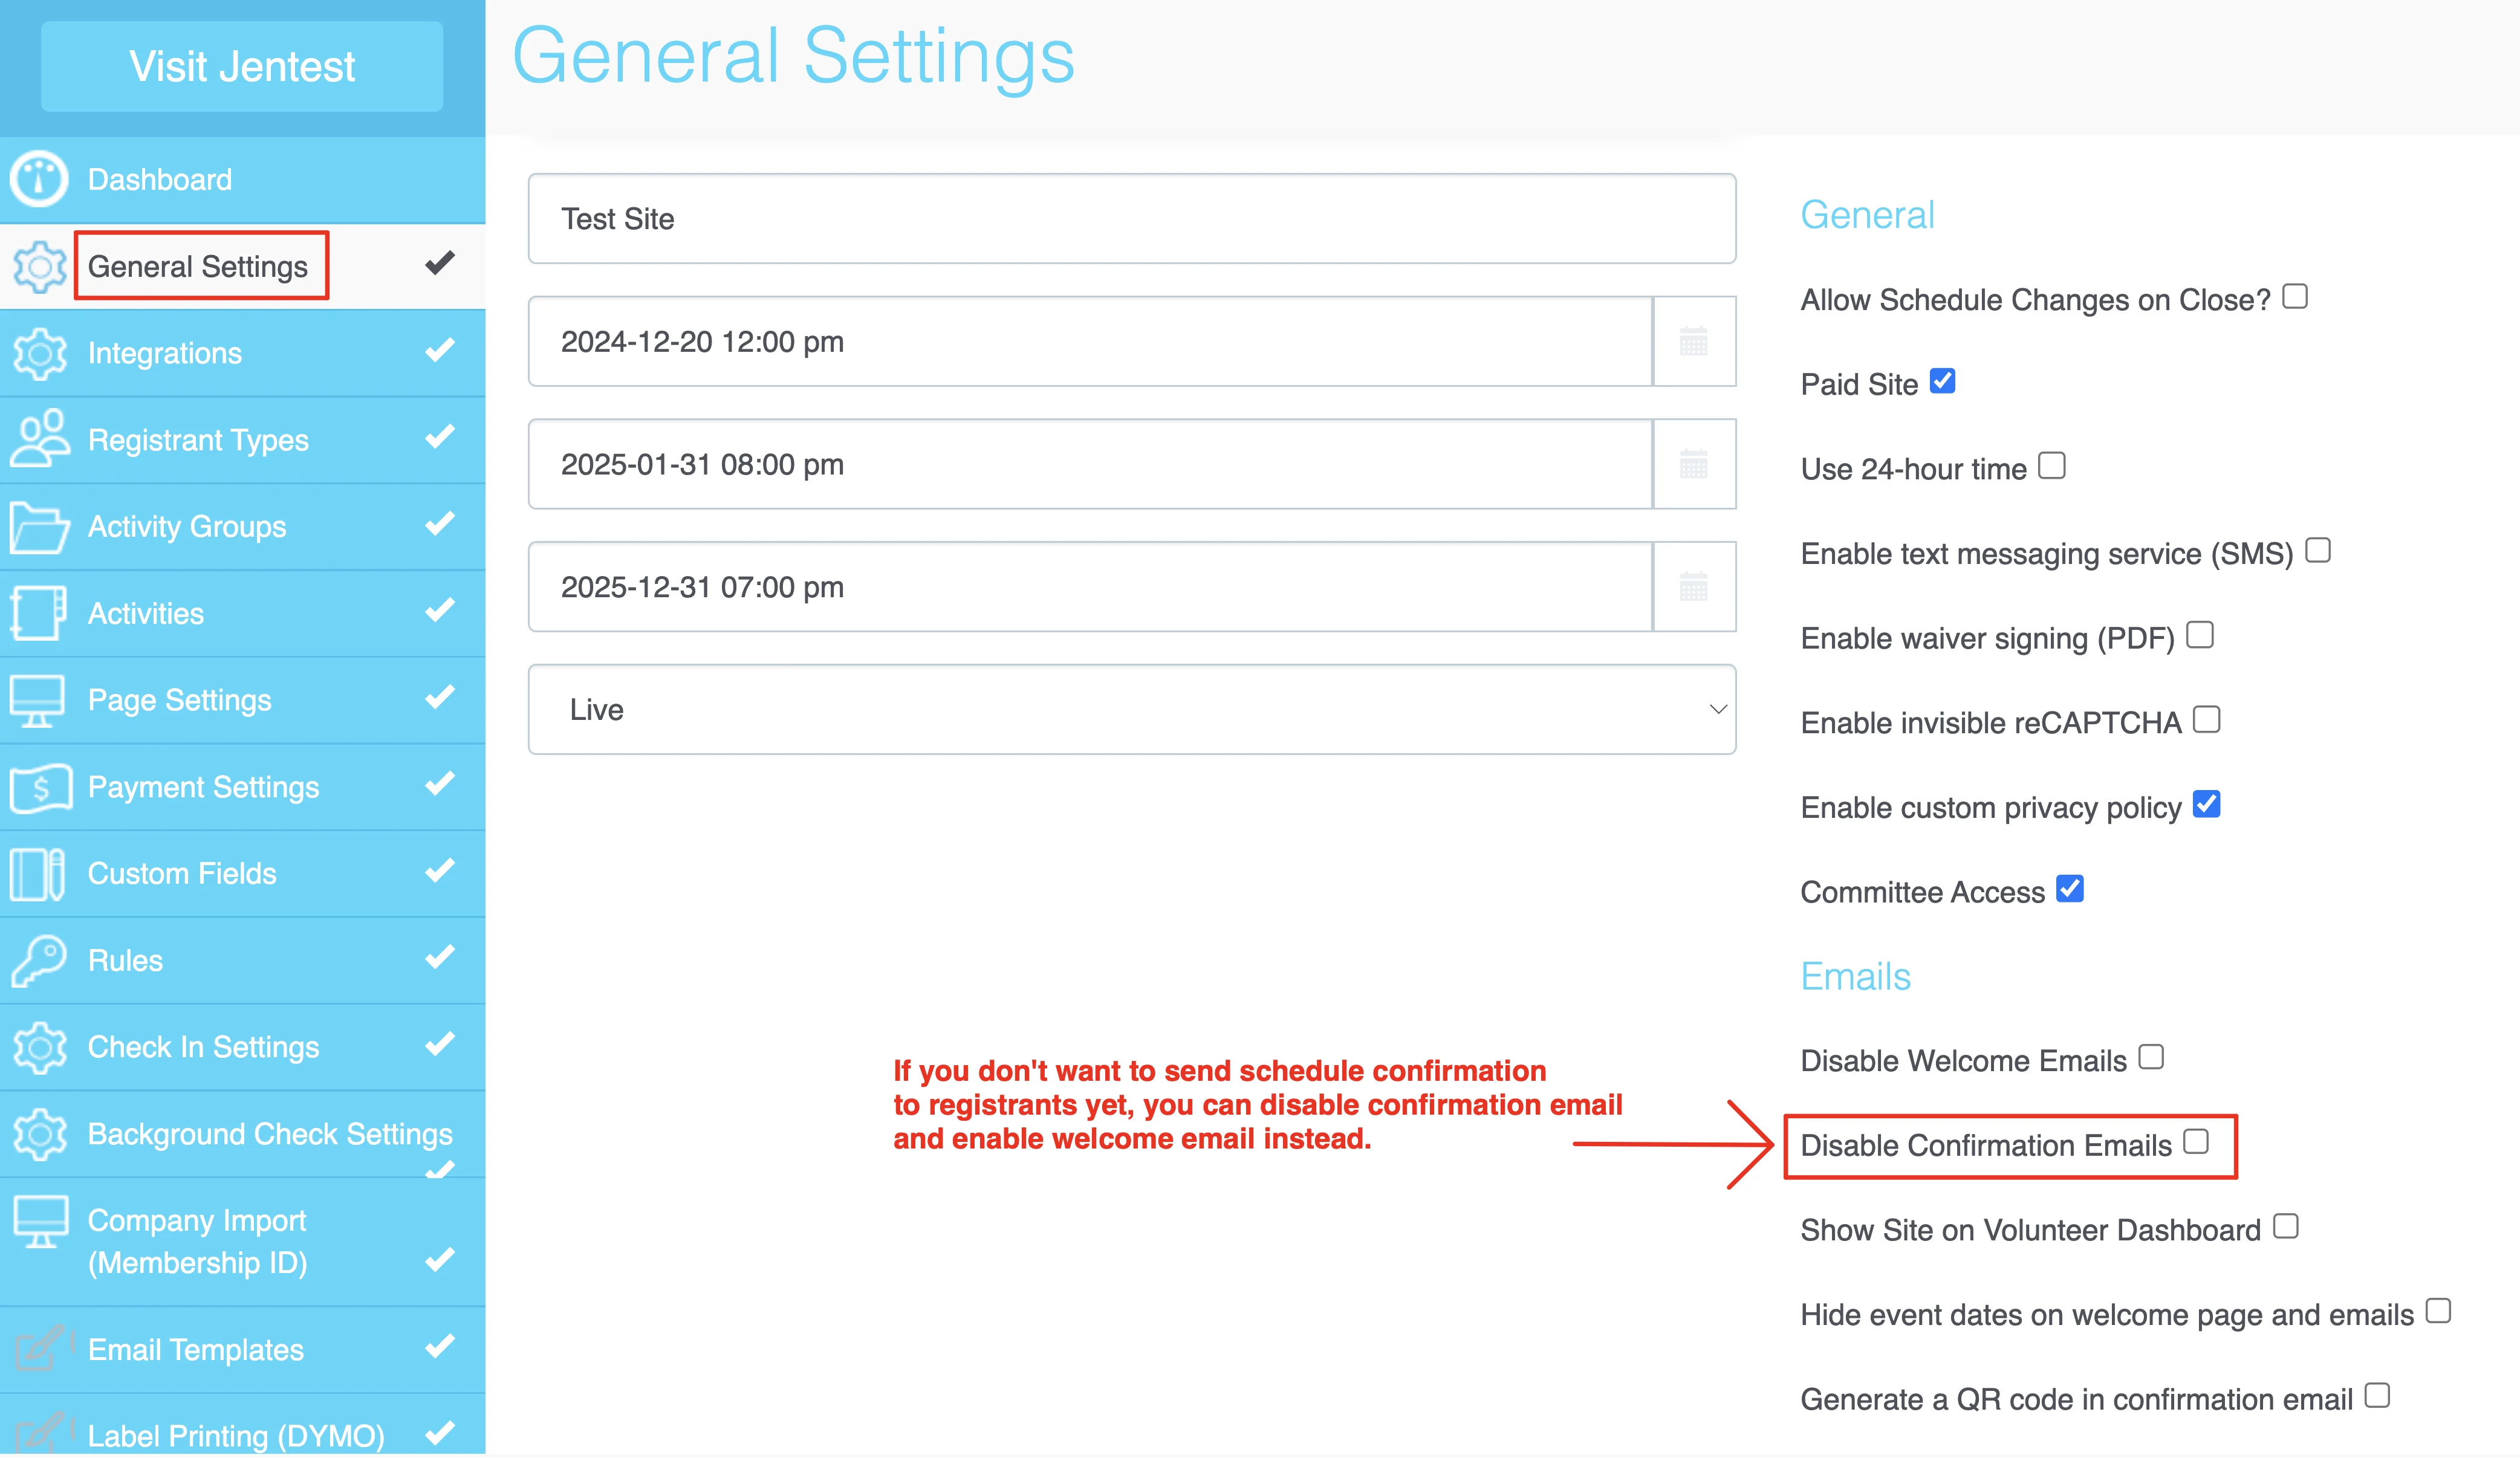
You should disable welcome email to prevent confusion for registrants. To disable welcome email, go to General Settings > check the box Disable Welcome Email.
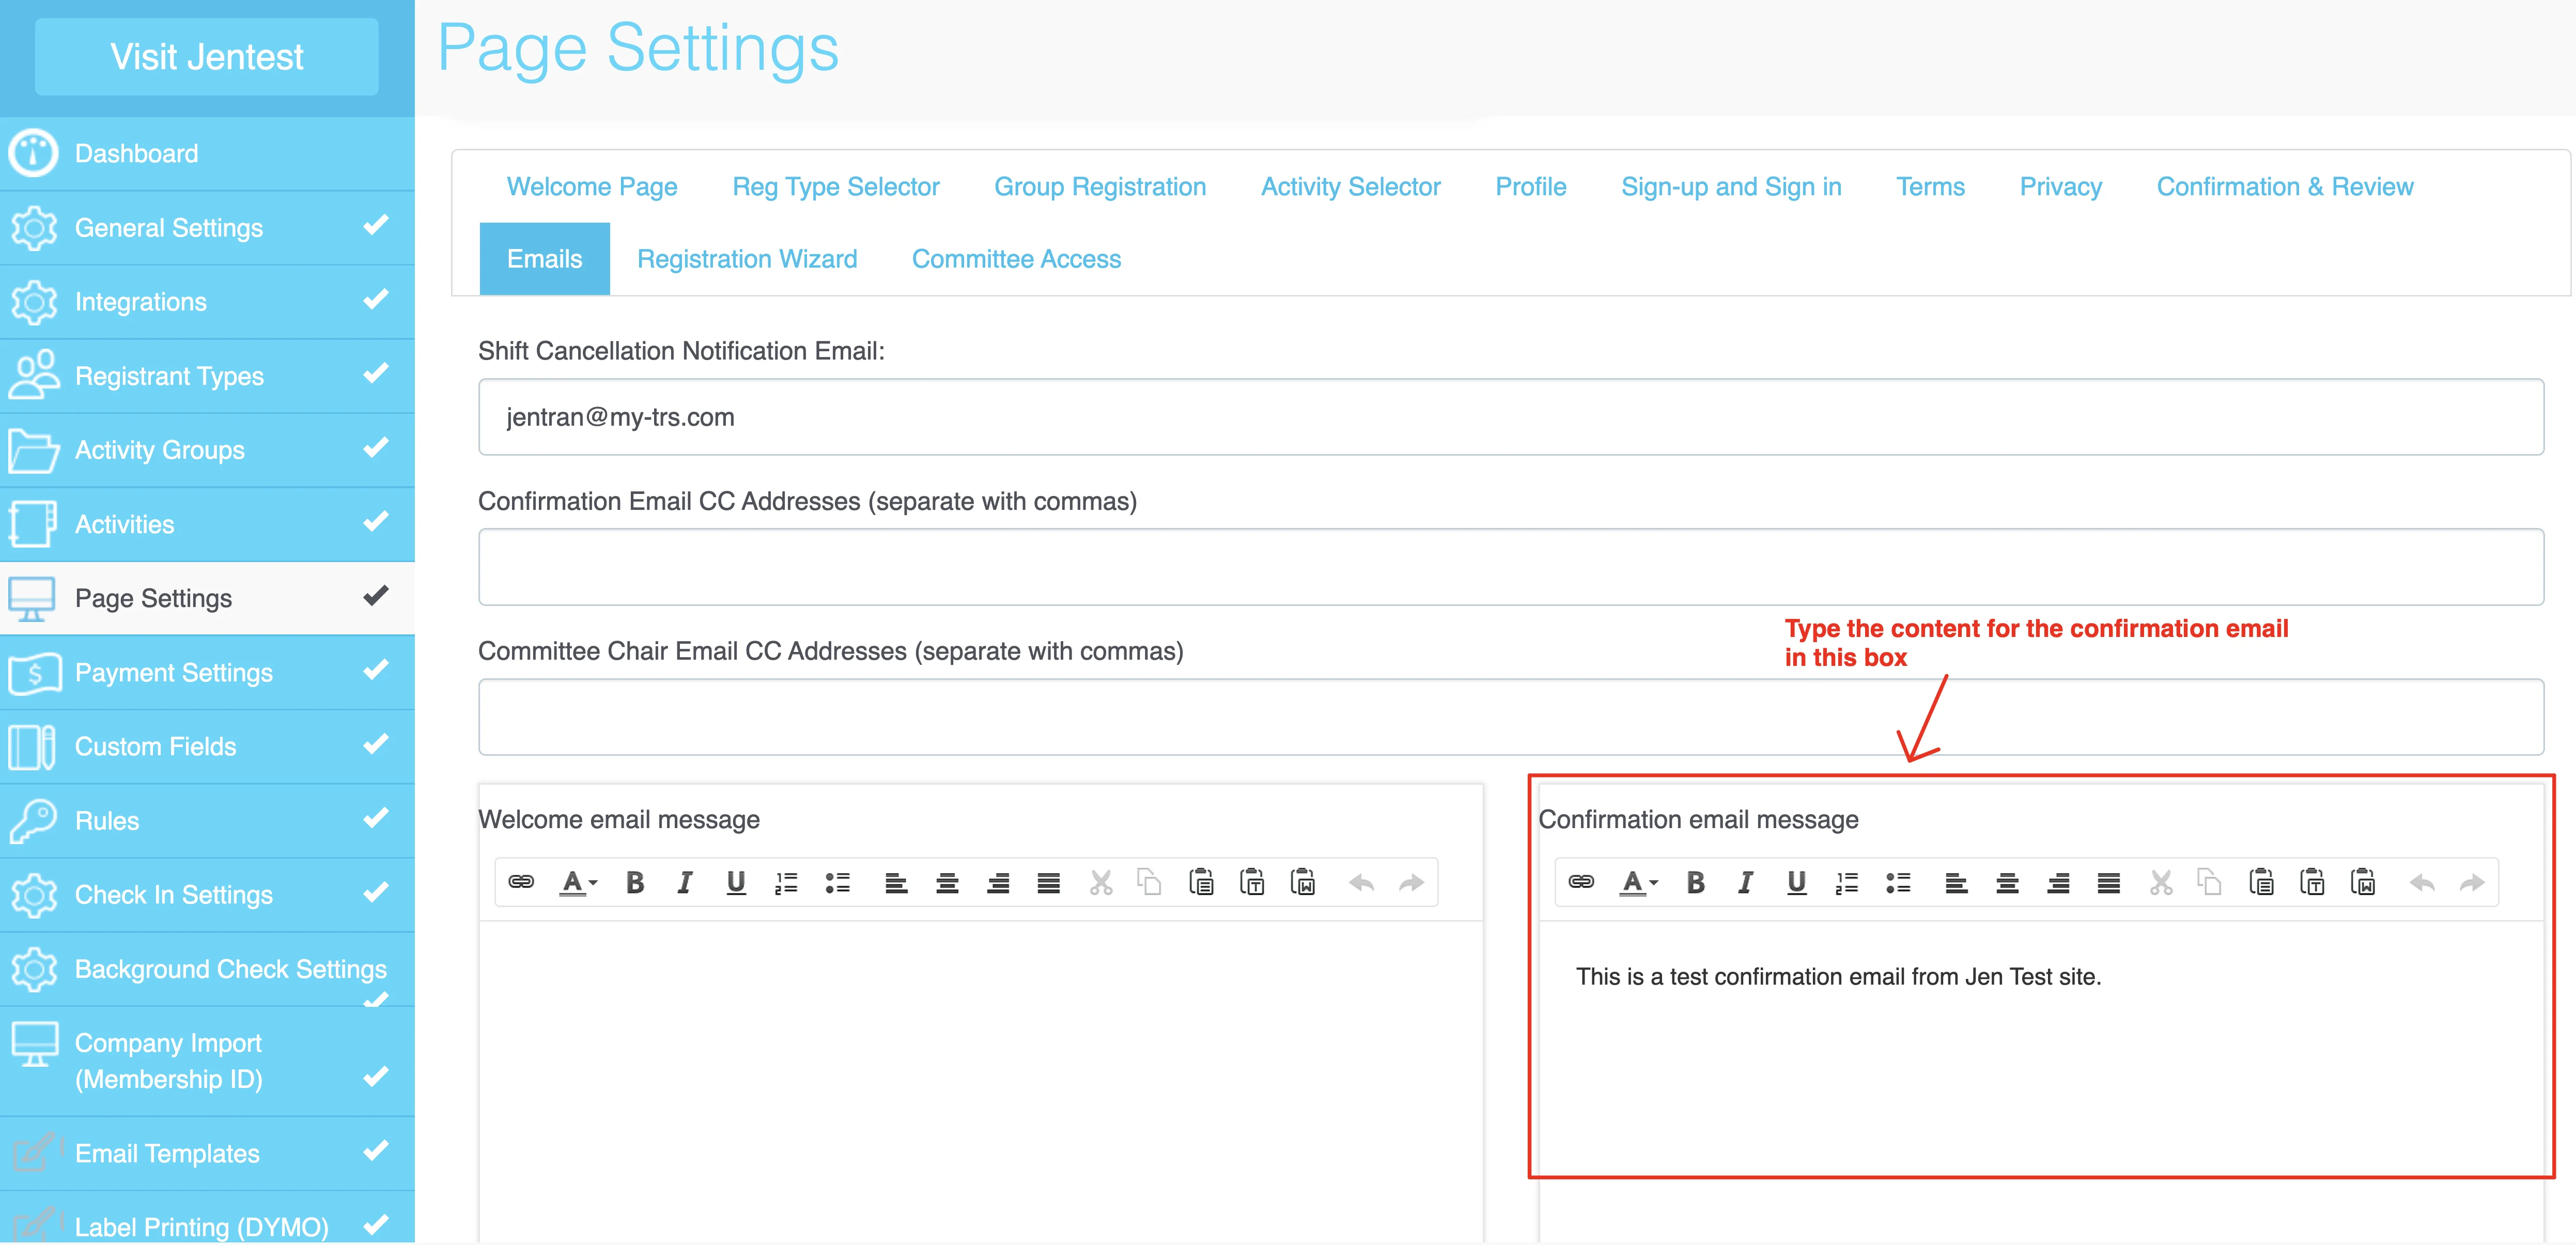
A confirmation email is sent to registrants automatically after they complete registration. It comes with the schedules that the registrants selected. To set up the content for the registration confirmation, go to Page Settings > Emails tab > type the content in the Confirmation email box.
If you don't want to confirm registrations yet...
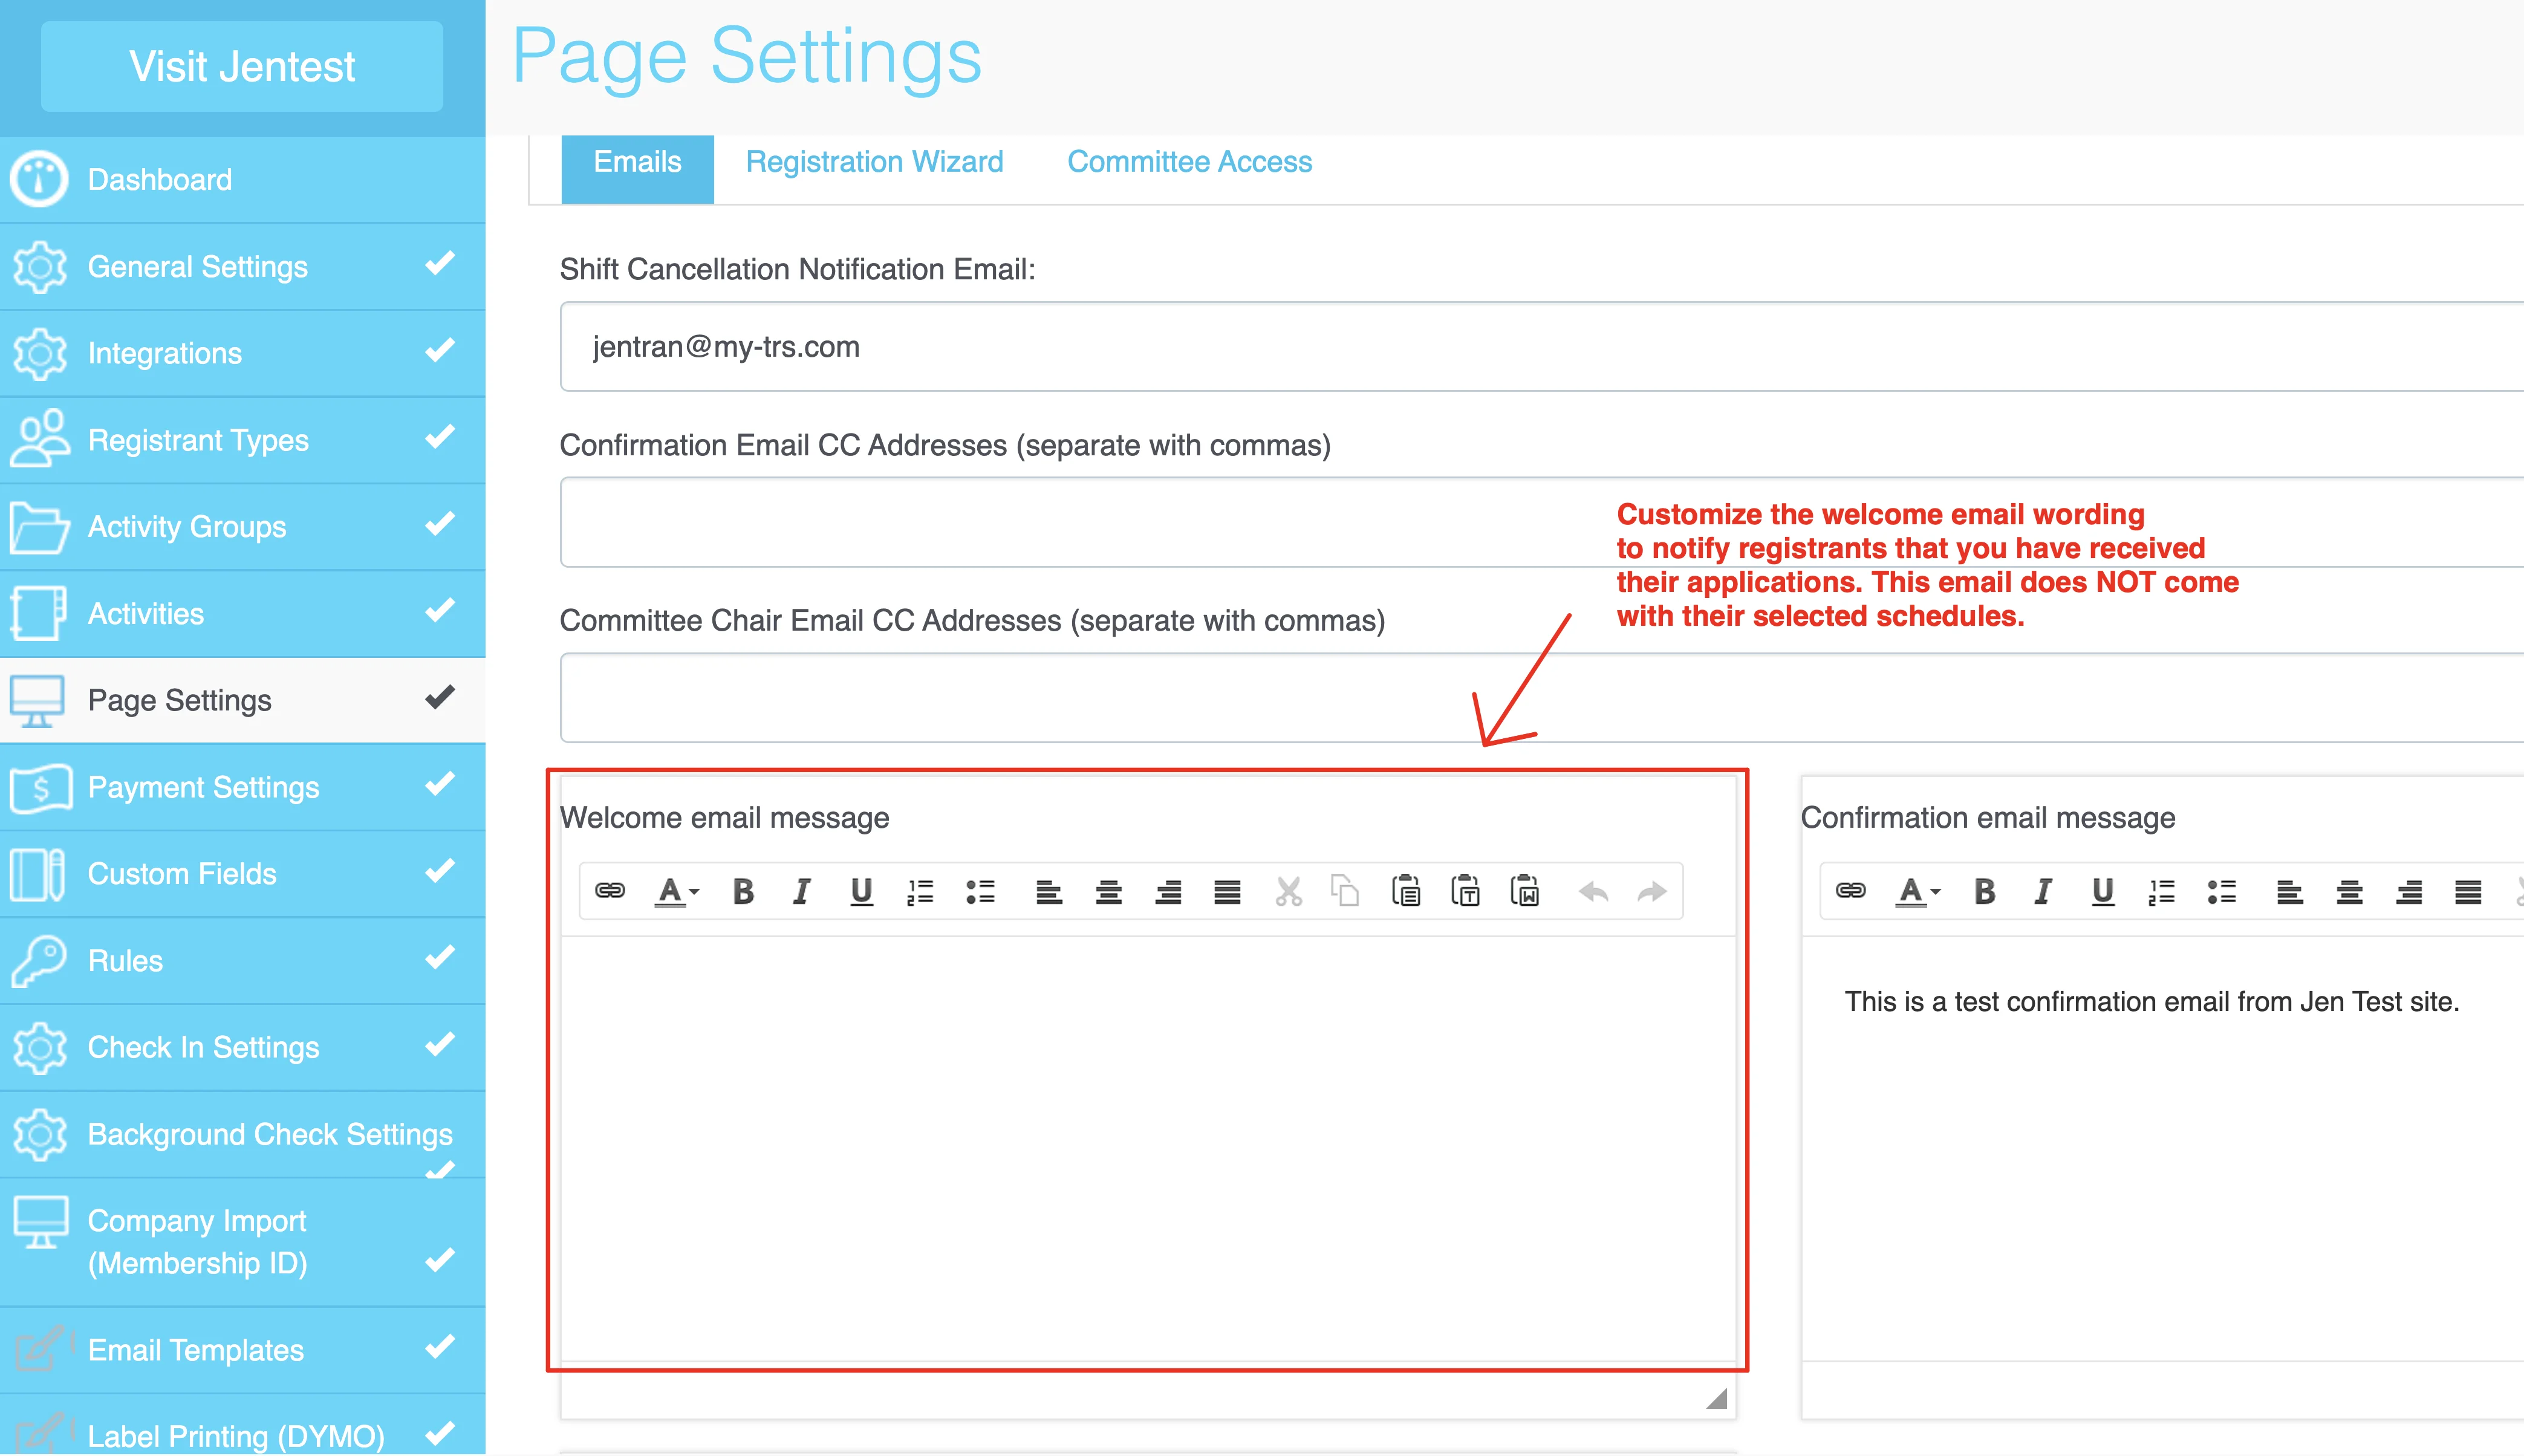
If you don't want registration confirmation to be sent out automatically with registrants' selected schedules, you can disable confirmation email and enable welcome email instead.
Customize the wording in the Welcome email to notify your registrants that you have received their applications. Please note that their selected schedules will not be attached in the welcome email.
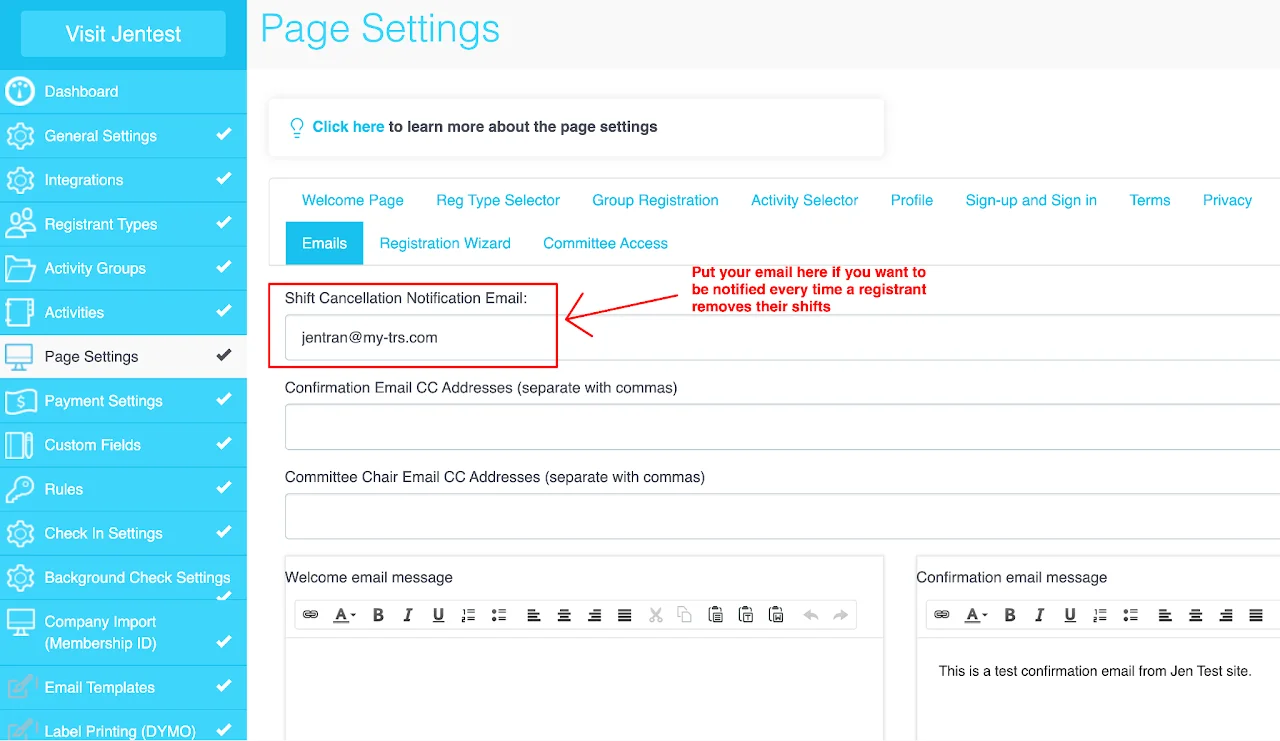
How can I receive notification whenever a registrant removes their shifts?
Go to Page Settings > Emails tab > type your email in the Shift Cancellation Notification box > Save & Continue.