Step 8 (optional): Integrations
Set up background checks
Understanding background check integration
TRS system is fully integrated with Sterling for background checks. You will need to sign a contract with Sterling directly and request them to send the credentials to TRS team to integrate. The integration on TRS end is quick and simple as long as we receive information from Sterling. There is no maintenance or integration fee on TRS end.
After your contract is signed with Sterling, please request Sterling to send your credentials to TRS to set up Background Check for your site.
If you receive the credentials directly from Sterling, you can follow the instructions below to input the credentials for Sterling integration:
- Go to
Integrationssection in your site editor - Check the box for
Enable background checksand save it - Go to
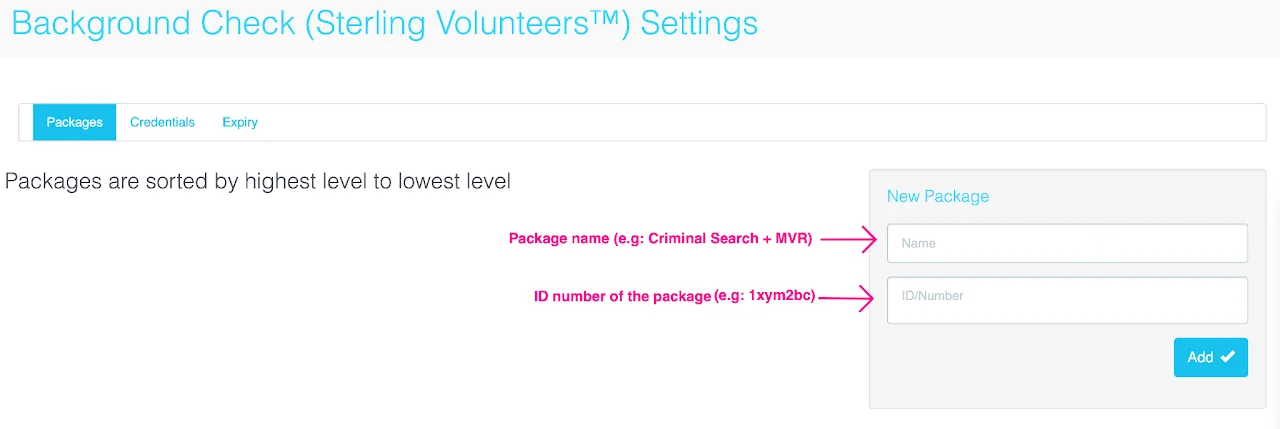
Background Check Settingsin your site editor. - In the Packages tab, add the background check package name and its ID number. If you have more than 1 package, add them individually.
- In the Credentials tab, put in the Username and Password.
- Watch this video to find out how set up background check package for each activity and registrant type.
Background Check process for registrants/volunteers
After a volunteer confirms their schedule, they will be directed to Sterling site to create an account and complete their information for background check. Once they complete their background check order, they will be redirected to TRS site to confirm their schedule and complete their registration.
If the volunteer fails to submit background check, they will NOT receive a confirmation email of their schedules. They will also see a red notification on their dashboard that requires them to resubmit background check.
Check out this article on how to run reports on background check result and find out which registrants didn't complete their background checks.
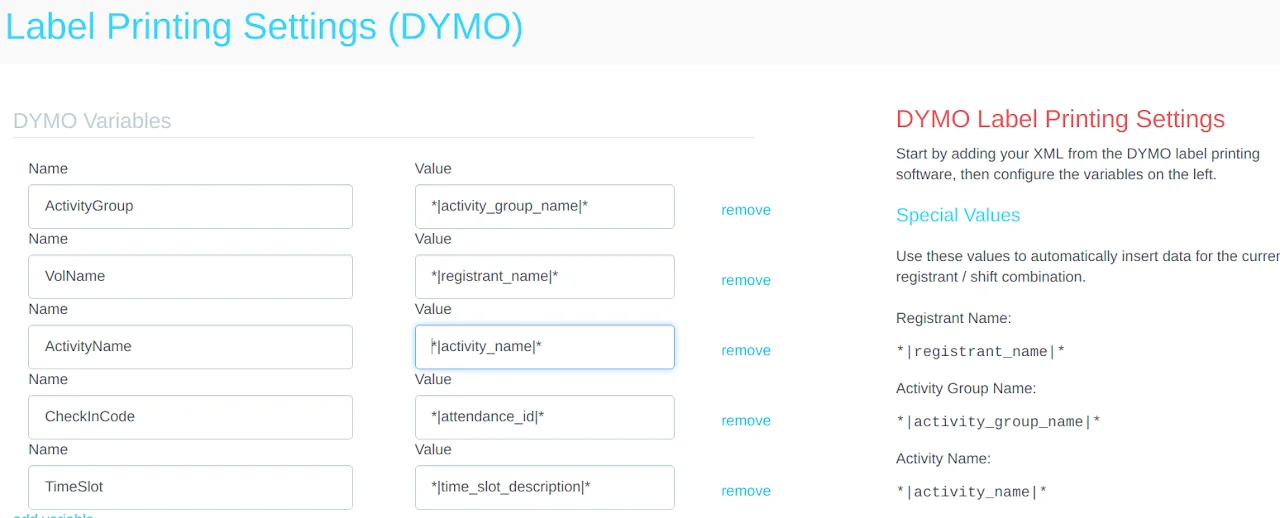
Print credentials with DYMO Label integration
Use the DYMO Label Printing integration to create labels directly linked from registrant records specific to a site. This option is used by clients for name tags, authorization and credentialing, check-in verification, and even to reflect last minute changes occurring during an event.
Important:
- myTRS does not generate DYMO labels. They must be created directly in the DYMO Software.
- Before printing confirm your DYMO printer is connected to the computer you're using. It is recommended to test print labels prior to the event, to confirm layout and printer settings are configured the way you want. Bulk print is not an option for this integration.
- Labels are generated by activity, not by an entire schedule.
-
Go to
Editon the site you need to print credentials for -
Locate and click on the
Integrationsfrom the left-side menu -
Check mark the option
Enable DYMO Label Printing. Then clickSave & Continue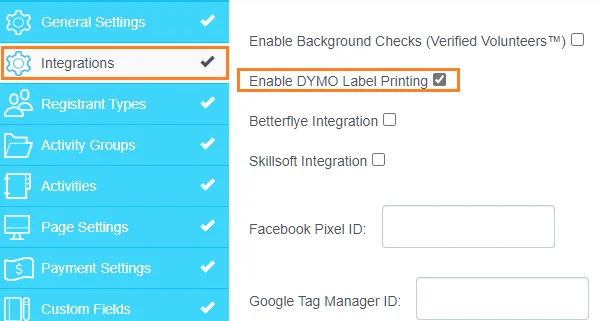
-
Label Printing (DYMO)will appear as a new tab on the left panel. Click theLabel Printing (DYMO)tab to begin. TheLabel Printing (DYMO)page is where actual configuration is completed. Instructions are presented on the right-side of the page to assist. -
Create your label within the DYMO Software. Any questions related to DYMO software should be referred to DYMO by accessing their website. DYMO® : Label Makers & Printers, Labels, and More! -
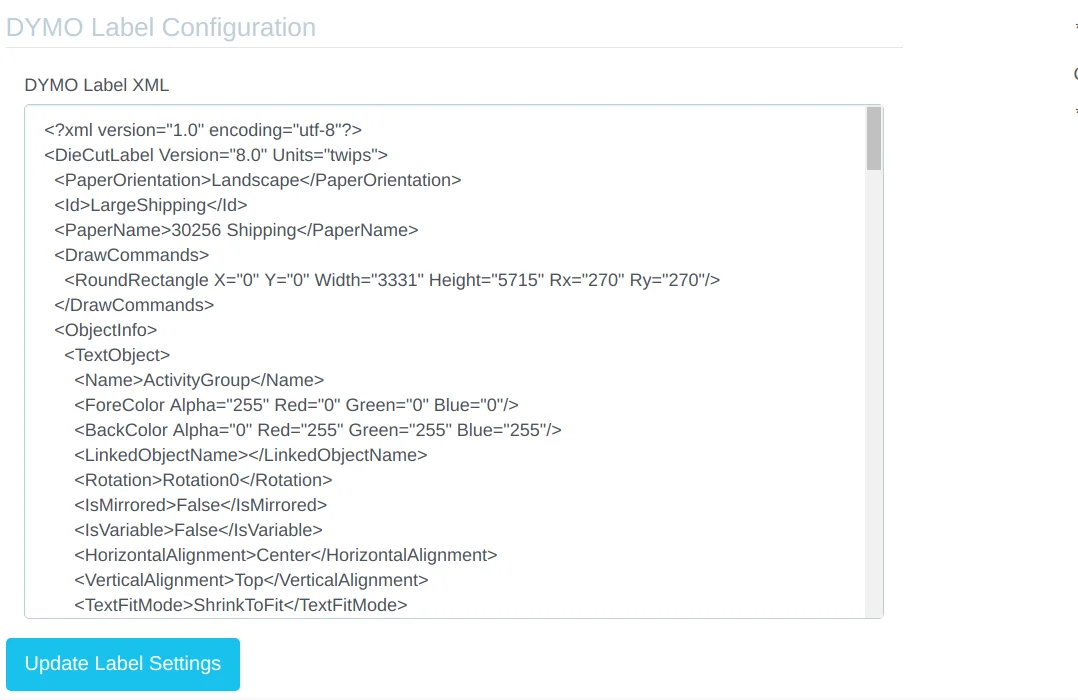
Copy + Paste the XML code into the open text box under the
DYMO Label Configurationsection. ClickUpdate Label Settings.
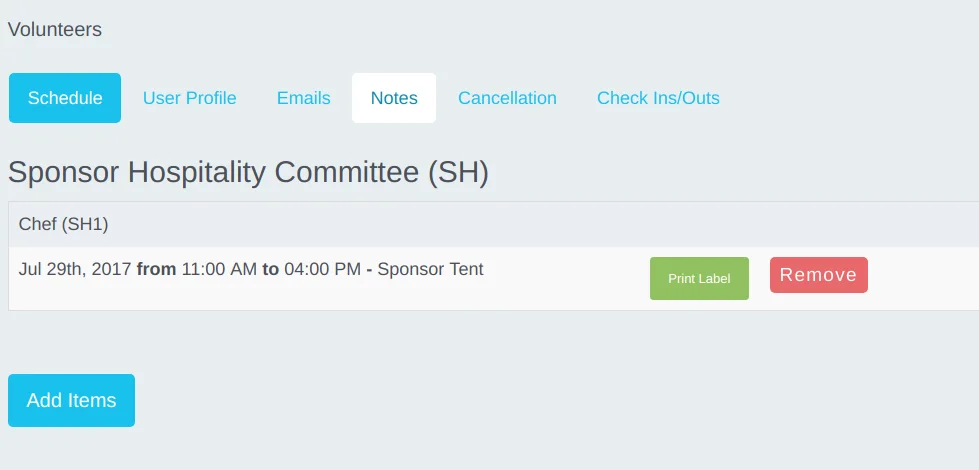
- Locate the registrant's user account (see Modify profiles & check in for instructions) and view their registration.
- View
Scheduleon the horizontal menu. - Next to each activity's schedule, click
Print Labelto print.

- Under the
DYMO Variablessection, configure the variables by matching the name and value fields. Refer to the example shown below: