Registration Report
The Registration Report is specific to your registrants. Think of it as a report that identifies who has registered for your event.
This report provides you with registration information (name, email, phone #, number of shifts, total volunteer hours, etc.) specific to each, and all, of your registrants, for the specific site you have selected to run the report for.
Click on each section below to learn more about customizing your registration report.
Locate registration report
-
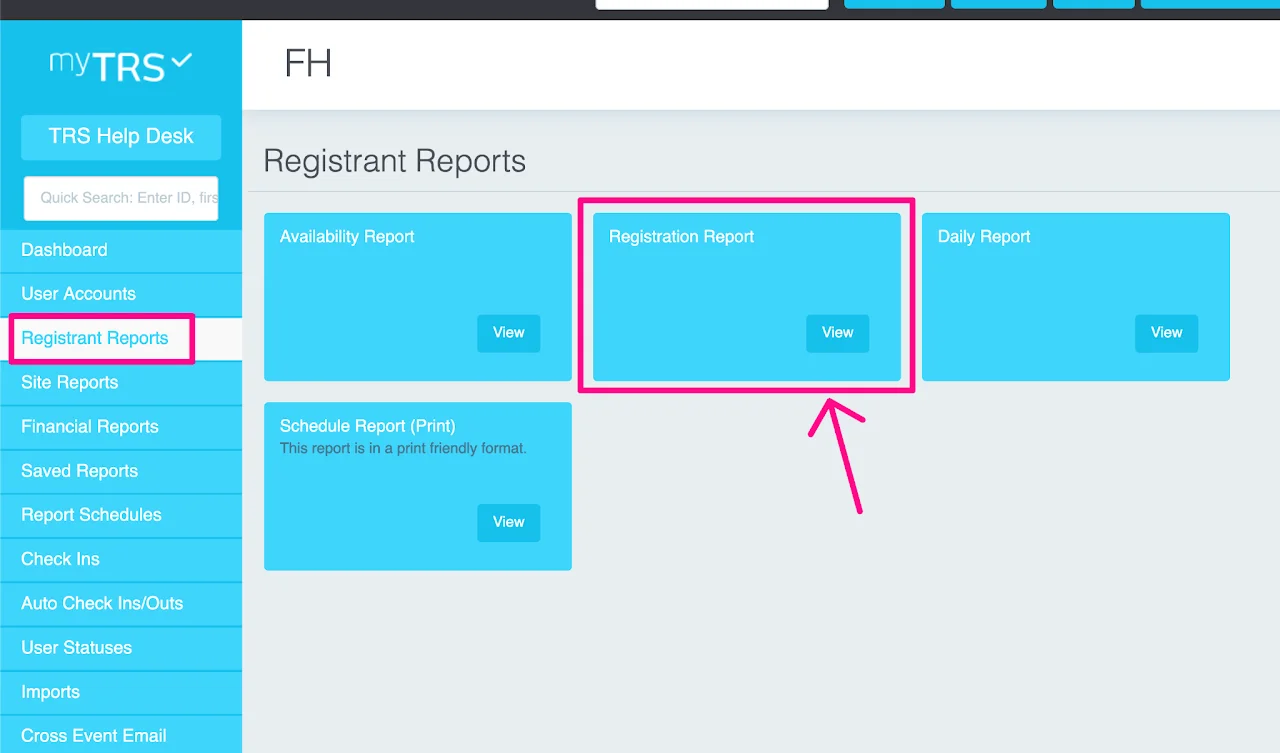
Click the
Registrant Reportsmenu panel option located on the left side of your dashboard. -
Click
viewunderRegistration Reportto pull up the Registration Report.
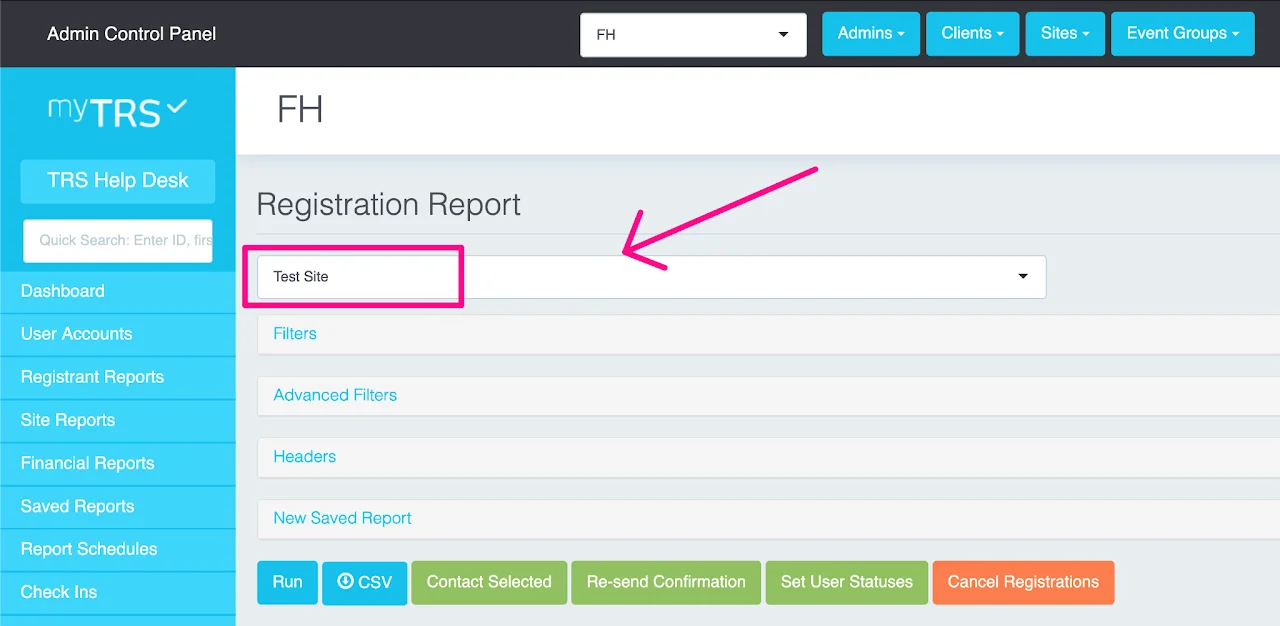
At the top of the Registrant Report page, there is a drop-down menu. Click and utilize the drop- down to select the site you wish to run the report for. Once you have selected the site for your report, you have the ability to click run and load your report without any customization.
How to use filters to sort & order registrants
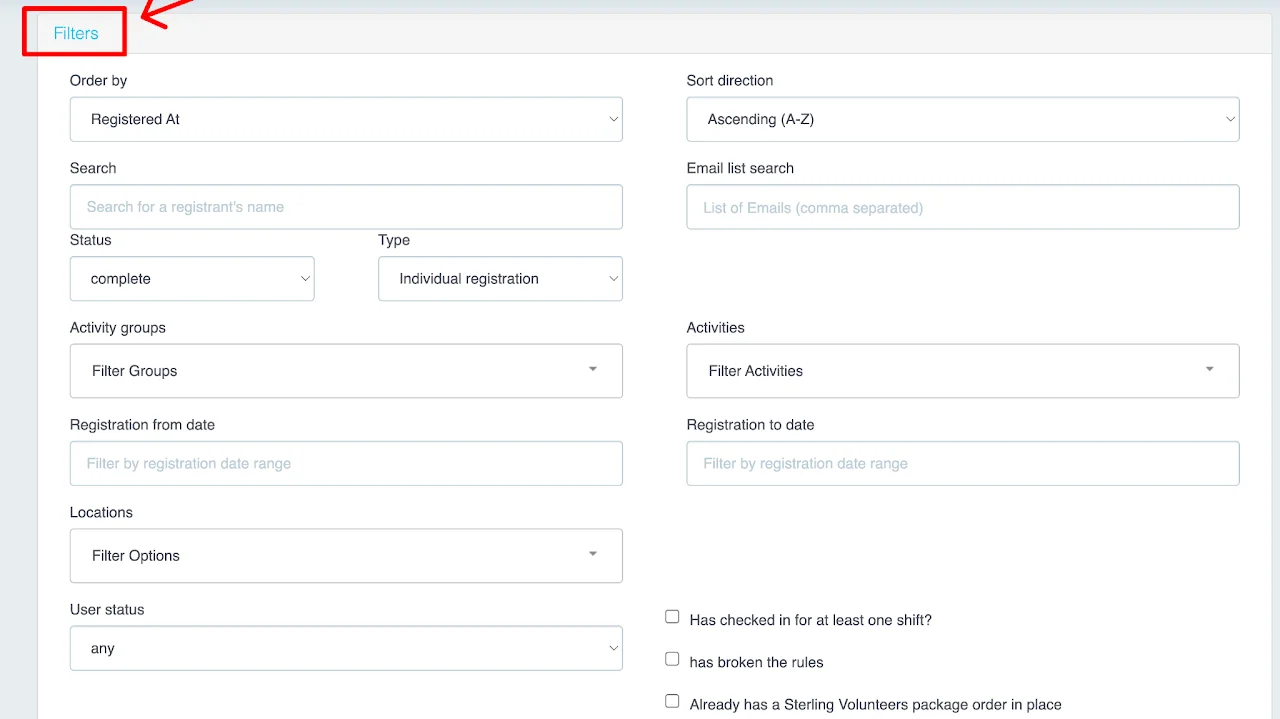
Open the Filters in your registration report. Scroll down to find instructions for the filter you need.
Anytime you change the filters on your report, you will need to click RUN again in order for the report to update.
ORDER BY
This is formatting option for how your report's data is displayed once you click run.
- Registration Date: select Registered At to sort by the date and time when each registrant has completed registration.
- Last Name or First Name
- Group Name: (If using Group Registration) Sort your data by the list of Group Names for your site.
- Group Leader First Name or Group Leader Last Name: (If using Group Registration) Sort your data by group leader first name or last name.
SORT DIRECTION
This correlates to the Order By option discussed above.
- Ascending: First to Last
- Descending: Last to First
SEARCH BY NAME
Use this filter option to pull a specific registrant record located on the specific site you are running the report for. In the search box, type either:
- First name
OR
- Last name
Do not type in full name. Then change the display to 5,000 and run the report.
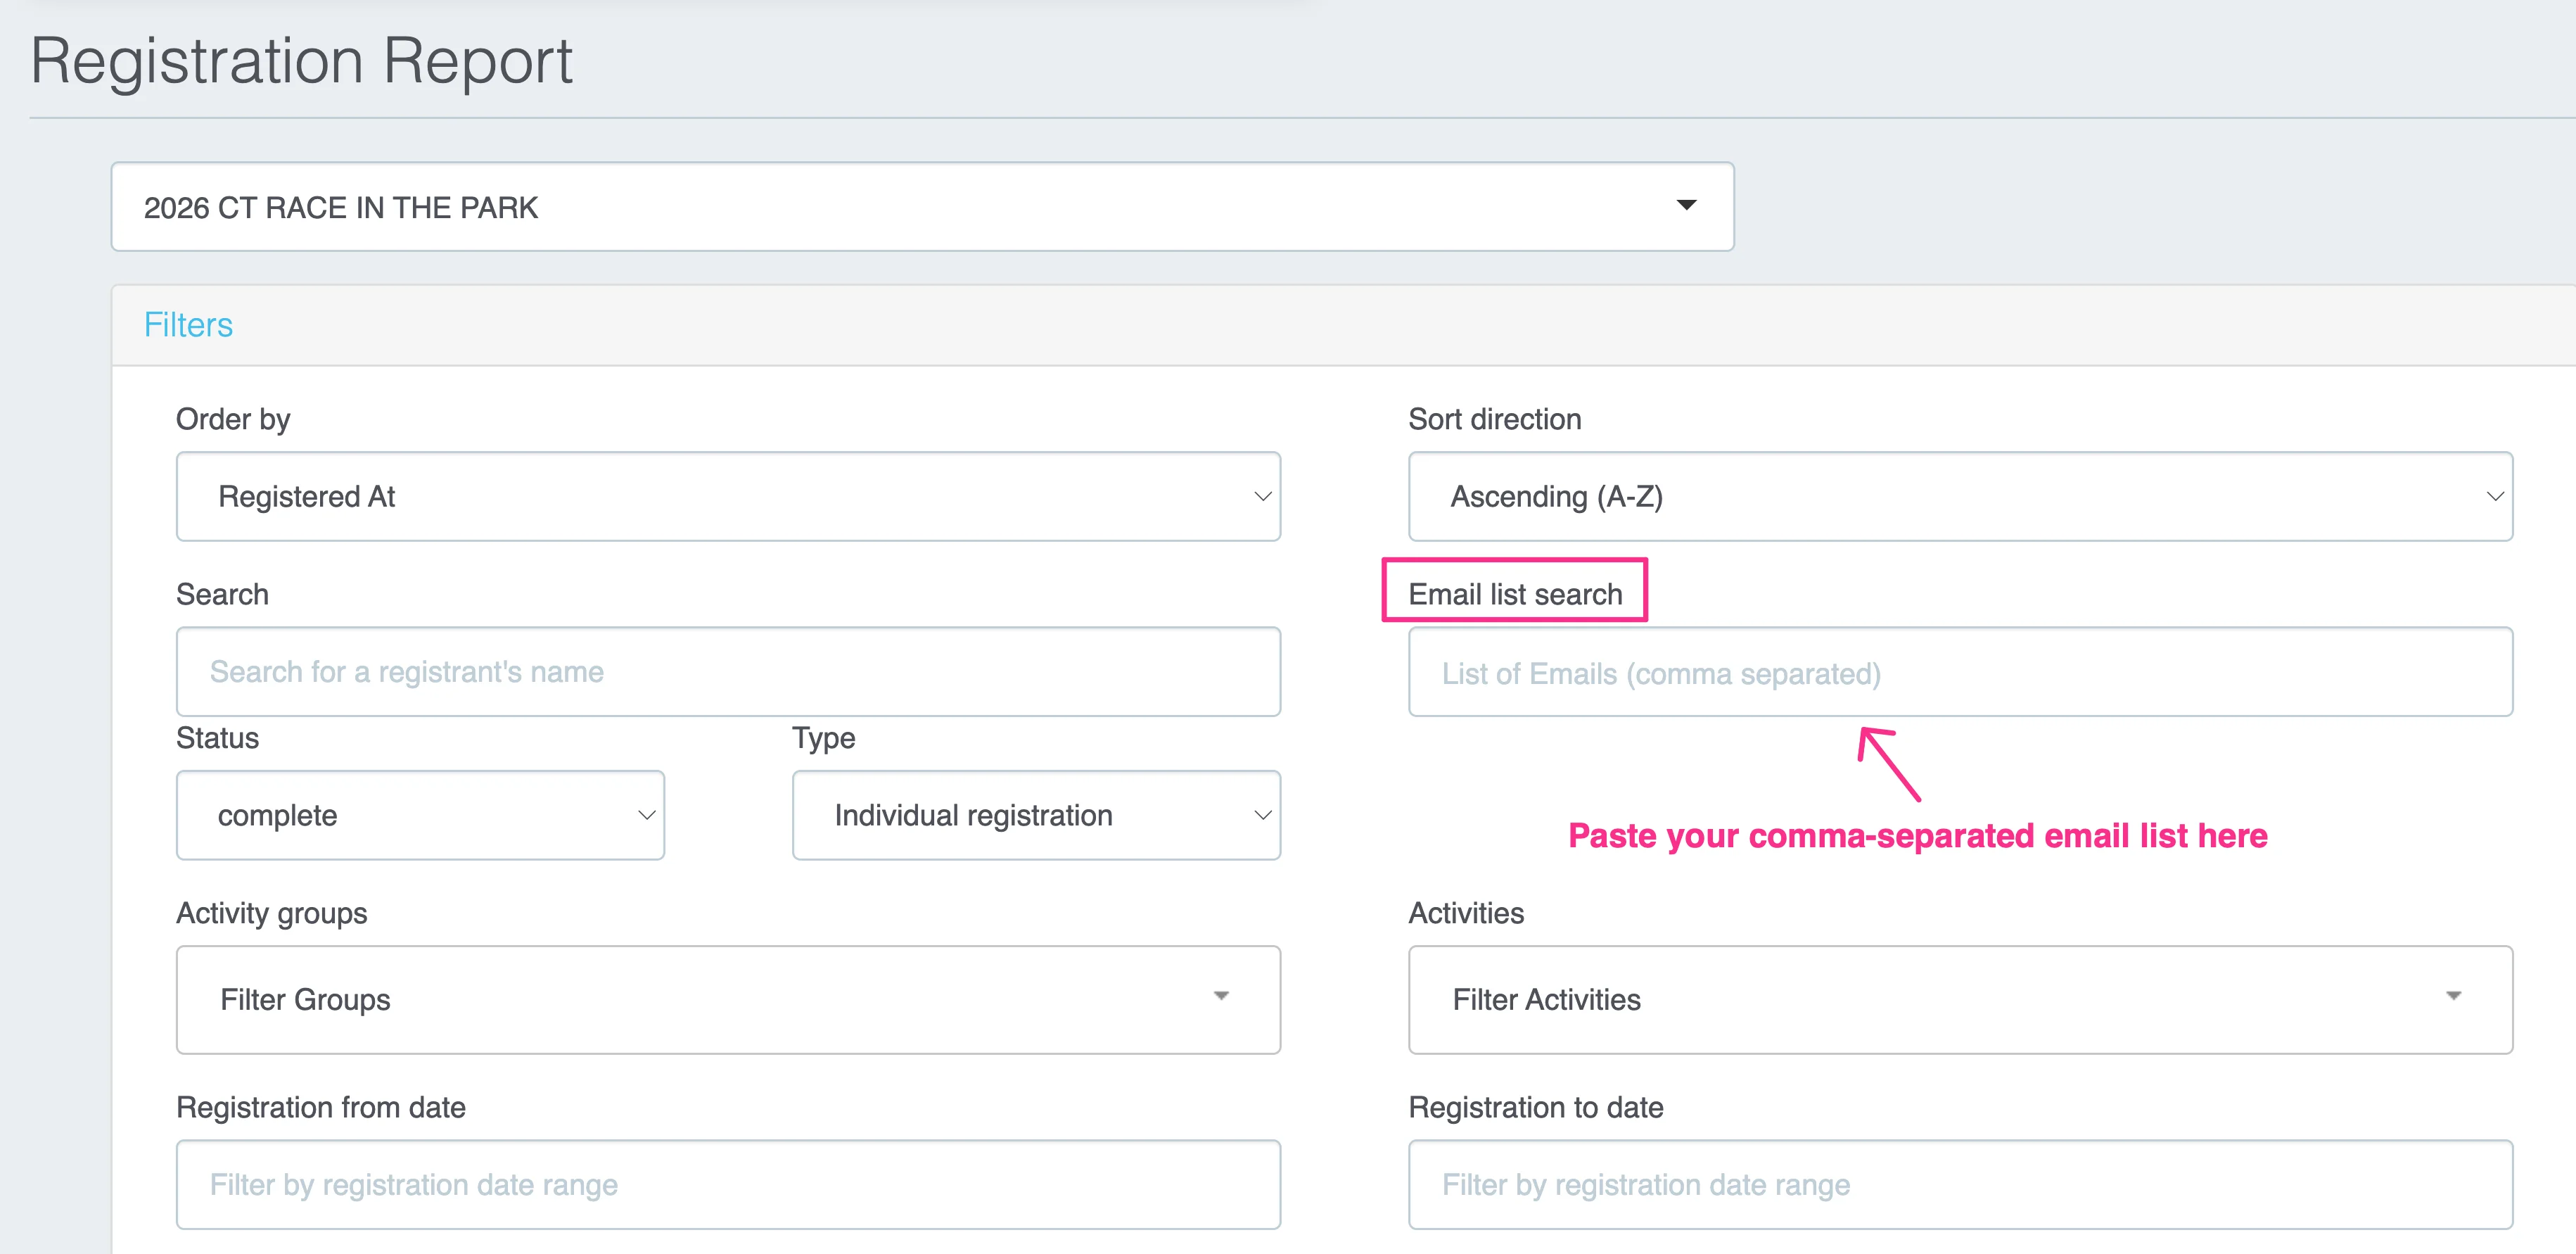
EMAIL LIST SEARCH
If you want to search several registrants at once, you can either type the emails of the registrants you are searching for OR use this tool to convert and copy a list of emails in the correct format for the email list search.
Email List Separator
Convert your email list to comma-separated format for the email list search
Emails can be separated by new lines, spaces, semicolons, or tabs
STATUS
Registrants have two statuses. You can choose to run your report to include one status, or both statuses.
- Complete: Registrants who have completed and registered for the specific site
- Cancelled: Registrants who completed registration for the specific site but cancelled their registration.
- Any: All registrants who have registered for the specific site, regardless of whether they have active registration or if they have cancelled registration.
TYPE
This relates to the type of registrant you wish to include in your report. Based on your site build, your site may allow for individual and group registration, or one or the other.
Individual Registration:
- Registrants who have registered themselves individually
- Registrants who have been individually registered by an admin.
- Group leaders of a group registration
- Group members apart of their group leader's registration
Individual with Items: Includes the individuals shown above, with include of their registration details (activity group(s), activity/activities, timeslot(s))
Group Registration: Compiles the group leader and associating group members apart of a group registration, and includes all group registrations which have occurred on the specific site.
ACTIVITY GROUPS AND ACTIVITIES
Activity Groups and Activities should be used individually.
How you use them to filter a report will alter the data shown when you hit run.
- Activity Groups: Identify registrants who have selected a specific activity group or activities groups.
- Activities: Identify registrants who have selected a specific activity or activities.
CHECK-MARK OPTIONS
Has checked in for at least one shift?
Includes only individuals who have successfully checked in for a minimum of one shift on your site.
Has broken the rules
If you have created rules within your site builder, this will identify only individuals who didn't follow the rules.
All registrants must select minimum of 2 shifts on your site. You want to identify individuals who originally registered for 2 shifts and then cancelled 1 shift because they no longer meet the minimum requirement.
Already has a Sterling Volunteers package order in place
Report will only include registrants if a background check package is associated to their registration.
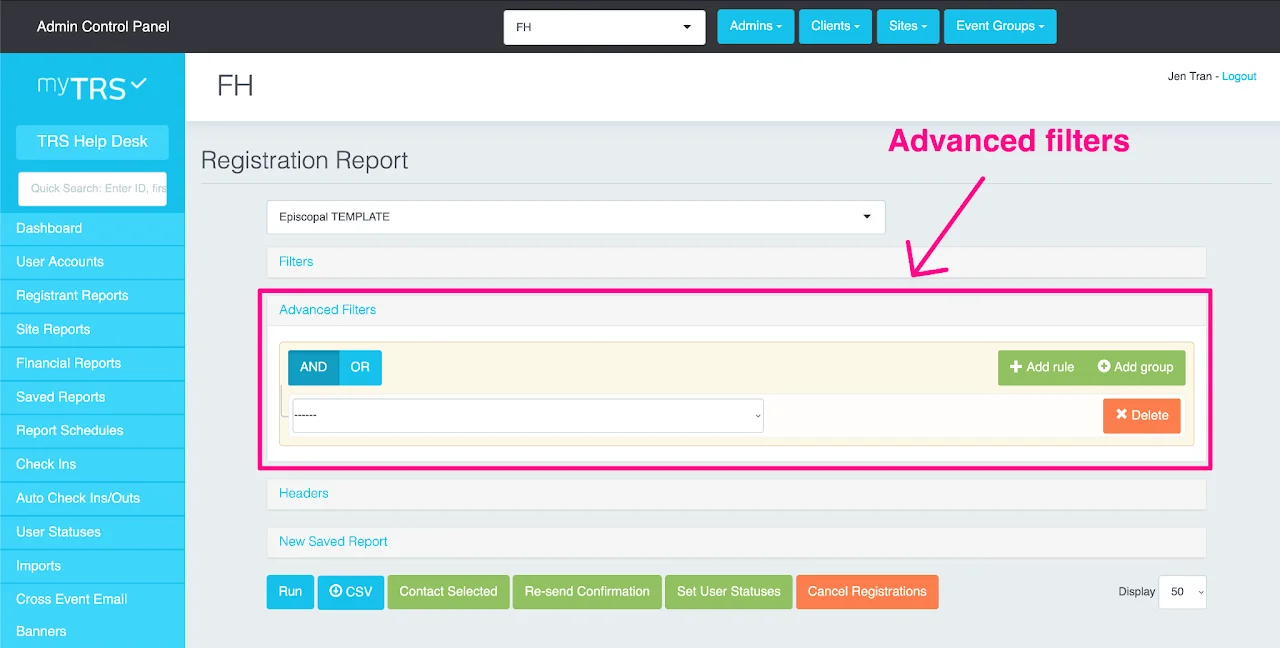
How to use advanced filters to filter registrants with specific info/registration responses (e.g: shirt size)
Advanced Filters is an optional tool. It is a very powerful that must be used correctly. This option should not be used unless you are filtering your report to identify specific information.
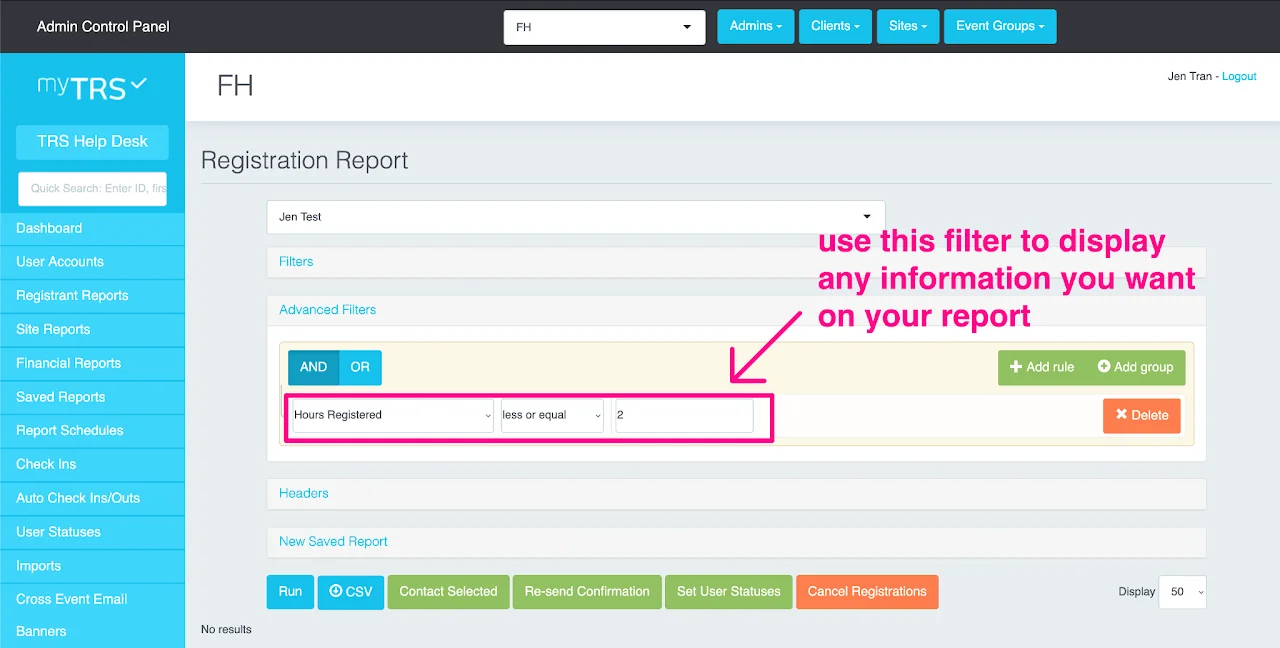
Follow in the order of the steps below:
-
Set up the first criteria for your search by selecting the field you want to search by in the drop down menu, e.g. T-shirt size.
-
Select the condition for that field, e.g. contains, equal, is greater than, etc
-
Enter the desired answer, e.g. small; this search will give the list of registrants who selected small and x-small as their shirt sizes.
-
AND/OR. If you need additional search criteria, click on AND/OR based on what you need.
- All registrants who selected a small shirt size or extra small and are new volunteers.
- All registrants who selected small or x-small shirt size and are not new volunteers.
- All registrants who are new volunteers and selected any other shirt sizes
- AND is used if you need to search multiple criteria on each registrant, e.g. T-shirt size contains small and New Volunteer equals Yes. This will give me all the registrants that requested a small or x-small shirt size AND are new volunteers.
- OR will usually give more results, as registrants only have to meet one of the criteria, e.g. T-shirt size contains small or New Volunteer equals Yes. The list will include:
-
Once you have selected AND/OR, click "+Add Rule" to get a new row of criteria.
For even more layers to your search, you can Add a Group. It will allow you to use both AND and OR conditions within the same search.
When using advanced filters, make sure you use the Headers feature to display the fields you are searching on. See more details below.
Example: Use advanced filter to find total number by shirt sizes If you want to sort the volunteers by shirt sizes and find out the total of people for each size, you can also do that in the Registration Report.
STEP 1:
- First, you need to find out the options that you created for the shirt size custom field question.
- Go to
Editon your site card - Go to
Custom Fields - Click the pen icon (
edit) on the question about shirt size - Memorize the shirt size options
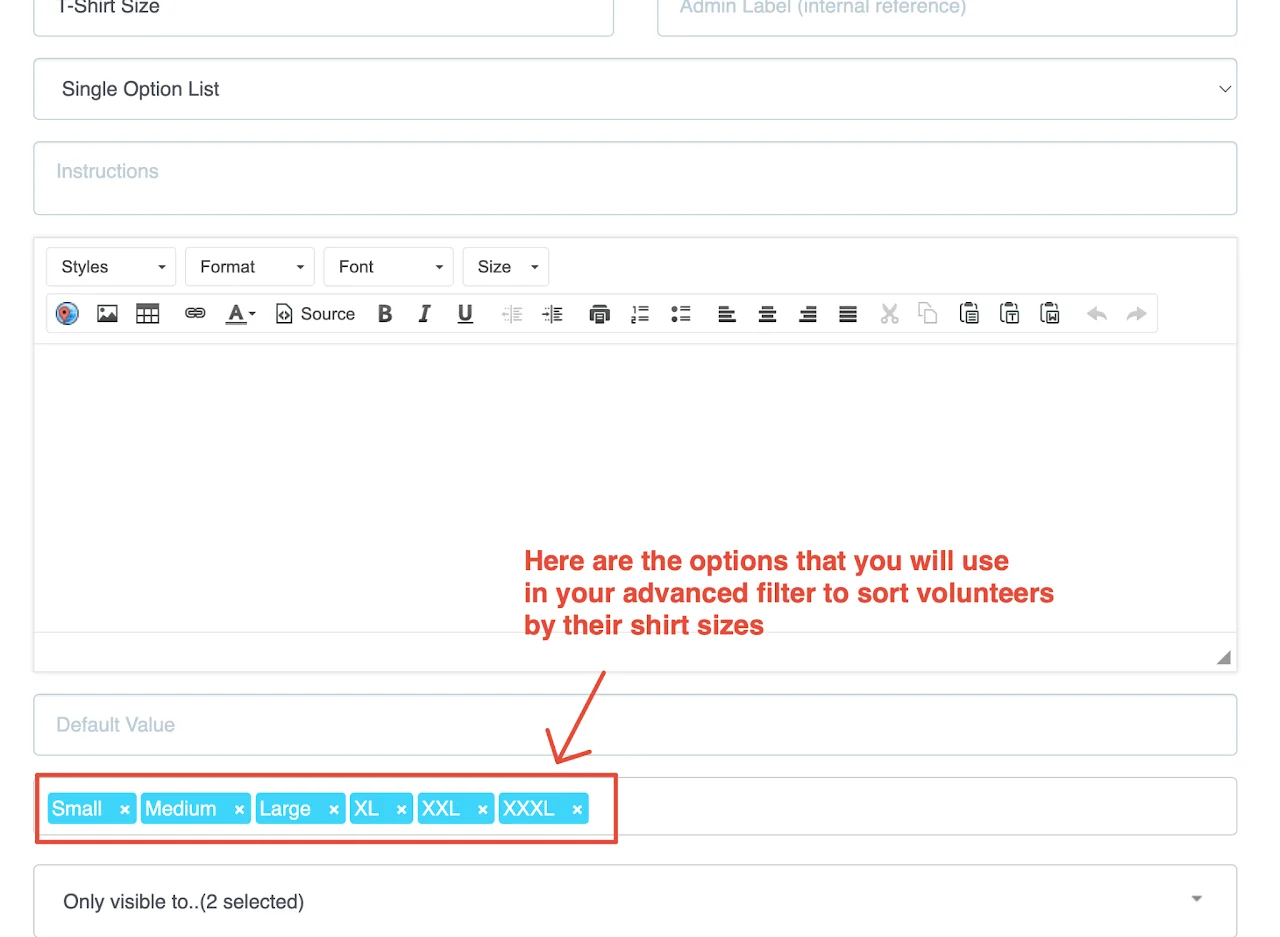
Check the custom field you created for shirt size and find the exact option names
STEP 2:
Go back to Registrant Report > view Registration Report > open the Advanced Filter > use the following formula:
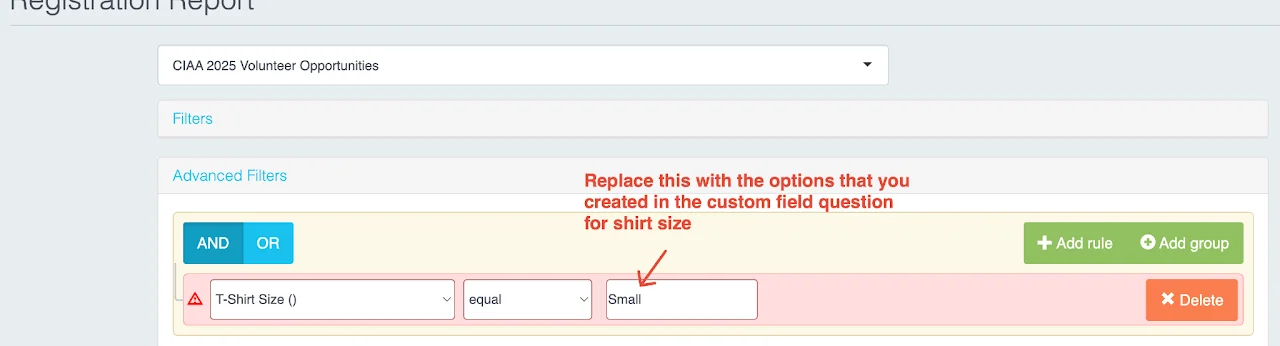
It is important that you use the exact wording of options created in that custom field. If your option for small shirt size is S instead of Small, you will use S in the advanced filter in the report. Using Small will not produce any results.
STEP 3:
Find the total number of people for your selected shirt size at the top of the report:

STEP 4:
Save the report in the system so next time you can just run it and view the information you need.
How to use headers to view registrant information you need
By default, only the built-in fields will show in a report.
Headers gives you the option to narrow down the fields which appear in your report, and also manage the order in which they are displayed once you hit run.
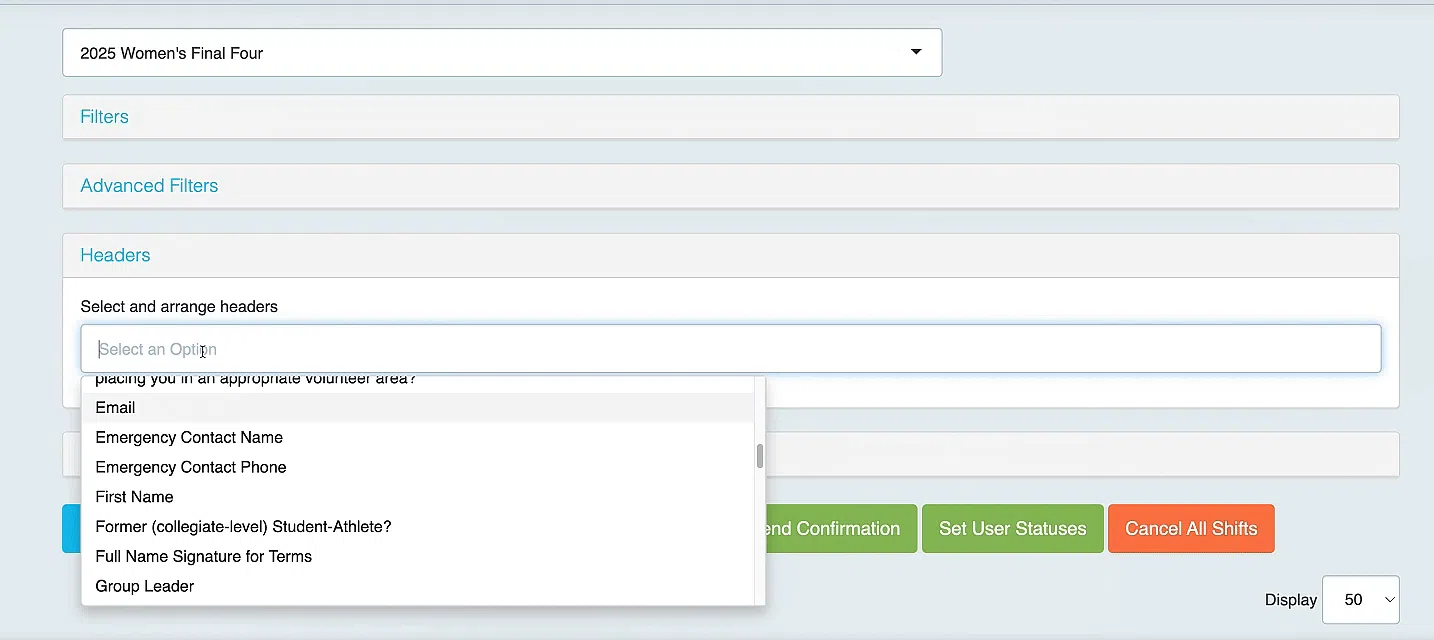
Simply click in the box shown in this section and type in the fields you need.
Selections are built-in fields of the report and your site-specific custom field questions.
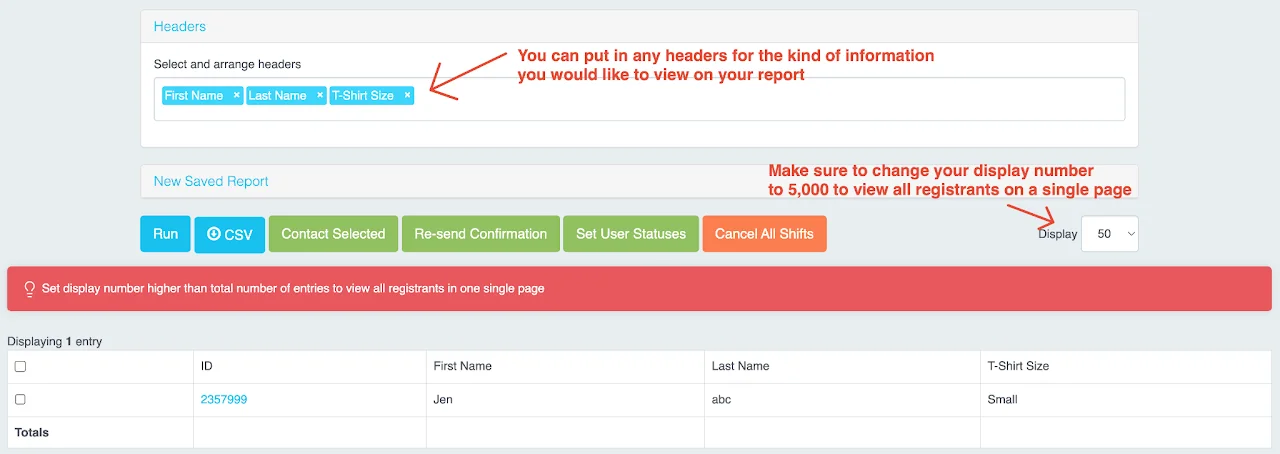
You can arrange your headers by dragging and dropping them in order from left to right.
Example: Use headers to search for every volunteer's shirt size
To run a report of shirt sizes, follow the steps below:
- Go to
Registrant Reportssection on the left side panel - Click
viewonRegistration Report - Open
Headers - Put in the information you want to show in your report.
See example below:
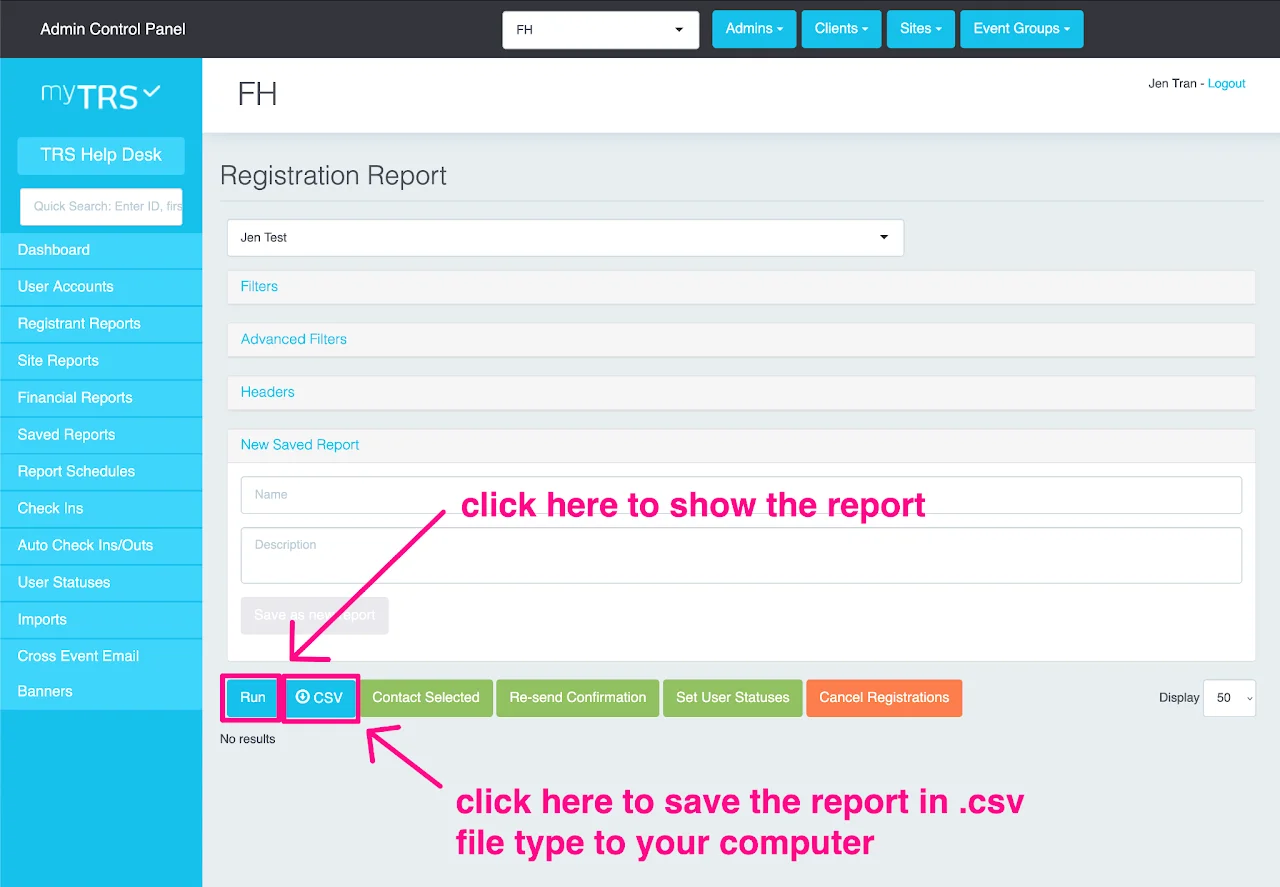
How to run, save & export reports to CSV
Run your Report:
Simply click run to compose your report.
NOTE: Anytime you change the filters on your report, you will need to click RUN again in order for the report to update.
Export your Report:
To export your filtered report, simply click CSV to automatically download your report as a CSV file.
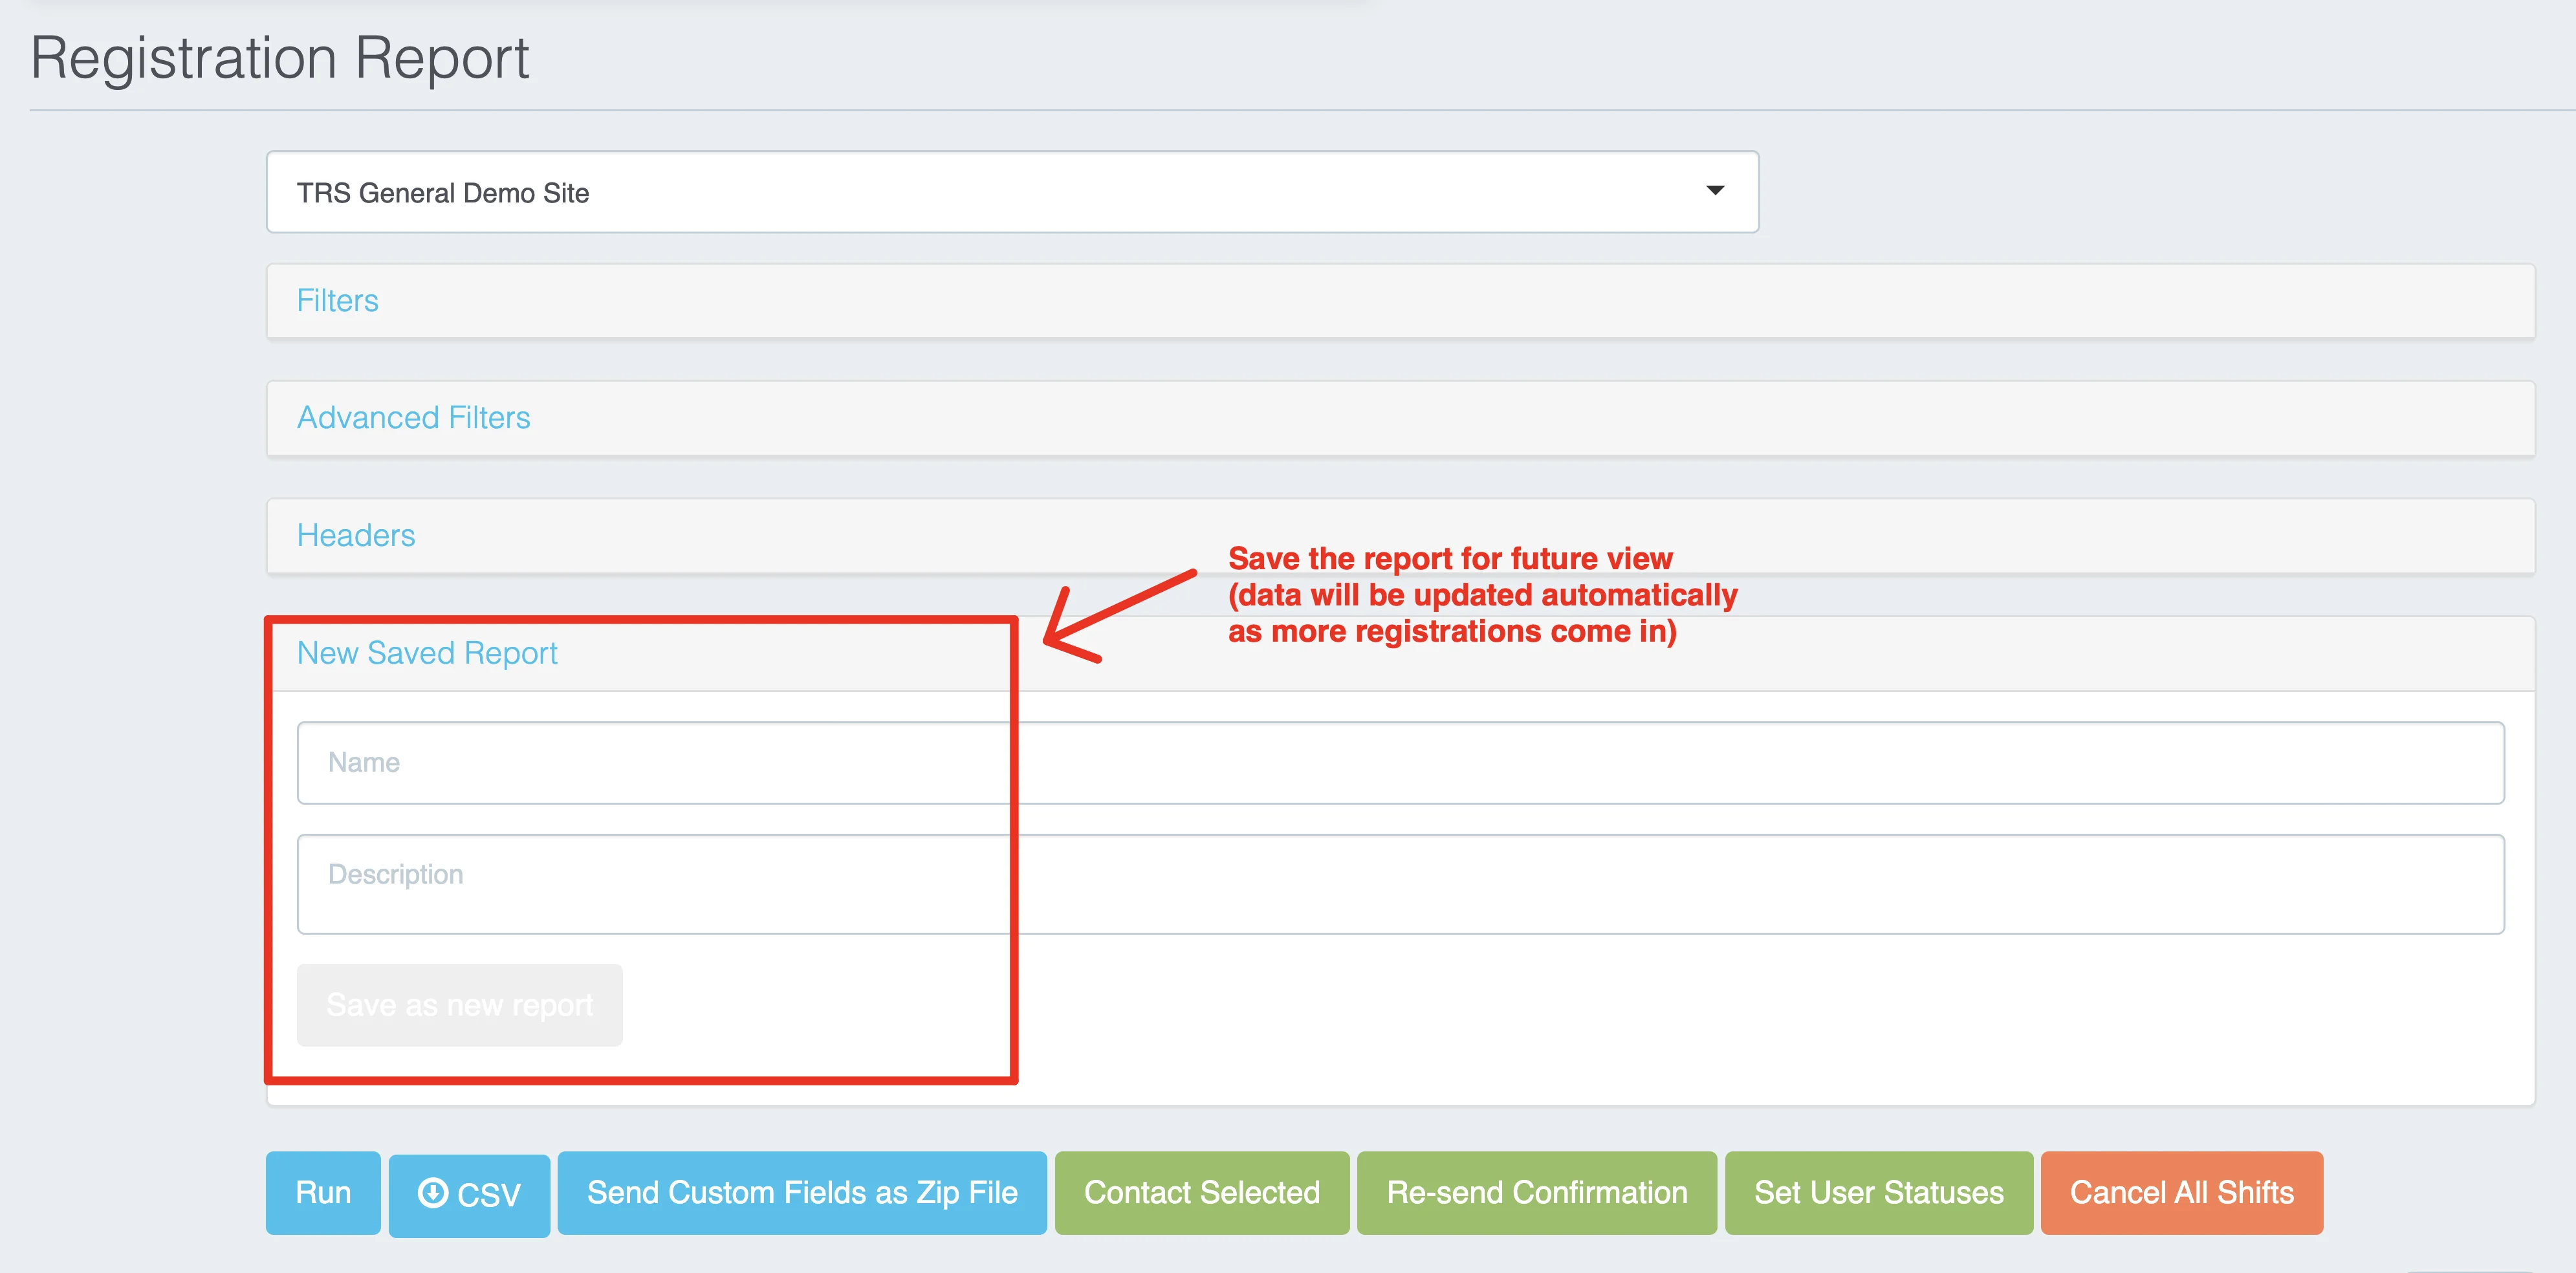
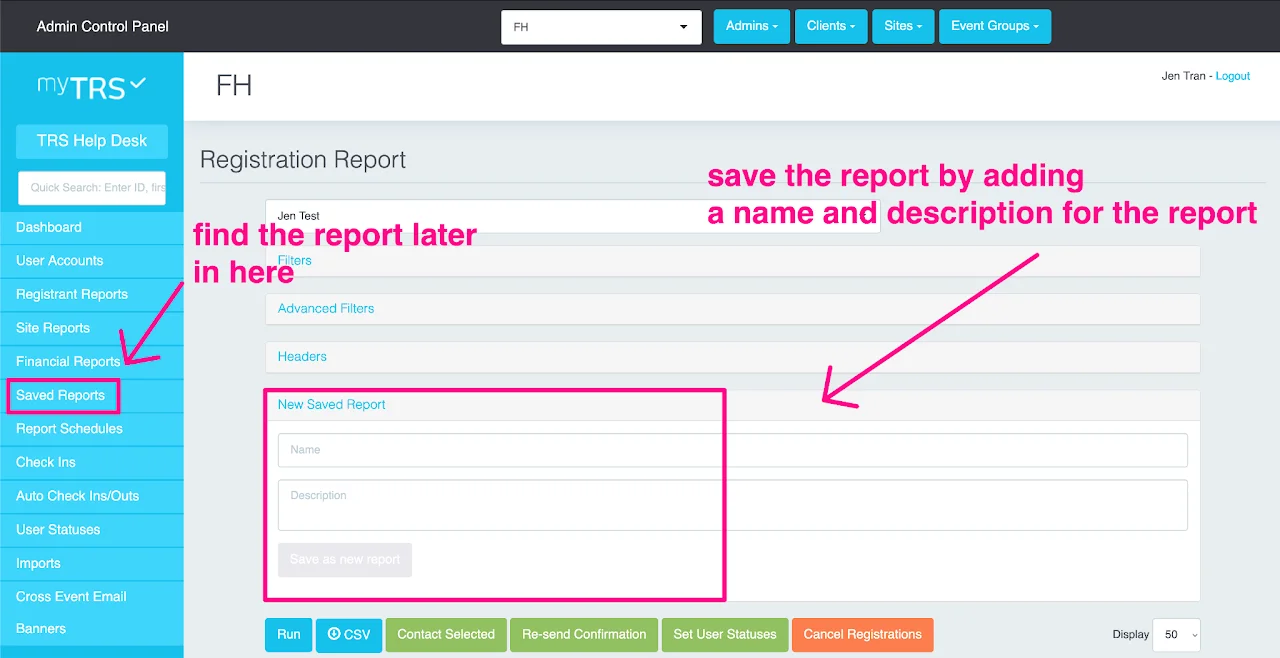
SAVE REPORTS
If you have created a custom report and you plan to re-run and utilize that report in the future, click New Saved Report
Give your report a name and an optional description.
Click Save as new report
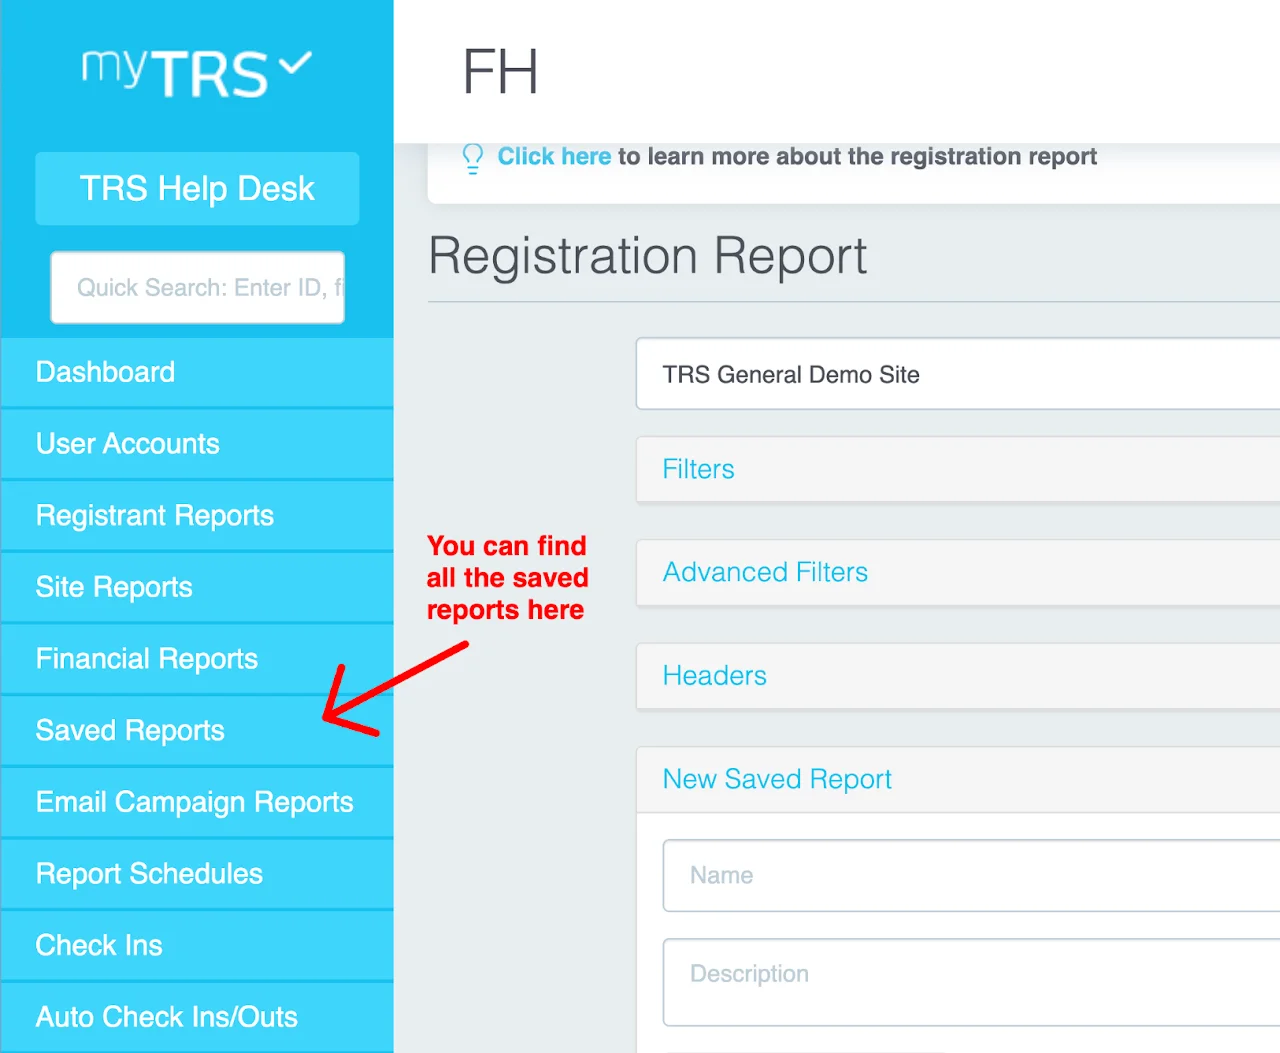
Easily pull up your saved report by visiting the Saved Reports menu panel option located on the left side of your dashboard. When you open your saved report and hit run, your data will automatically compose.
For instructions on communication with your registrants within reports, please go to Registrant Communication section.