Committee Chair & Bulk Scheduling
Use committee access when each committee or activity has its own leader who schedules volunteers. Volunteers share their availability when they register. Then each committee chair assigns them to shifts from a Committee Chair dashboard, and volunteers log in to see their schedules.
A committee chair can only see the activities you give them access to. From their dashboard, they can:
- See the volunteers registered for their committee
- Review availability in the
Shift Preferencesreport - Assign volunteers to shifts in bulk from
Shift Scheduling - Email their volunteers from
Communications - Print a daily schedule and download reports
How the process works
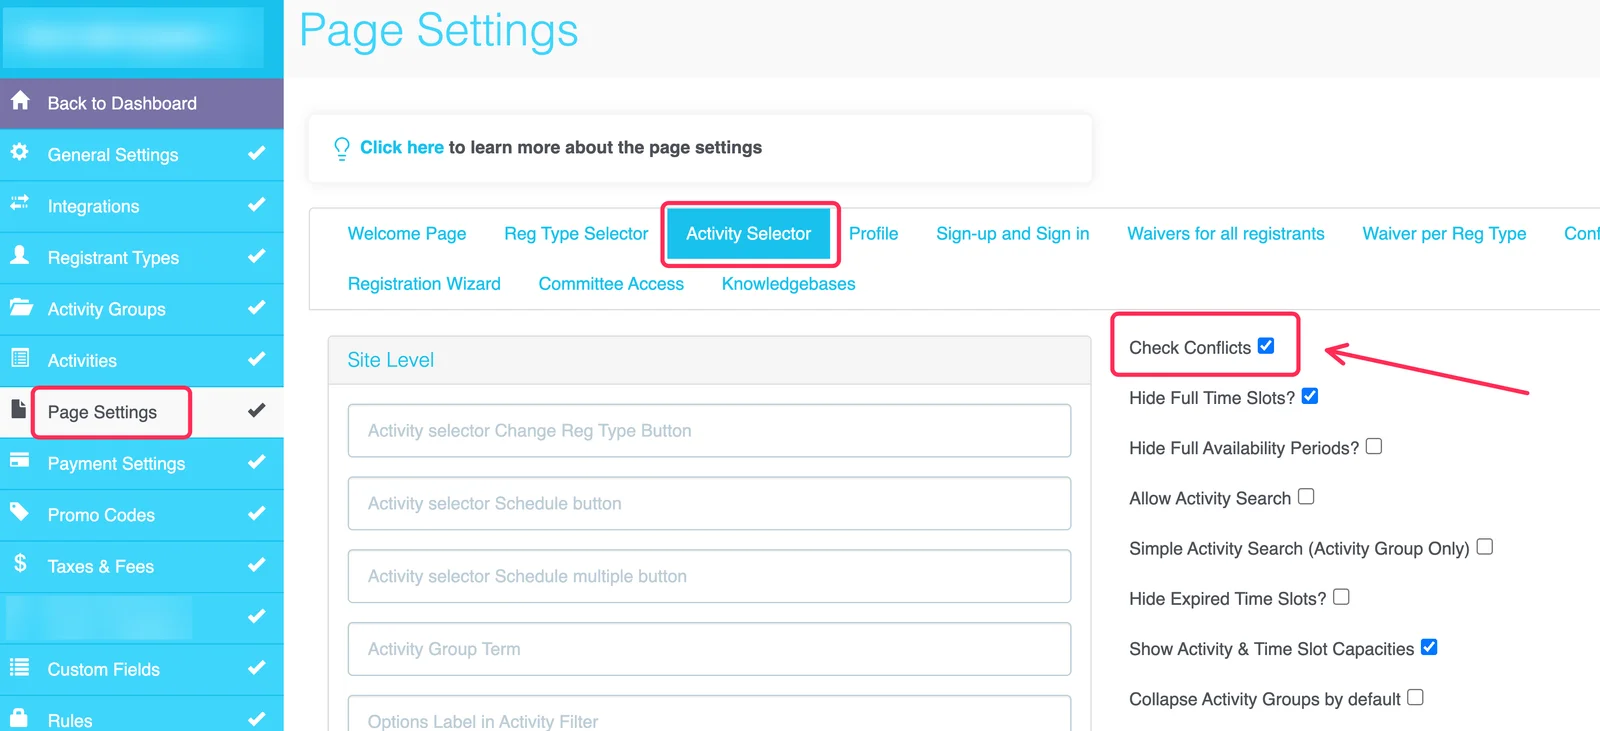
Most sites follow these four phases. Use the checkboxes in Page Settings > Activity Selector to control which buttons volunteers see on their dashboard during each phase. Leave any other button not listed below unchecked. Check Show Edit Schedule only if you want volunteers to be able to change their schedule after it's assigned.
Volunteers also shouldn't see the default View & Edit Schedule button, so check Hide View & Edit Schedule Button in Page Settings > Profile.
| Phase | What happens | Checkbox to check |
|---|---|---|
| 1. Setup | You build the site and add committee chairs | None |
| 2. Registration | Volunteers register and share their availability | Show Edit Availability |
| 3. Scheduling | Committee chairs assign volunteers to shifts | None |
| 4. Publish | Volunteers log in to see their assigned schedules | Show View Schedule |
Admins complete Parts 1, 2, and 4. Committee chairs complete Part 3.
Part 1 (Admin): Set up the site
STEP 1: Go to General Settings in your site editor, then check Committee Access and Enable General Availability Preferences. Click Save & Continue.
STEP 2: Add the availability dates to each activity. Volunteers can then choose AM, PM, All Day, or Not Available for each date.
STEP 3: Create a registrant type for your committee chairs, such as Committee Chairs.
STEP 4: Add that registrant type to every activity your chairs will manage:
- Go to
Activities. - Click the
Registrant Type(person) icon on the activity. - Add your committee chair registrant type and save.
- Repeat for each activity.
A committee chair who is registered for their own committee appears on the committee's list and receives a copy of the emails sent with Contact All Volunteers. A chair can register using the same link as volunteers and selecting the committee chair registrant type, or you can sign them up yourself.
Part 2 (Admin): Give chairs access to their committee
STEP 1: Go to Edit on the site, then open the activity.
STEP 2: Go to the Activity Users tab.
STEP 3: Click Add User, look up the chair by email, then click Save Activity.
STEP 4: Repeat for each activity the chair manages.
You can also give access from the Registration Report using the Grant Committee Access button.
Open the activity, go to the Activity Users tab, and remove the person.
Optional settings
- Primary contact: Show volunteers who to contact for each activity. See Add primary contacts to emails.
- Copy someone on chair emails: Go to
Page Settings>Emailsand add addresses toCommittee Chairs CC email addresses. These addresses are copied on all emails sent by committee chairs. - Show custom field answers to chairs: Edit a custom field and check
Visible in Committee Chair's Shift Preferences report,Visible in Committee Chair's Shift Assignments report, or both. UseDisplay for Committee Chairto set the column name chairs see.
Add time slots before chairs start scheduling
Add the time slots to each activity. Chairs can only assign volunteers to shifts that already exist.
You can hide a whole activity, but not individual time slots. If volunteers shouldn't see specific shifts, wait until registration closes to add the time slots. Then turn off Show Edit Availability before chairs start scheduling.
Part 3 (Committee Chairs): Schedule volunteers
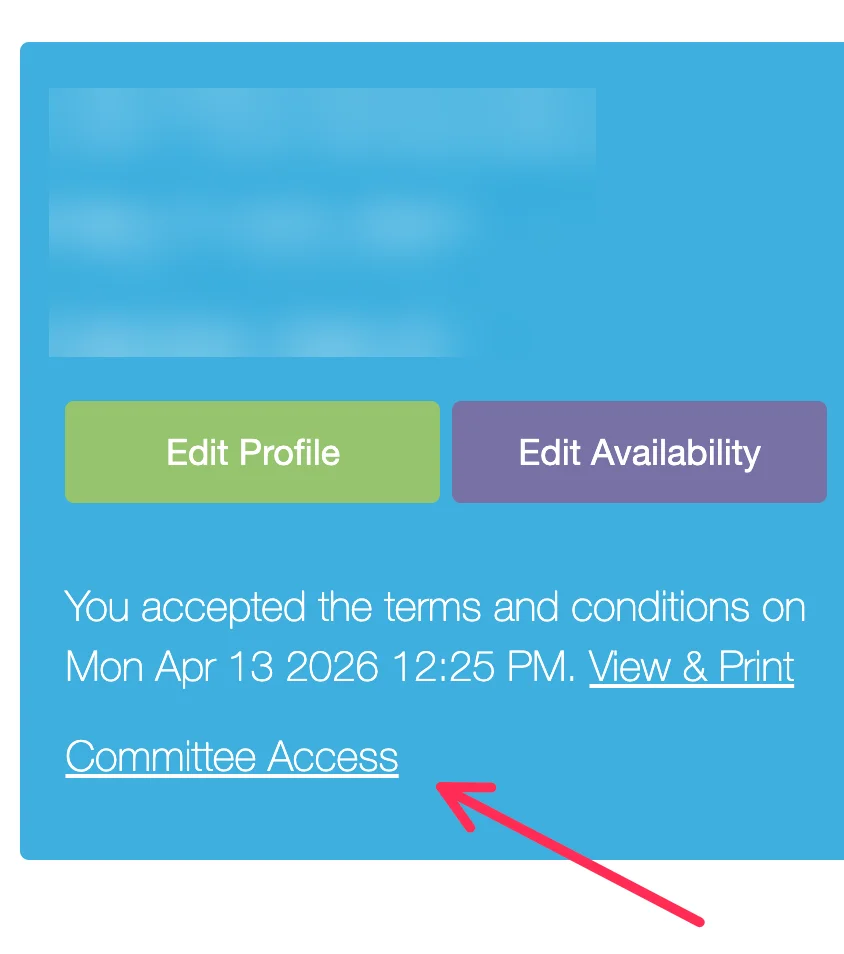
Once a committee chair is granted access, they can go to their dashboard and click the Committee Access link to open their chair dashboard. From there, they can click Manage on the committee they'd like to view registrations and assign schedules for. Follow steps 1-3 below to view availability and bulk schedule volunteers.
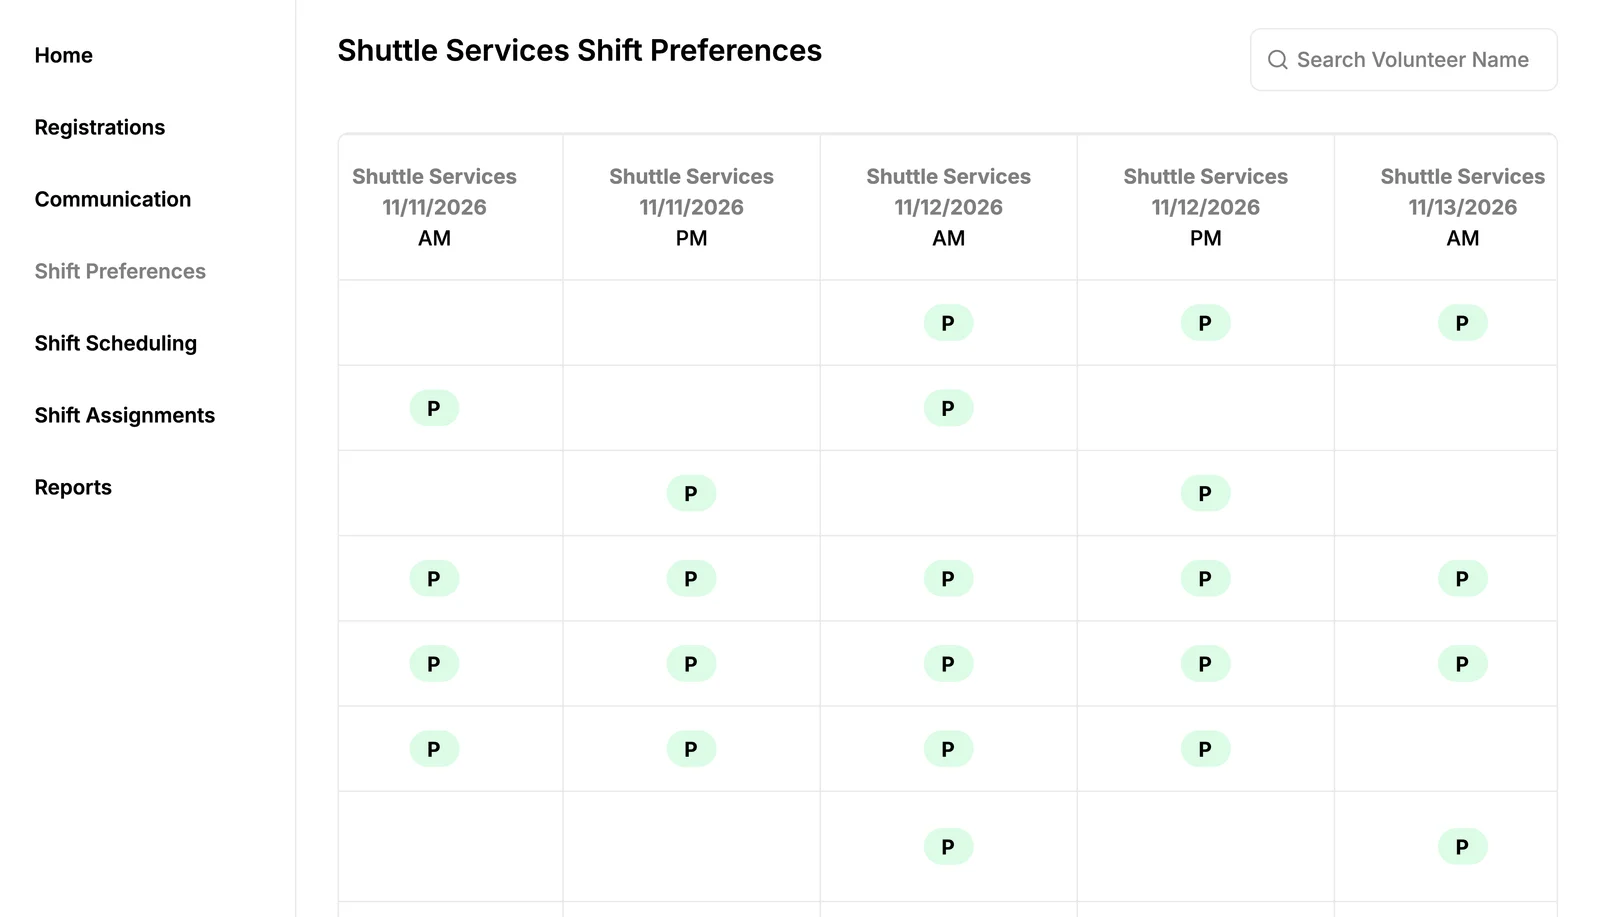
STEP 1: Open Shift Preferences to review each volunteer's availability.
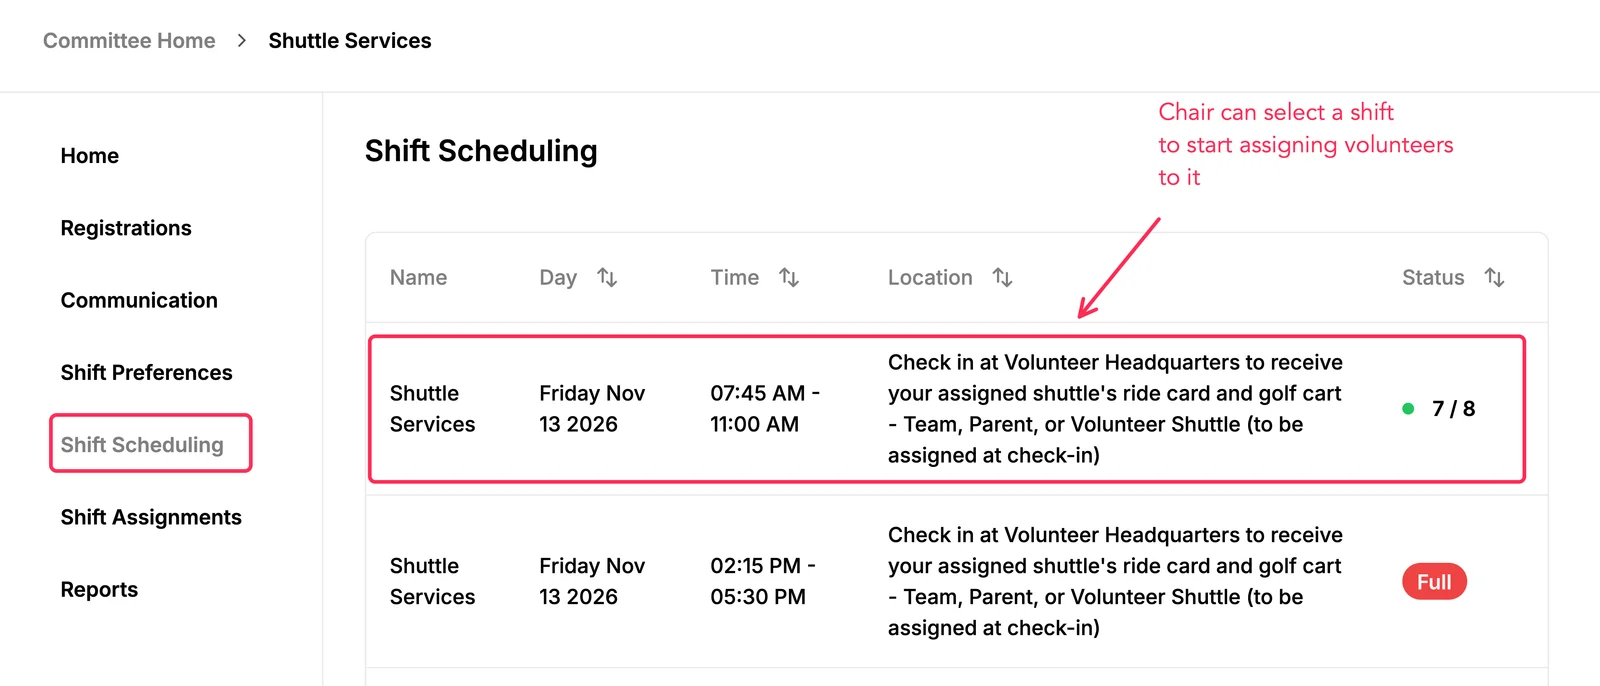
STEP 2: Open Shift Scheduling and assign volunteers to shifts. Chairs can schedule volunteers into shifts they didn't choose, as long as the activity is available to the volunteer's registrant type.
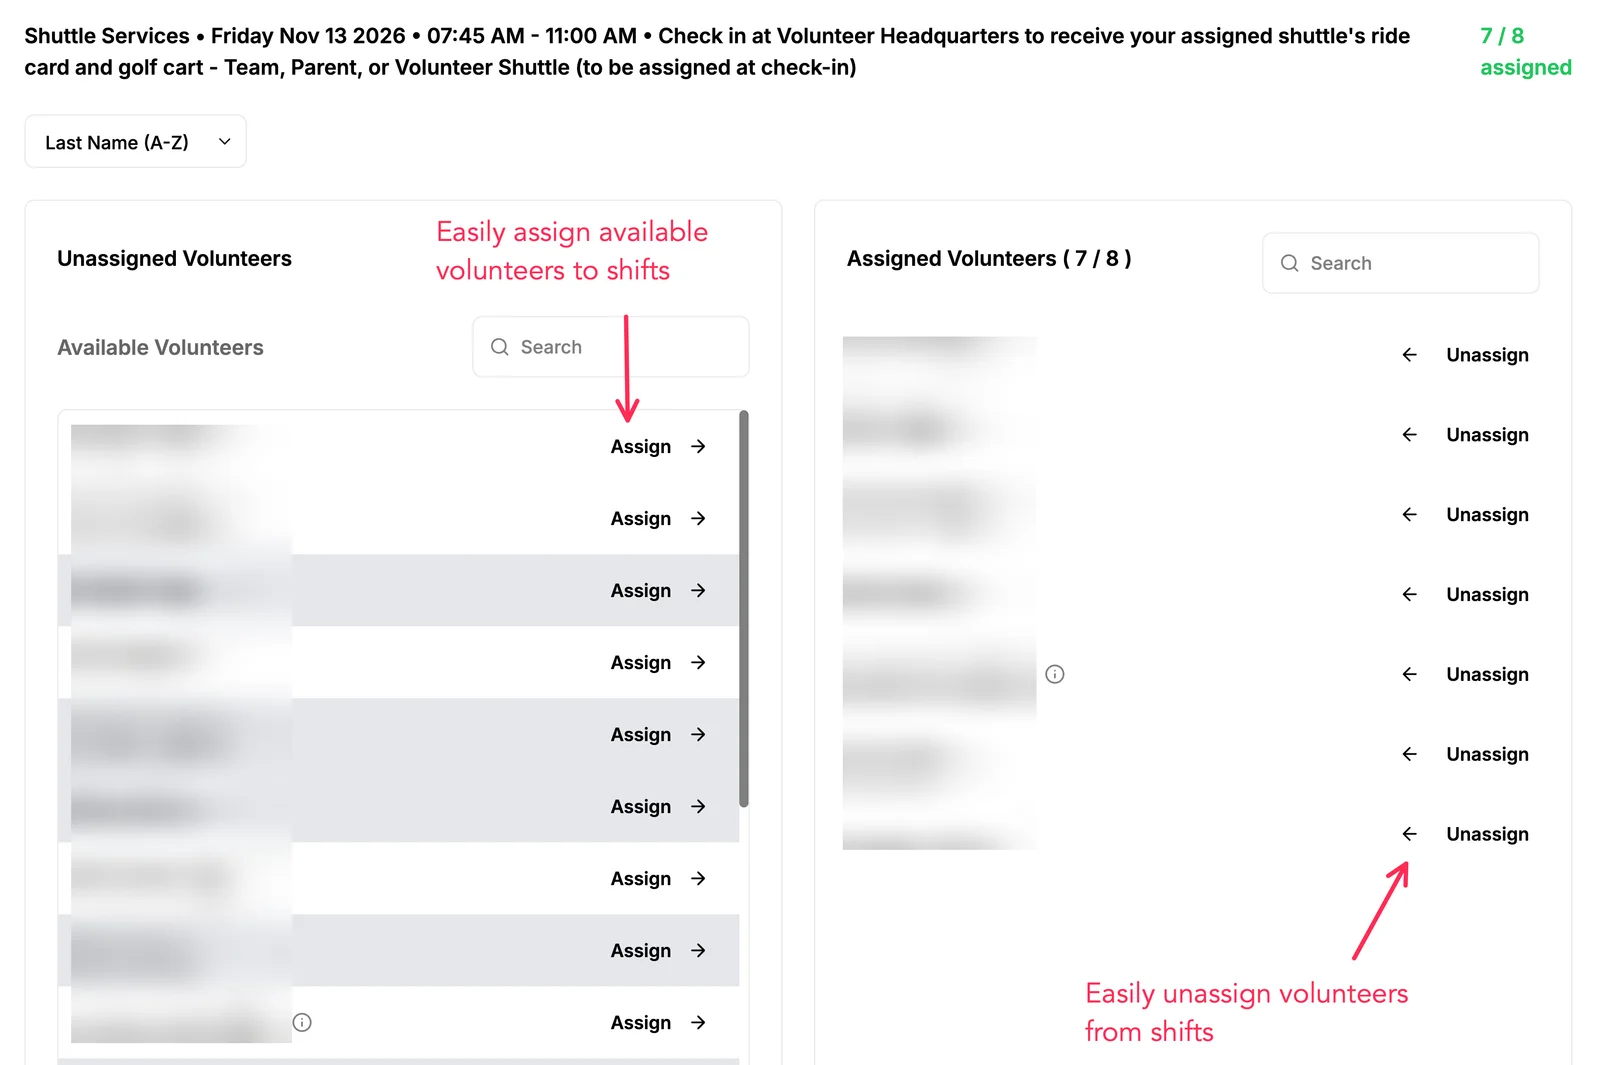
STEP 3: Check for overlapping shifts. A volunteer with a conflict is highlighted in grey. Clicking Assign next to their name opens a Confirm Assignment pop-up that shows the date, time, and location of the shift they're already assigned to.
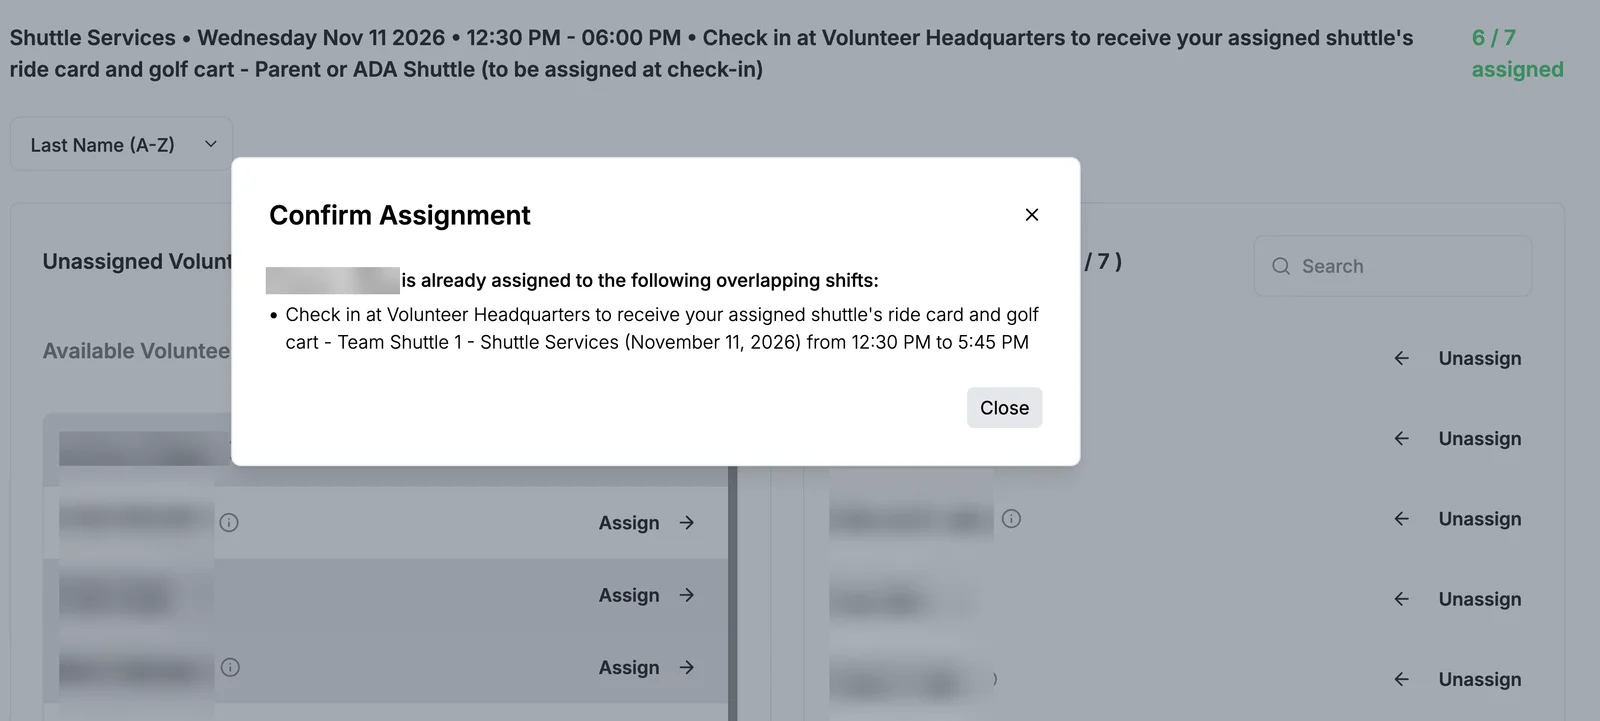
While Check Conflicts is checked, the pop-up only has a Close button. An admin can go to Page Settings > Activity Selector and uncheck Check Conflicts. Chairs will then see a confirmation message and can schedule the volunteer anyway.
Part 4 (Admin): Publish the schedule
STEP 1: Go to Page Settings > Activity Selector, check Show View Schedule, and click Save & Continue. Volunteers can then see their availability and assigned shifts, but can't change them.
STEP 2: Email your volunteers to let them know they can log in and see their schedules.
Volunteers who choose their own time slots
Committee chair scheduling is built around availability preferences, but volunteers who select time slots from the beginning also appear in the committee chair's reports.