DYMO Label Printing
Use the DYMO Label Printing integration to create labels directly linked from registrant records specific to a site. This option is used by clients for name tags, authorization and credentialing, check-in verification, and even to reflect last minute changes occurring during an event.
Important:
- myTRS does not generate DYMO labels. They must be created directly in the DYMO Software.
- Before printing confirm your DYMO printer is connected to the computer you're using. It is recommended to test print labels prior to the event, to confirm layout and printer settings are configured the way you want. Bulk print is not an option for this integration.
- Labels are generated by activity, not by an entire schedule.
-
Go to
Editon the site you need to print credentials for -
Locate and click on the
Integrationsfrom the left-side menu -
Check mark the option
Enable DYMO Label Printing. Then clickSave & Continue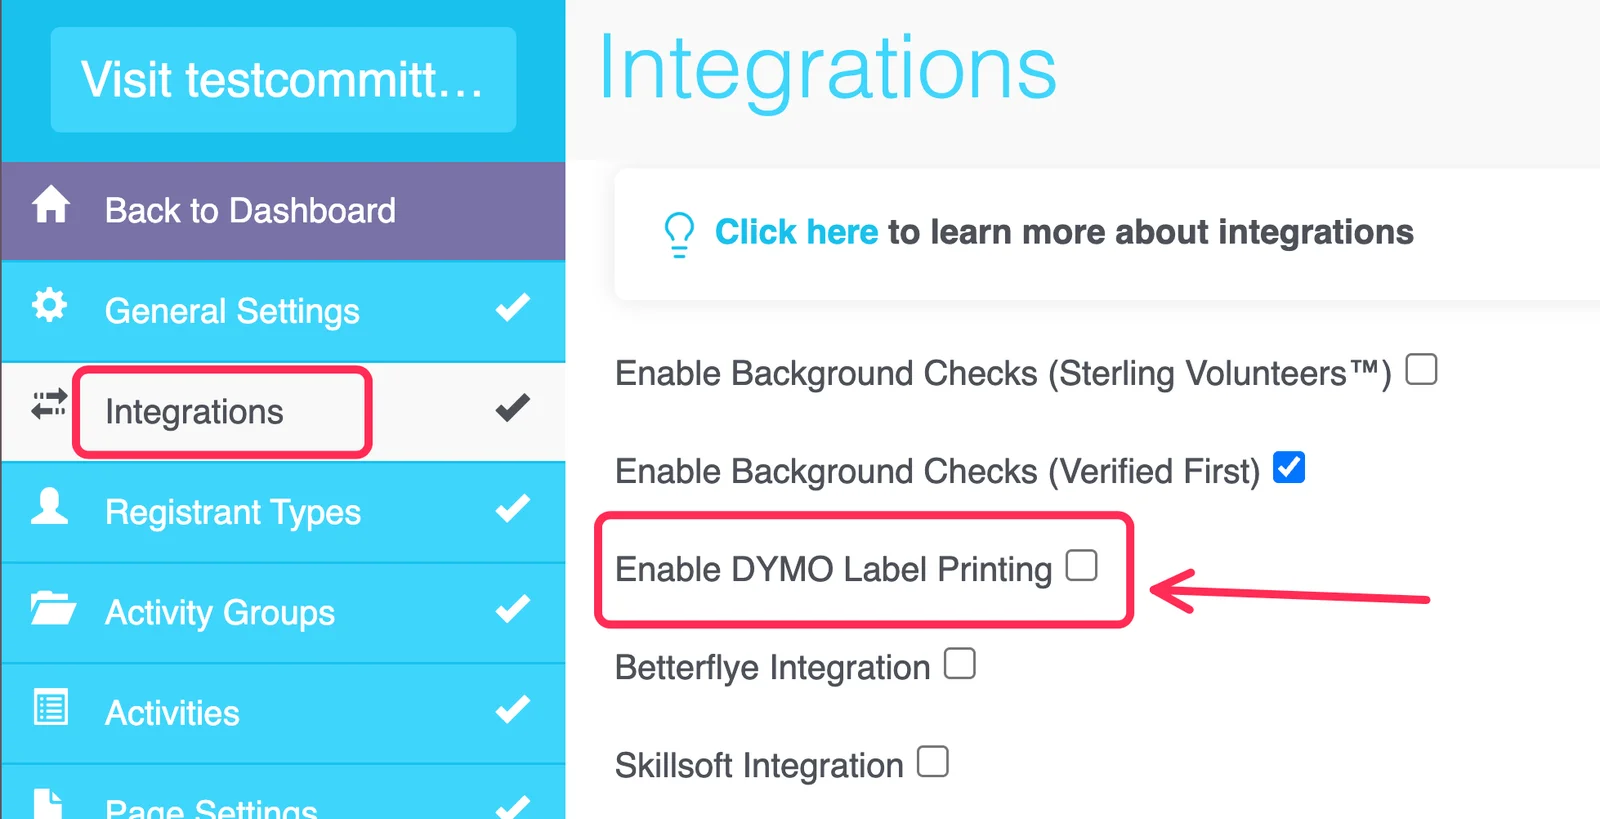
-
Label Printing (DYMO)will appear as a new tab on the left panel. Click theLabel Printing (DYMO)tab to begin. TheLabel Printing (DYMO)page is where actual configuration is completed. Instructions are presented on the right-side of the page to assist. -
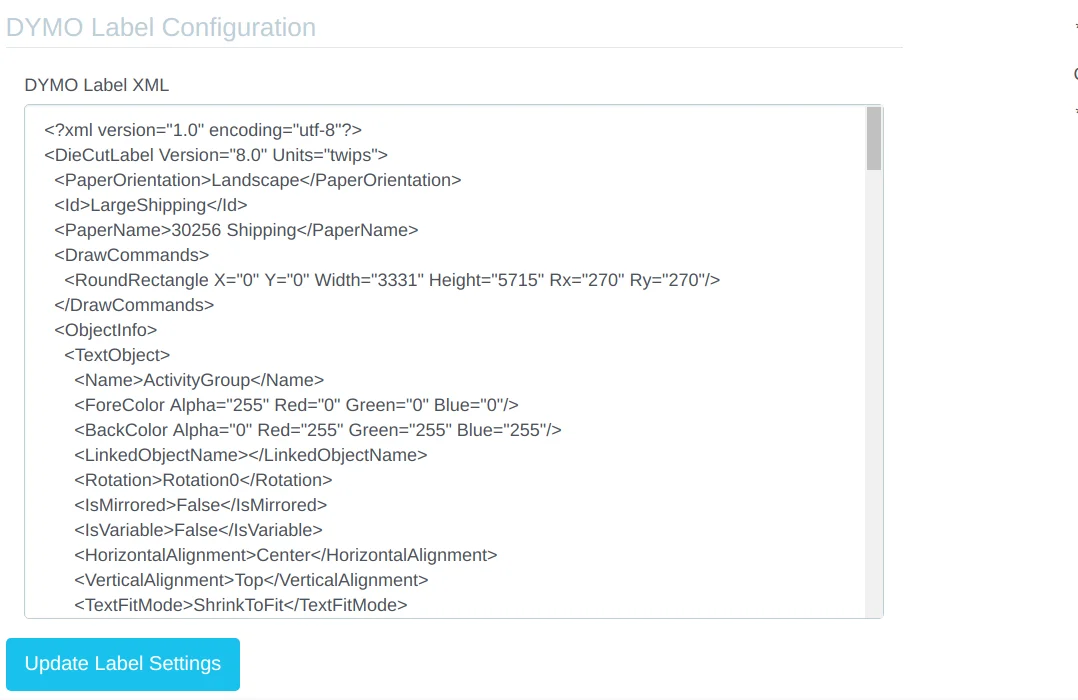
Create your label within the DYMO Software. Any questions related to DYMO software should be referred to DYMO by accessing their website. DYMO® : Label Makers & Printers, Labels, and More! -
Copy + Paste the XML code into the open text box under the
DYMO Label Configurationsection. ClickUpdate Label Settings.
- Go to the
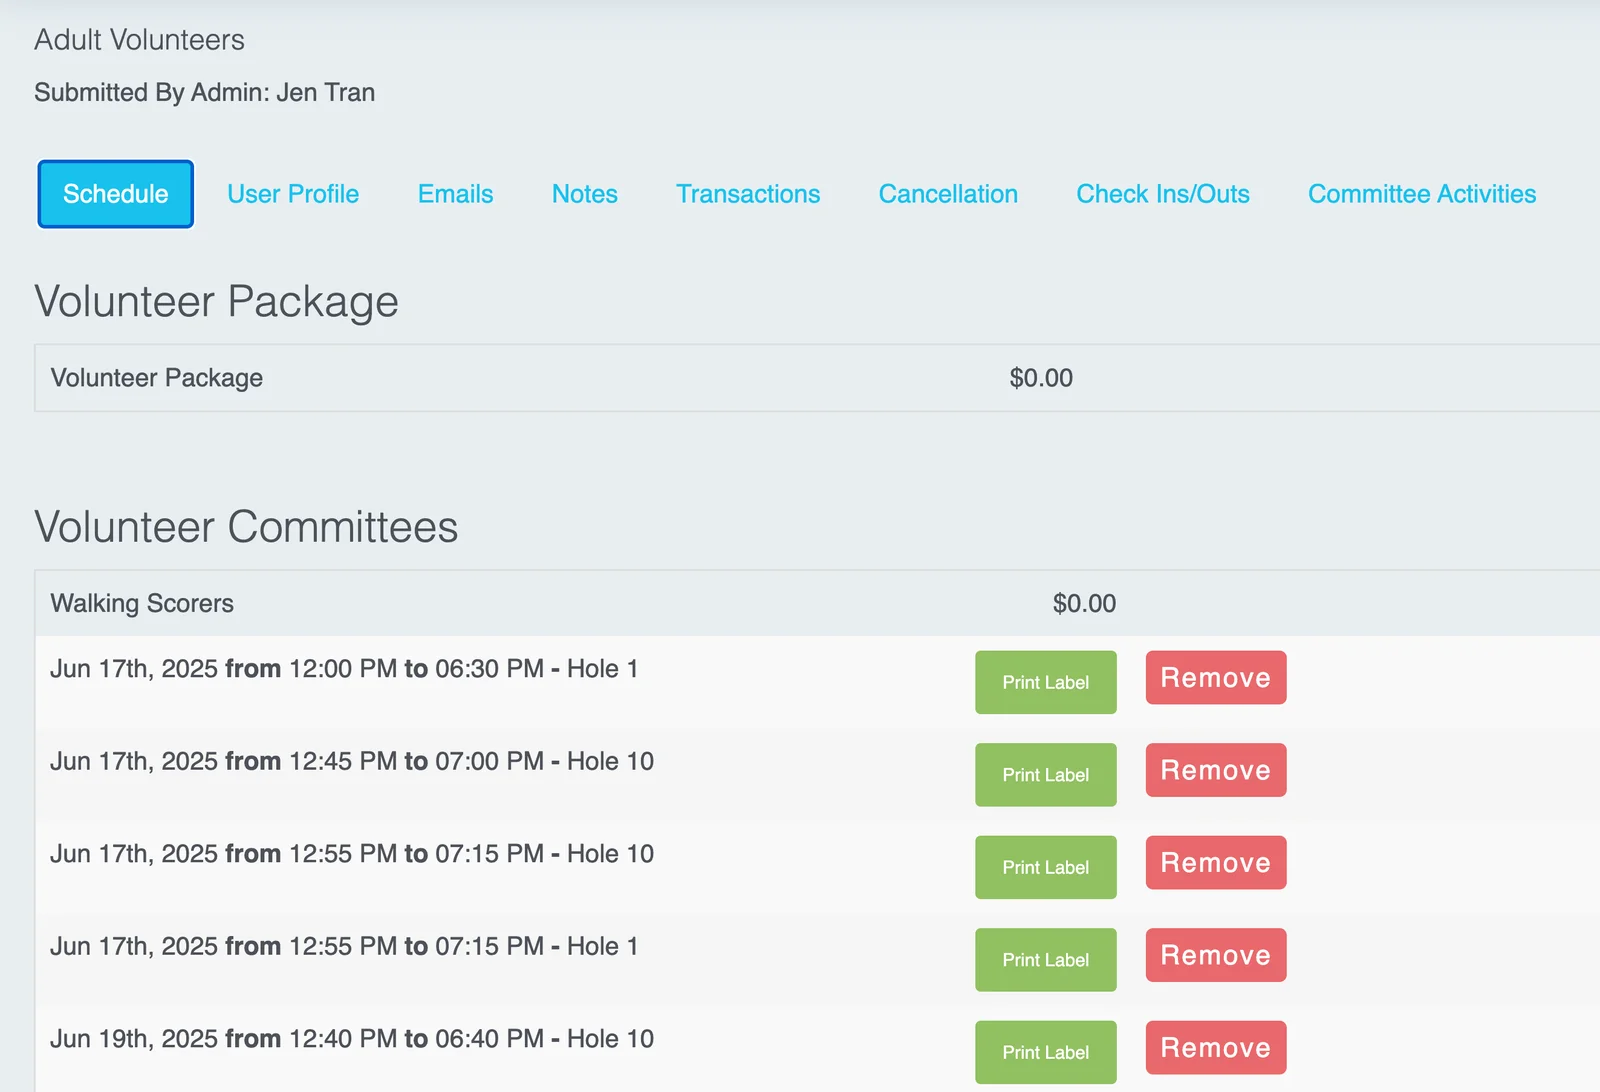
Quick Searchbar on the top left of your TRS admin dashboard, type in the registrant's last name or email, clickActionnext to their registration, then clickView. - View
Scheduleon the horizontal menu. - Next to each activity's schedule, click
Print Labelto print.

- Under the
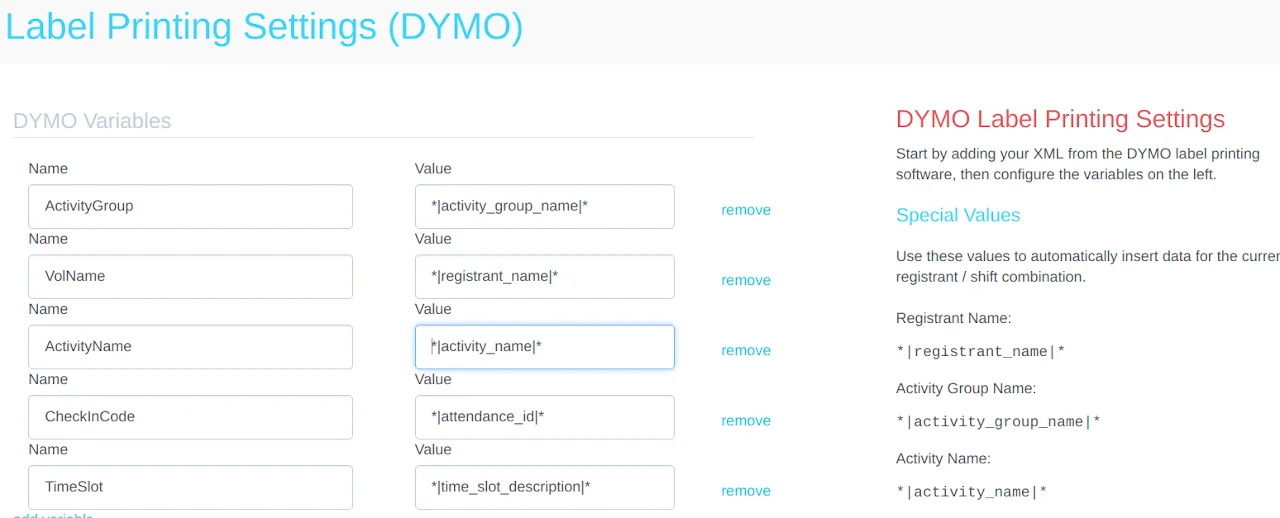
DYMO Variablessection, configure the variables by matching the name and value fields. Refer to the example shown below: